In this tutorial, we will show you how to slice/split and rearrange video clips in Microsoft Clipchamp. Clipchamp is the default video editor in Windows 11. It is an effective and great video editing app as it is packed with some powerful editing features in a user-friendly GUI. Using it, you can perform many video editing tasks like merging video clips, adding audio to video, applying visual effects and filters, adding text to videos, and doing much more. It also provides a dedicated Split tool that you can use to slice a video clip into multiple parts. Also, you can easily rearrange the sequence of video clips according to your requirements.
How do I rearrange videos in Clipchamp?
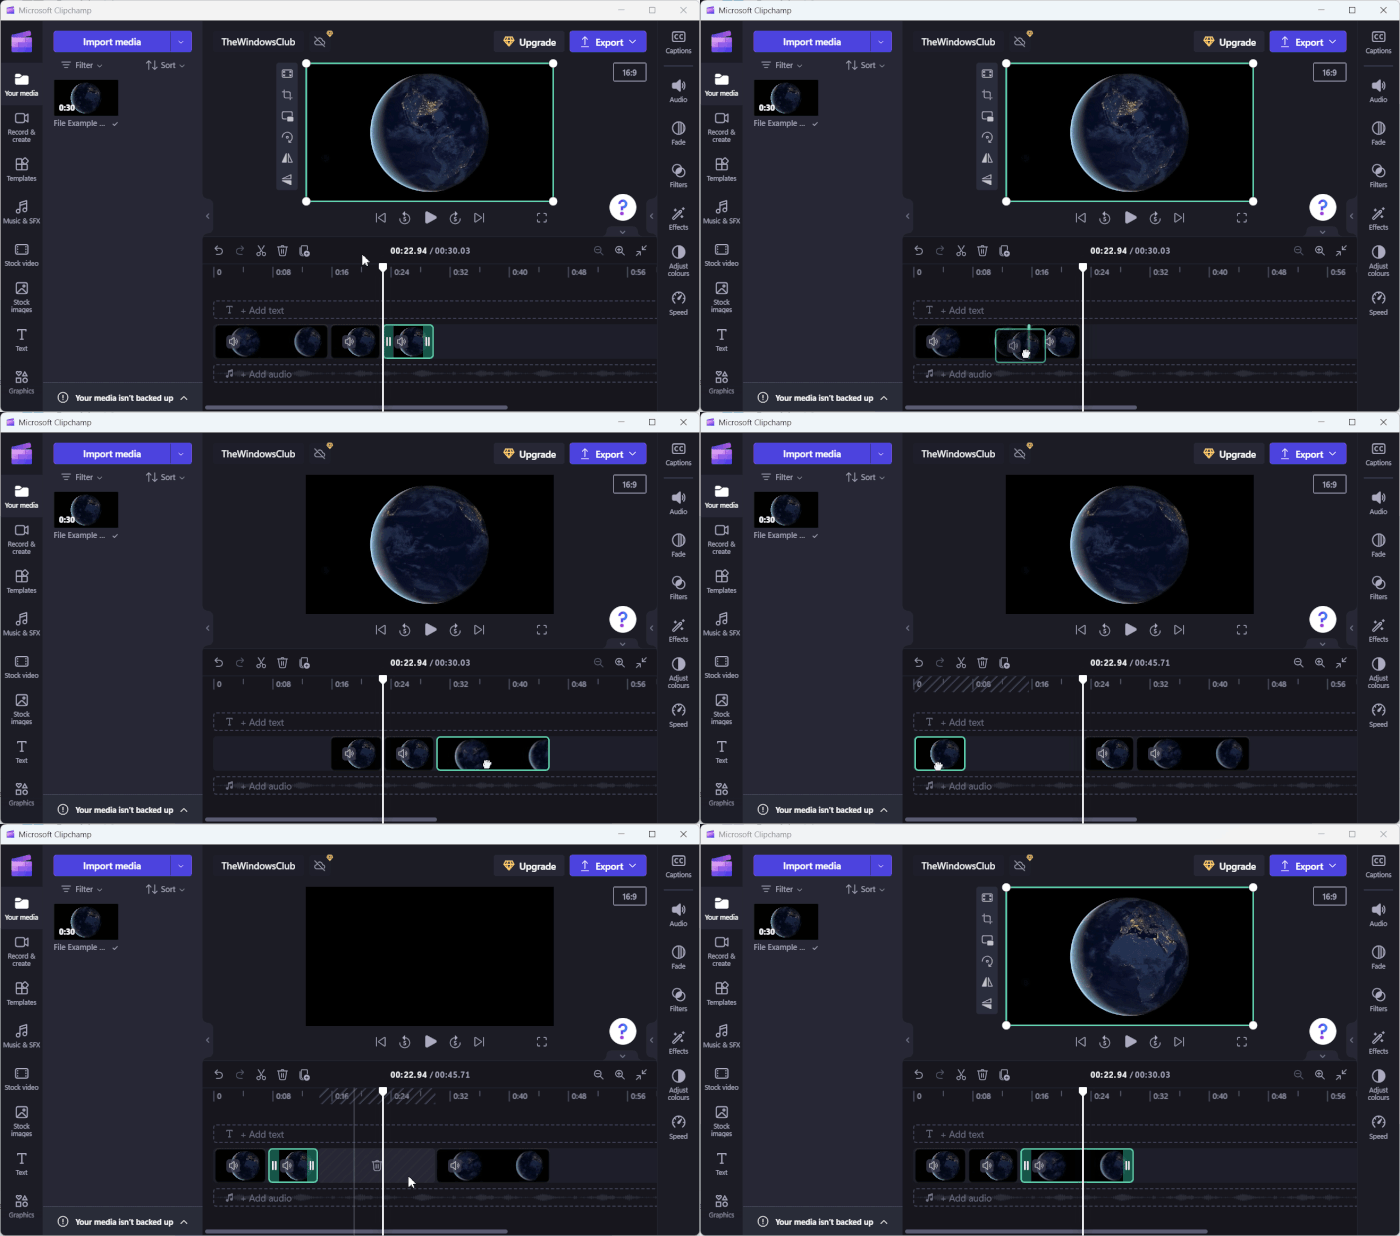
You can easily rearrange your video clips using the Clipchamp app on Windows 11/10. All you have to do is select the video clip that you want to rearrange, long press and drag it, and drop it to the position where you want to place the video clip. This way, you can easily position your video clips in a video project in a desired sequence.
How to Slice and Rearrange Clips in Clipchamp?
Here are the main steps using which you can slice and rearrange or reposition your video clips in Clipchamp:
- Open Clipchamp.
- Add your videos.
- Drag videos and add them to the timeline.
- Select the video clip you want to slice.
- Drag and place the timeline cursor at the position where you want to slice the clip.
- Click on the Split button.
- Drag and drop the sliced clip section to the desired position.
- Save the final video.
First, launch the Microsoft Clipchamp video editor app on your PC. Then, click on the Create a new video option to create a new video project.

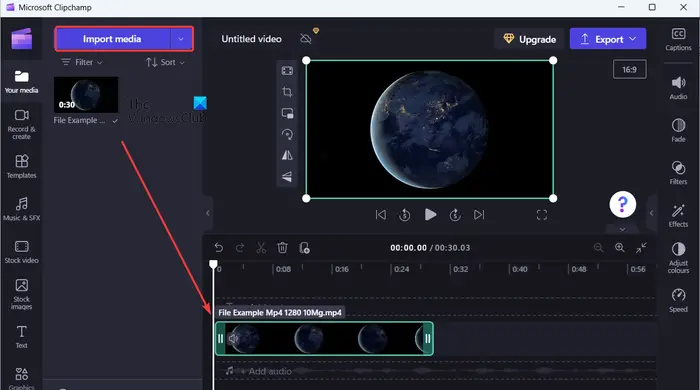
After that, press the Import media button to import your source video files to edit them. You can also click on the drop-down button present next to Import media to choose the source from where you want to add your video clips. You can import videos from your PC, phone, Google Drive, OneDrive, or Dropbox.
Read: How to add Subtitles to your Videos in Windows?
Once videos are added, drag them onto the timeline to start editing them. Or, hover the mouse over an added video clip and click on the Add to timeline option.
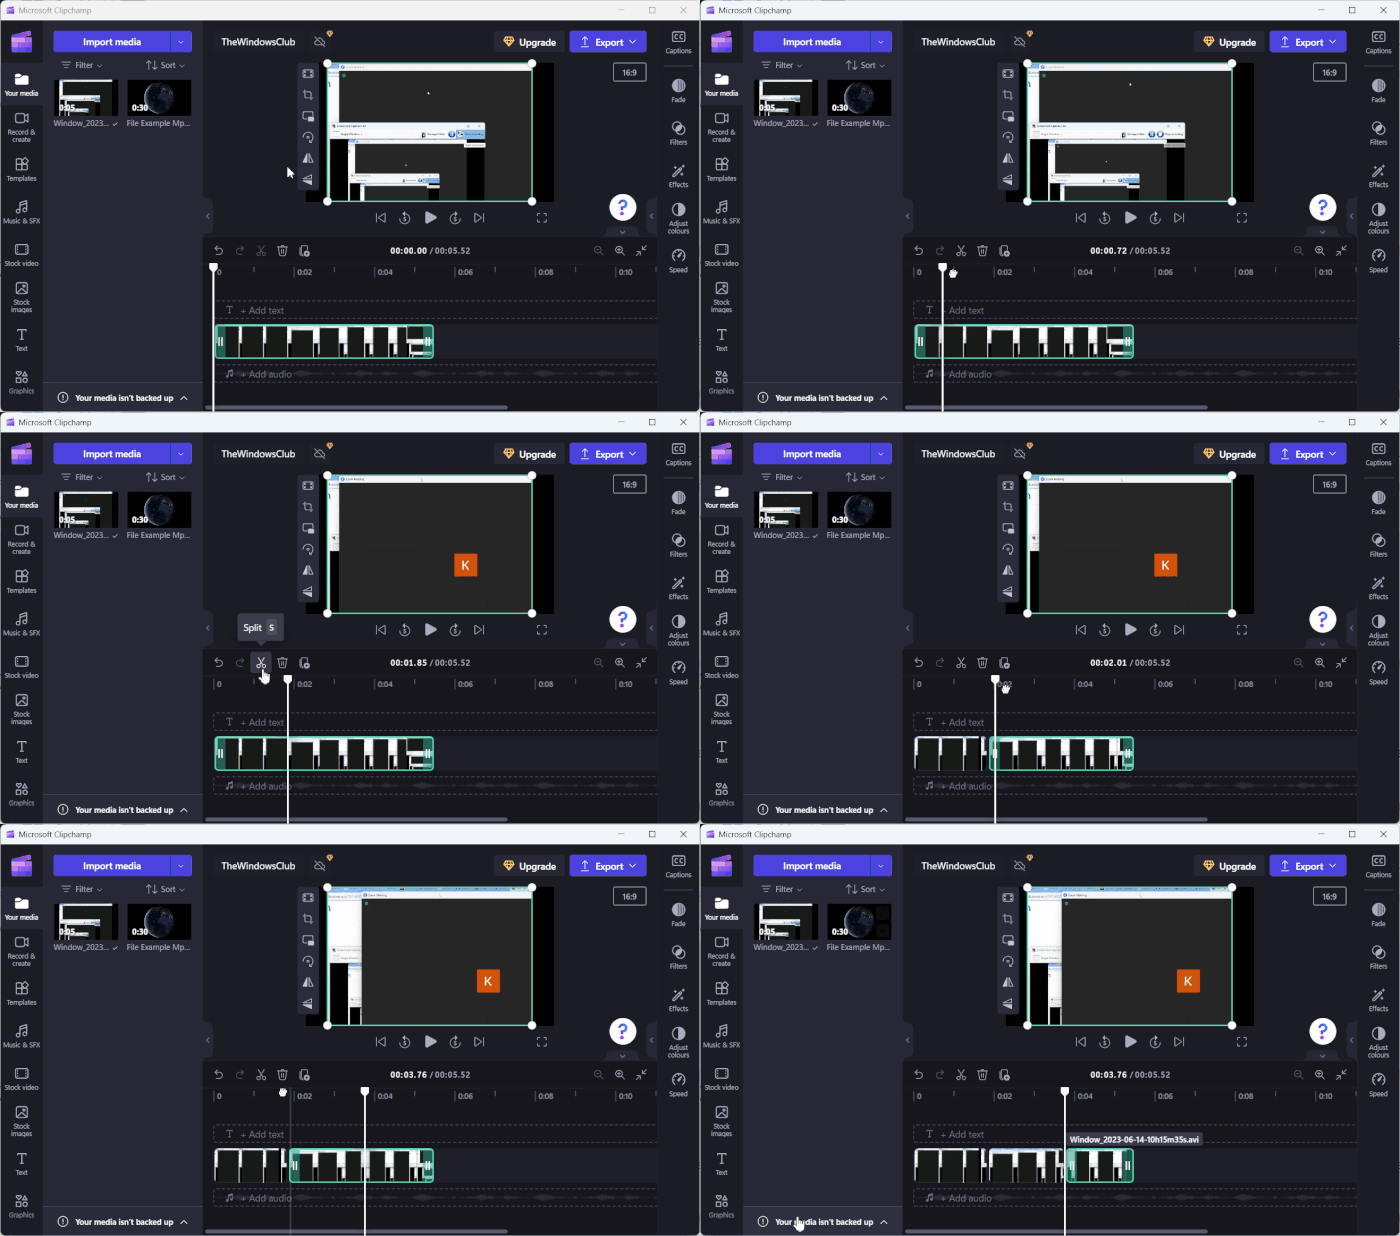
Next, if there are multiple clips, select the video clip you want to split or slice. Now, drag the timeline cursor and place it in the position from where you want to split the video clip.

Then, click on the Split button (scissor icon) to slice the video clip into two parts.
You can repeat the above steps to split a video clip into multiple parts.
Once you are done slicing your video clips into several parts, you can rearrange their order in the final video.

To do that, you can drag the sliced clip and drop it at the preferred position in the video. That’s it. Your clips will now be rearranged.
Furthermore, you can perform other editing tasks on your videos like adding filters, applying transition effects, inserting subtitles and text, etc.
When you are done, the final video can be saved in MP4 format or animated GIF (if less than 15 seconds). For that, click on the Export button and choose the output video quality from 480p, 720p, and 1080p. It will then start rendering and exporting the video that you can save to your computer. Or, you can also save the final video to Dropbox, OneDrive, or Google Drive. It also lets you upload the edited video directly to your YouTube channel or TikTok.
So, this is how you can easily split your video clips and rearrange their order in Clipchamp.
See: How to add Timer in Video on Windows?
How do you select multiple items on Clipchamp?

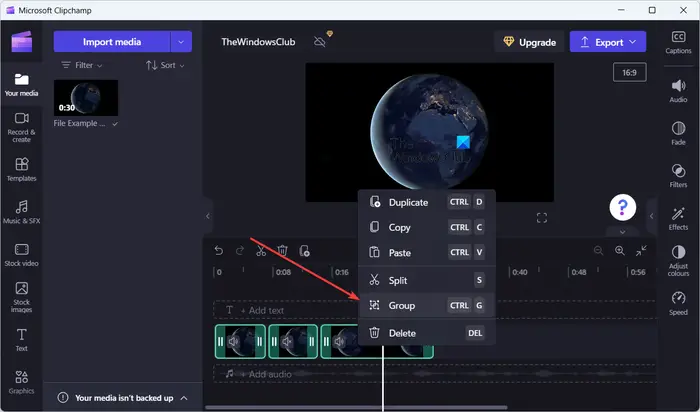
To select and group multiple items in Clipchamp, select a video clip on the timeline and then press and hold the CTRL key on your keyboard. After that, click on the other video clips, audio clips, text, etc., present on the timeline individually. All items will now be selected. You can now press the right-click on a clip and then choose the Group option to group all the items. Or, you can press the CTRL+G hotkey to group the selected items. If you want to ungroup the items later, you can again right-click on the grouped items and choose the Ungroup option or press CTRL+SHIFT+G.
Now read: How to add Timer in Video on Windows?
Leave a Reply