If you want to stop cloud backup on your Windows 11/10 PC, this post is for you. We are going to show you different methods on how to turn off OneDrive and stop files from saving OneDrive on Windows 11/10.

How to turn off Cloud Sync in Windows 11?
OneDrive is the Microsoft cloud service that enables you to backup and sync your files and folders on the cloud on Windows 11/10. To disable or turn off the cloud backup on a Windows PC, you must quit the OneDrive app to stop backing up data temporarily. Other than that, you can also disable OneDrive from launching at system startup. In case you don’t want to use OneDrive cloud service at all, you can simply uninstall the OneDrive app from your PC.
How to stop Cloud Backup in Windows 11/10
To stop cloud backup, i.e., Microsoft OneDrive backup on your Windows PC, here are the methods you can use:
- Close OneDrive from the taskbar.
- Disable OneDrive from Task Manager.
- Use Settings to disable OneDrive.
- Prevent OneDrive from opening at startup using Registry Editor.
- Stop OneDrive using Command Prompt or Windows Powershell.
1] Close OneDrive from the taskbar
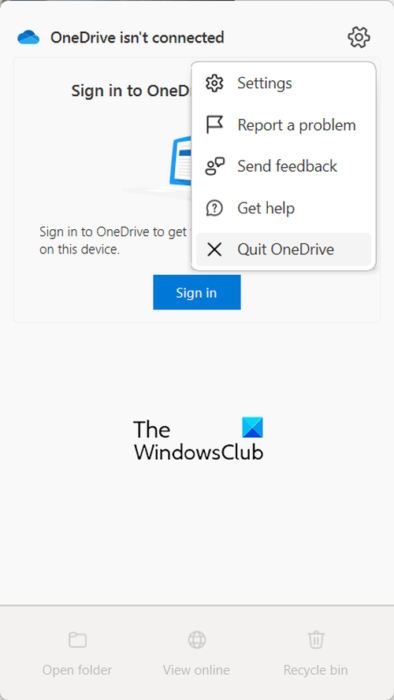
The first method to disable cloud backup on your Windows PC is to close OneDrive from the taskbar. Here’s how you can do that:
- First, click on the OneDrive icon from the taskbar (or system tray).
- Now, press the Help & Settings button.
- Next, click on the Pause syncing drop-down option.
- After that, click on the Quit OneDrive option to close the app.
If you want, you can temporarily pause cloud syncing by clicking on the Pause syncing option and choosing a time duration to disable cloud backup.
See: How to unlink, exclude, or remove a folder from OneDrive in Windows?
2] Disable OneDrive from Task Manager
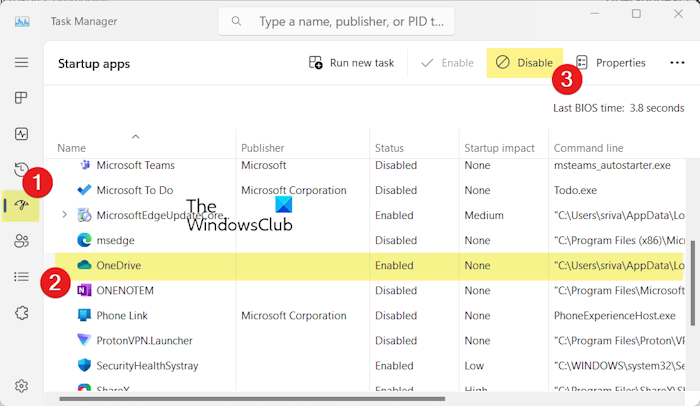
You can also stop running OneDrive whenever you restart or log into Windows by using Task Manager. This way you can start cloud backup whenever required. Here are the steps to do so:
- First, right-click on your taskbar and select the Task Manager option. Or, press CTRL+SHIFT+ESC to open Task Manager.
- Now, move to the Startup apps tab from the left-side pane.
- Next, select the OneDrive app and then press the Disable button to stop it from launching at startup.
Read: Stop saving screenshots to OneDrive automatically in Windows.
3] Use Settings to disable OneDrive
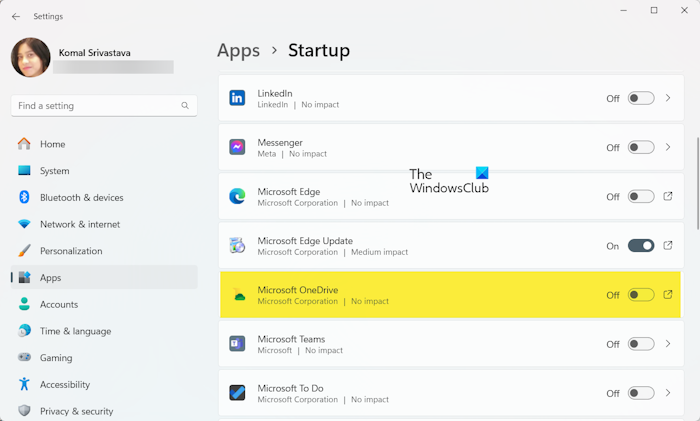
You can also stop files from saving to OneDrive by disabling it from Windows Settings. Here is the process to do so:
- First, open the Settings app using Win+I.
- Now, navigate to the Apps > Startup section.
- After that, locate the Microsoft OneDrive app and switch off the toggle associated with it.
4] Prevent OneDrive from opening at startup using Registry Editor
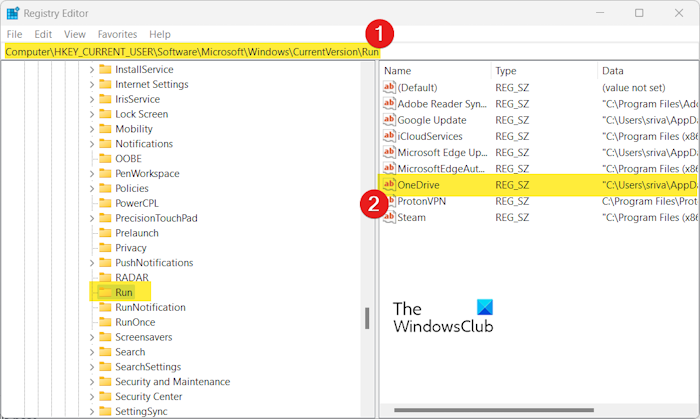
Another way to disable OneDrive at startup and stop files from saving to OneDrive on Windows is to use Registry Editor. You can delete the OneDrive Run key from your Registry to stop it from running when you log into your PC. Here’s how:
First, open the Run command box using Win+R and enter regedit in its Open box to open the Registry Editor app.
Now, move to the following address:
HKEY_CURRENT_USER\SOFTWARE\Microsoft\Windows\CurrentVersion\Run
After that, select the OneDrive key from the right-side pane and press the Delete button to delete it.
OneDrive will stop launching at Windows startup.
Read: Fix OneDrive high CPU or Memory usage problem in Windows.
5] Stop OneDrive using Command Prompt or Windows Powershell
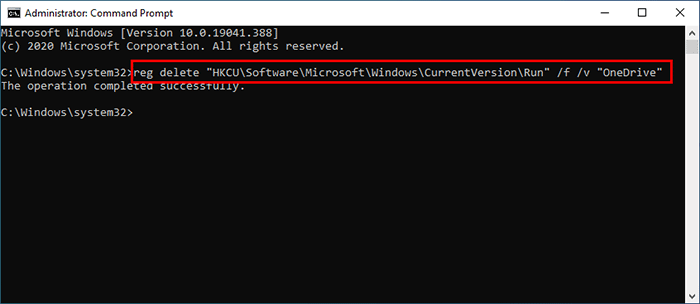
The next method to prevent OneDrive from backing up your files to the cloud at system startup is via Command Prompt or Windows Powershell. Here’s how:
- First, open the Command Prompt as an administrator.
- Now, enter the below command to stop OneDrive at startup:
reg delete "HKCU\Software\Microsoft\Windows\CurrentVersion\Run" /f /v "OneDrive"
- Once you see the “The operation operated successfully” message, close the Command Prompt window. OneDrive is now disabled at startup.
You can run the same command via Windows Powershell (as an administrator).
That’s it!
How to clear Windows Backup Cloud Synced Settings?
To clear your Windows backup and sync settings, visit the https://account.microsoft.com/devices page. Once you signed into your Microsoft account, scroll down towards the end of the page and click on the Clear stored settings option under the Cloud synced settings option.
How do I stop my computer from syncing with Windows 11?
To disable sync settings on your Windows PC, open the Control Panel. Now, set View by to Large icons and select the Sync Center option. Next, click on the Manage offline files option from the left-side pane. After that, in the newly opened window, click on the Disable offline files button. You will be then asked to restart your computer to let the change take effect.
Leave a Reply