This post will show you how to take a scrolling screenshot in Windows 11/10. Thus, instead of capturing only the visible area of a folder, webpage, or window, you can take a long screenshot that will capture the full content. You need to select the area from where scrolling starts and then auto scroll will start for the selected window to take the full screenshot. For doing this, we have covered some best free tools to take a scrolling screenshot.
Though there are many ways to take a screenshot in Windows, taking a screenshot beyond the visible part on a webpage or window is not possible using built-in features. Therefore, we have created this list which contains tools that can take scrolling screenshots of a particular window.
How to take scrolling screenshot in Windows 11/10
In this post, we are using three free scrolling screen capture freeware:
- PicPick
- ShareX
- Screenshot Captor.
1] PicPick
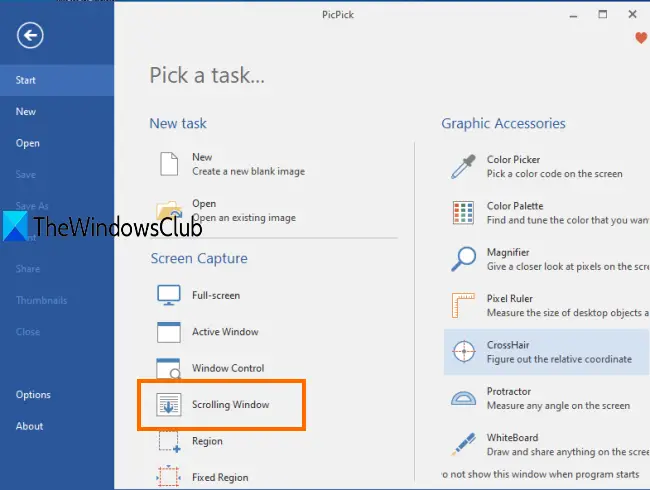
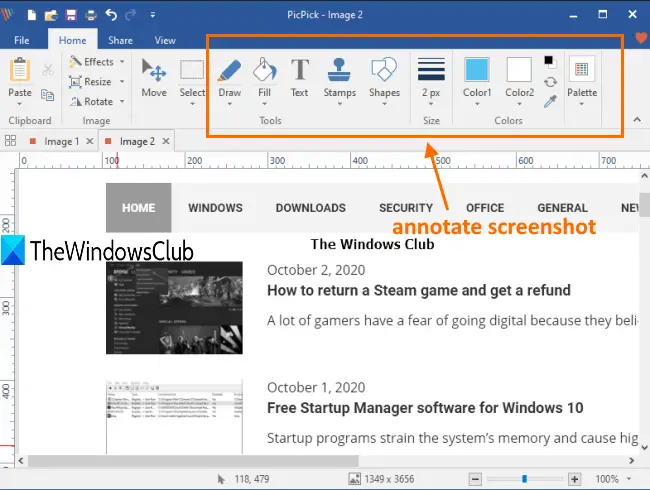
PicPick software can be used free for personal or non-commercial use. Its scrolling screenshot feature is very useful as you can save scrolling screenshot as PDF, PNG, GIF, JPG, or BMP format. Also, before saving the captured screenshot, you can do the annotation part using text tool, brush, marker, image effects, highlight rectangle, and other tools.
Download its installer or portable version. When you have launched the software, use the File menu on its main interface, and click on Scrolling Window. Or else you can access the Options window and set a hotkey to trigger scrolling screenshot command. After that, you can select the area to capture in the foreground window and press the left click. It will activate its auto scroll option, complete the scrolling, and open the captured image on its Image Editor tab. Now you can use annotation tools and use Save As button in File menu to save the screenshot.
This software has many other options like set delay time for auto-scroll, capture an active window, use a ruler, magnifier, color picker, take a screenshot in freehand mode, and more.
TIP: You can use Web Capture in Microsoft Edge to capture scrolling screenshots
2] ShareX
ShareX comes under the best freeware to take screenshots and edit them. It can capture full screen, any of the running windows, a specific region with a transparent background, etc. The scrolling capture feature is also there. You can also perform post-capture actions like draw using the freehand mode, add stickers on any part of the screenshot, add cursors, blur a portion, use an eraser, insert another image in the screenshot, etc. Finally, you can use Save as button to store the scrolling screenshot as GIF, TIFF, BMP, JPEG, or PNG format image.
After launching this software, you should first access application settings, hotkey settings, post-capture settings, etc., to set the options as per your needs. Just spend some time adjusting options.
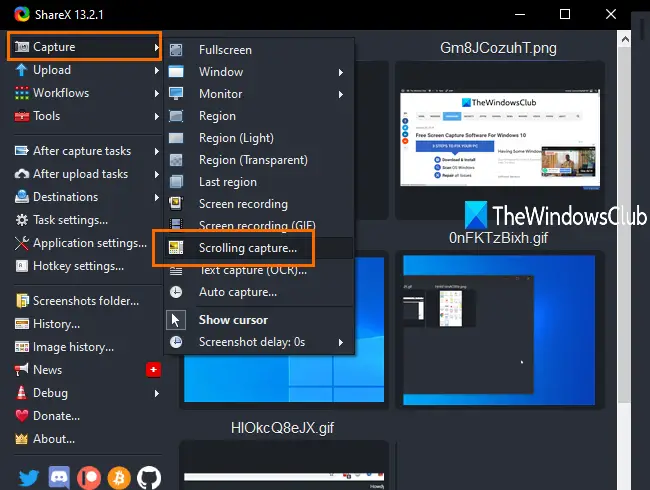
After that, use the Capture menu, and select Scrolling capture.. option. It will open capture related settings. In that, you can set start delay, scroll method (keep it to the automatic setting for better result), scroll delay, minimum scroll count, etc. When you have adjusted settings, press the ‘Select window or control to Scroll’ button.
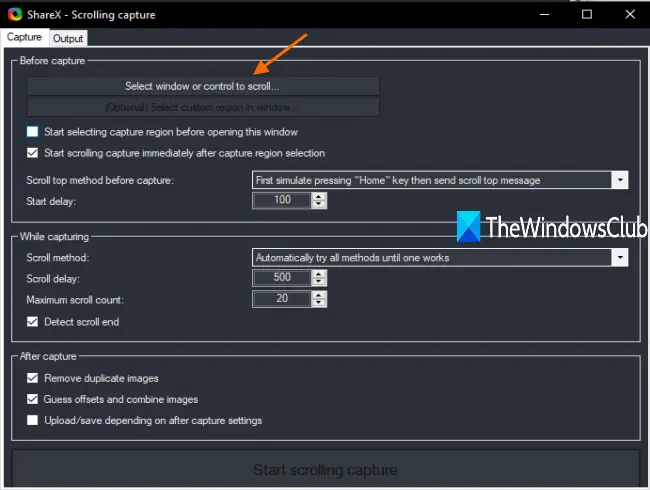
Now you can click on the scrolling area of the foreground window and it will do the processing automatically. When the scrolling part is done, the post-capture window is opened where you can edit the screenshot. Finally, you can use Save As button and save the scrolling screenshot taken by you.
This software can also record desktop screen as an animated GIF or in video format. Moreover, it provides many other tools that you can use. For example, you can upload images to Imgur, use an image ruler, video converter, image combiner, image splitter, etc.
Read: How to take a screenshot with Mouse Pointer and Cursor included.
3] Screenshot Captor
Screenshot Captor is another useful tool to take scrolling screenshots. It comes with vertical and horizontal scrolling options. The step by step process makes it easier to capture a full webpage or window with all the available content. It lets you save scrolling screenshot as TIF, GIF, PNG, BMP, PGM, TGA, or DCX image format. Apart from scrolling capture, it has an active window capture, a selected region, and full-screen capture options.
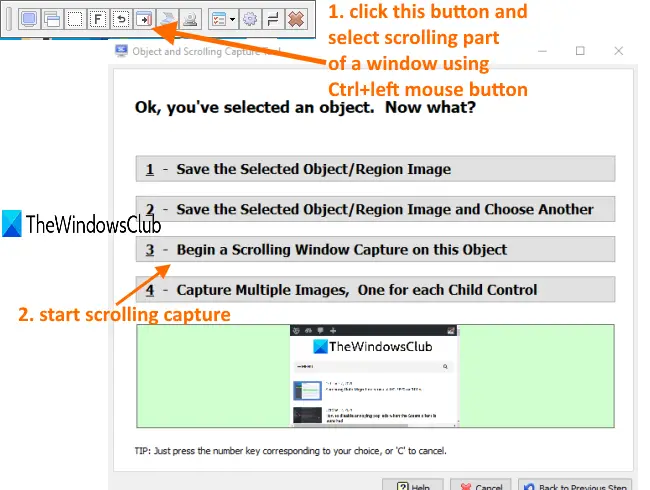
Grab its portable version or installer version. Launch it and its Quick capture bar will be visible on the top left side. In that bar, you can press Grab windows Object or scrolling window button. Or else, you can use the default hotkey (Ctrl+Shift+PrtScr) to activate scrolling screenshot mode. You can always change hotkeys by accessing Options of this software.
Read: How to screenshot a YouTube video on PC
Now press the Ctrl+Left mouse button on the scrolling part of a window. A window will open prompting you to select the next action. You need to press Begin a Scrolling Window Capture option just like it is visible in the image above.
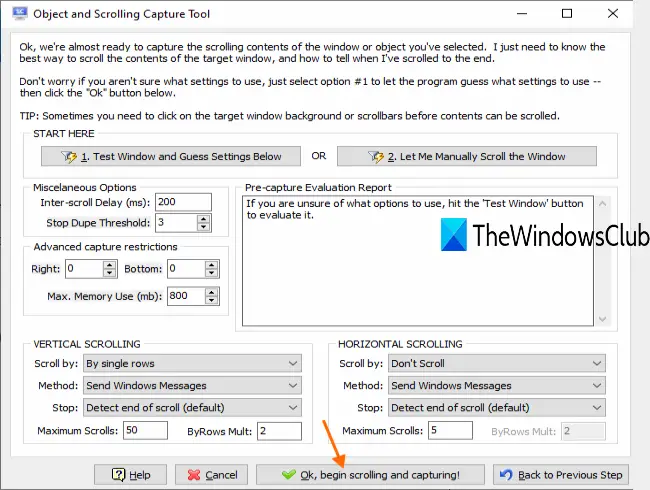
Another window will open where you can adjust vertical scrolling and horizontal scrolling options. You can set options like scroll by pages or single rows, auto-detect end of scroll, scroll delay, etc. Though the default options are good to proceed further, you can change options if needed. After that, press ‘Ok, begin scrolling and capturing!‘ Button.
This will begin the auto-scroll capture process. When it is completed, it will show preview and some options for customization. You can use options such as set left, right, bottom, top margins, set overlaps, etc. If the screenshot is good, press ‘OK, save built image‘ button.
Finally, you can use Save As button, and save the output.
BONUS TIP: This post shows how to take a screenshot of Lock Screen & Login Screen.
The list of screenshot capturing tools might be endless, but the feature to take a scrolling screenshot is rare to find, which is available in these free tools. Some, like Screenpresoo and DuckLink Screen Capture do offer it.
I hope this list will be helpful in fulfilling that requirement.
Also read: How to take full webpage screenshot in Chrome & Firefox.
Leave a Reply