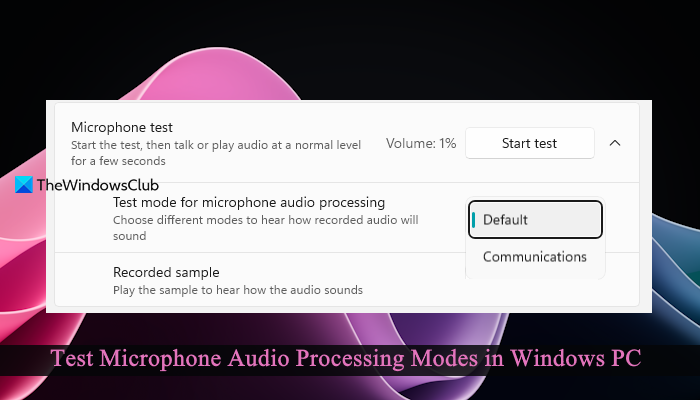
In this tutorial, we will show you how to test Microphone Audio Processing Modes in Windows 11 PC. This new feature of Windows 11 lets you select a test mode (Default and Communications) for microphone audio processing and record a sample audio for the selected mode. After that, you can play that sample recording to hear how the audio sounds. Once the test is completed, you can change the test mode and record another sample audio. Based on the test results, you would better understand how a microphone sounds with regular apps and communication apps with different audio processing.

We already have the feature to set up and test a microphone on a Windows PC, but that doesn’t help how the recorded audio sounds with the default processing and a communication app that may use a different audio processing. This is where this new setting comes in handy.
This feature comes with Windows 11 version 24H2 for Copilot+ PCs and is also rolling out for existing devices. So you have to update your system and access the Settings app of Windows 11 to perform the microphone test with the different test modes.
How to test Microphone Audio Processing Modes in Windows 11

Here are the steps to test microphone audio processing modes on your Windows 11 PC:
- Open the Windows 11 Settings app by pressing the Win+I hotkey
- Select the System category
- Access the Sound page
- Under the Input section, expand the Choose a device for speaking or recording setting
- Select a microphone you want to test (if there is more than one microphone available). This will open the Properties page of that microphone
- In the Input settings section, expand the Microphone test setting
- Now select a test mode (Default or Communications) using the drop-down menu available for Test mode for microphone audio processing option
- Press the Start test button available for the Microphone test setting and record your audio at a normal level for a few seconds at the current input volume. By default, the sample recording is stopped automatically after 5 seconds. However, you can stop the microphone test before that too
- Press the Play button available for Recorded sample setting to hear how the audio sounds
- Repeat the above steps with another test mode and hear the sample recording. You can also change the input volume for your microphone tests until you get the recorded audio the way you want.
That’s all. I hope this helps.
Also read: Best free mic testing software and online tools for Windows PC
How do I test my microphone settings in Windows 11?
To test your microphone settings on a Windows PC, first, open the Settings app. After that, navigate to System > Sound > and select a Microphone in the Input section. In the Input settings section, you can select the input format, adjust the input volume for the microphone, and also perform a microphone test.
How can I test my microphone sound quality in Windows 11?
You can use the Settings app of Windows 11/10 and record or play audio at a normal level for a microphone test and finally play the recorded sample to check if the microphone is working fine or not. The recording sample will also help in checking the sound quality. You can also use the built-in Sound Recorder app of Windows 11/10 to test your microphone and record audio. Or else, you can also try some best free mic testing apps or programs for it.
Read next: Microphone not working on Windows PC.
Leave a Reply