You can use Photoshop to turn an image into an interesting piece of art. Learning how to turn a photo into a collage in Photoshop can be a great way to make a boring project come to life. Collages can be used as a gift, it is a great way to use up photos in an interesting way.

What is a collage?
A collage is one image that is made up of multiple images, a collage is also described as placing multiple images together to create a single image. Collage is the object and also the act of creating the object. Cutting up the image in Photoshop and adding the stroke around it gives it the look of a collage because it now has pieces looking like individual pieces. it is like each piece comes together to create a single image.
How to turn a Photo into a Collage in Photoshop
This article will show you how to turn a full photo into a collage, making it look like pieces that can be put together. The image can be that of a person, scenery, food, or any image that you want to use. The image can be cropped to be a square if it is not already a square. If the image is a portrait of a person, ensure the face is clear and the mouth and nose are in the center when you cut in the squares.
- Open and prepare Photoshop
- Place the photo in Photoshop
- Add guides
- Cut photo
- Enlarge canvas space using the crop tool
- Add a stroke to each piece
- Hide guides
- Move and rotate pieces
- Add a background color
- Add a drop shadow
1] Open and prepare Photoshop
Open Photoshop and prepare a new document by going to File and then New. A New document options window will appear. Enter the desired dimensions and other options that you want to use for your artwork. When you are finished choosing, press Ok to confirm and create the canvas. Another way to prepare the document is to find the photo then right click on it and choose Open With then Adobe Photoshop (version). This method opens Photoshop, and the image will be opened in Photoshop as a background.
2] Place the Photo in Photoshop
With Photoshop opened it is time to place the image in Photoshop. If you did not do the Open with method then you will have to place the image in Photoshop after opening it. With Photoshop opened, go to File then Open or press Ctrl + O. The search window will open. Find the photo that you want, click it and then press Open. The image will open in Photoshop as a background. If you had prepared a canvas before, you will have to drag the image onto the canvas. If you did not create a canvas, this image will be the canvas. You could get the image into Photoshop by going to where it is saved on your computer and dragging it into photoshop. If you had a blank canvas there, it will go on the canvas as a Smart object. If no canvas was there, the image will go into Photoshop as a background. You will then duplicate the image and turn off the visibility of the first image. this is ok whether you have a canvas or you have the image as the background.
Depending on the image you are using, you may want to crop out some sections or crop it to bring into focus the part that you want to use.
3] Add guides
Now that the Photo is in Photoshop it is time to move to the next step. This step will require you to add guides to the photo. The guides will help you to see where to divide the photo in the next step.
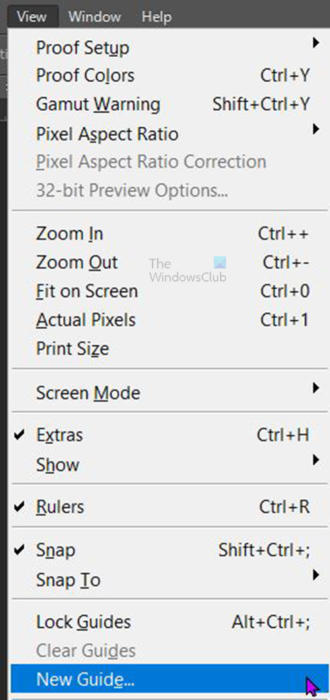
To add the guides go to the top menu bar and click View then New guide.

A new guide option window will appear, here you can choose the guide orientation, whether horizontal or vertical, and the position. The orientation will be important because you will use both horizontal and vertical guides. The position will line up with the Ruler on the top and bottom of the work area. The position can be pixel or percent. For this article, the position will be entered in percent. The percentage will place the guides as a percentage of the page. For the first guide orientation, you can choose either of the positions.
This article will use four guides to divide up the photo. Follow these steps to add the four guides to the photo.
Go to the top menu bar and click View then New guide to place these guides, you will have to do this for each.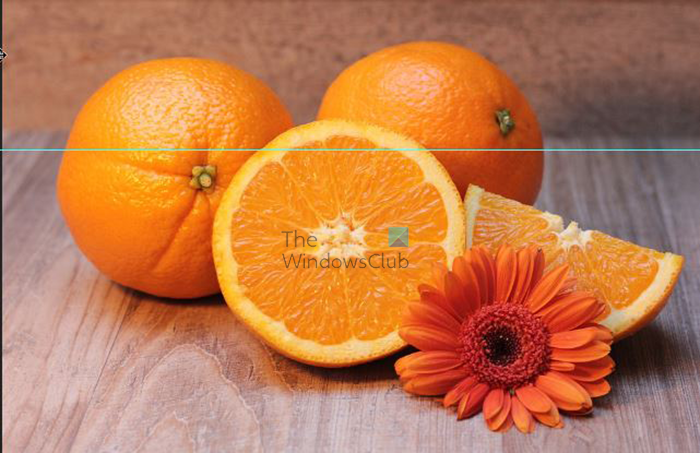
Here is the position and the orientation of the first guide: Orientation is Horizontal and the Position is 33%. Press Ok when you have entered those values to confirm them and to bring up the guide. This will place the guide at the one-third mark of the image.
Here is the position and orientation for the second guide: Orientation is Horizontal and the Position is 66%. Press Ok when you have entered those values to confirm them and to bring up the guide. This will place the guide at the two-thirds mark of the image.
Here is the position and orientation for the third guide: Orientation is Vertical and the Position is 33%. Press Ok when you have entered those values to confirm them and to bring up the guide. This will place the guide at the one-third mark of the image.
Here is the position and orientation for the third guide: Orientation is Vertical and the Position is 66%. Press Ok when you have entered those values to confirm them and to bring up the guide. This will place the guide at the two-thirds mark of the image.
4] Cut photo
It is now time to cut the photo, this will be done using the Rectangular marquee tool. Before using the Rectangular marquee tool to cut the photo, you want to make sure that the cuts you make will snap to the guides on the photo.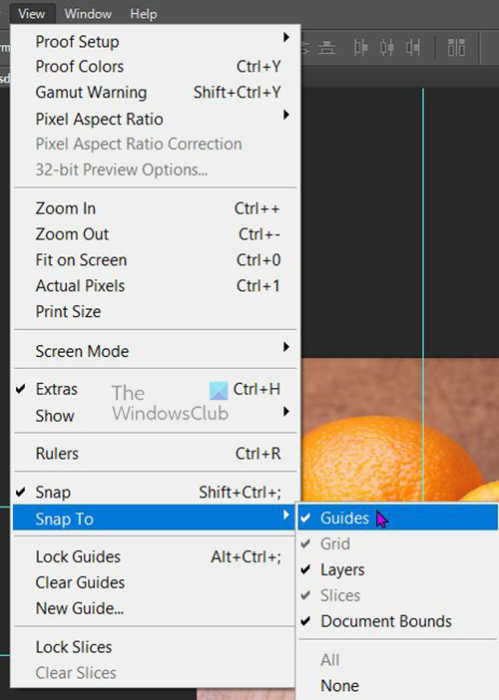
To check if they will snap to the guides, go to View then Snap to. Look to see if Guides is checked off on the list, if it is not checked off then just click it.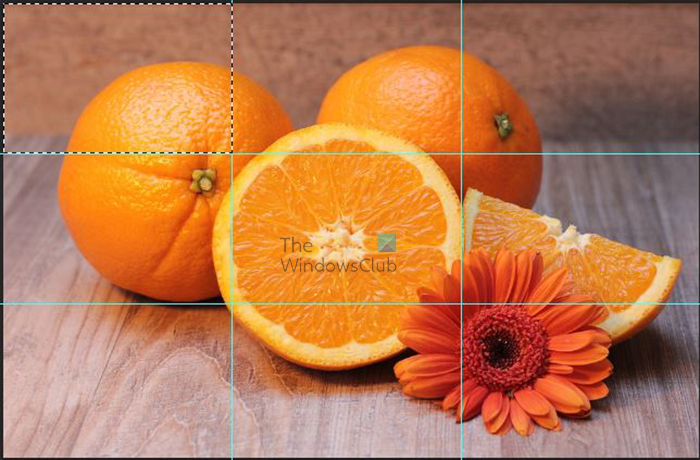
Now that you have confirmed snap to guide, it is time to cut the photo. Go to the left tools panel and select the rectangular marquee tool, draw the Rectangular marquee tool and select the first rectangle created by the guide. The guide will create rectangles or squares depending on the image that you used. A square image will be divided up into squares and a rectangular photo will be divided up into rectangles.
When the first marquee outline is created, right-click on the selection and choose Layer via copy or press Ctrl + J. Photoshop will create a new layer with the selection in the layers panel. Repeat this process for all the sections. Ensure that each time you select the image before you do the selection. A common mistake is to forget to select the original image before making the selection with the marquee tool.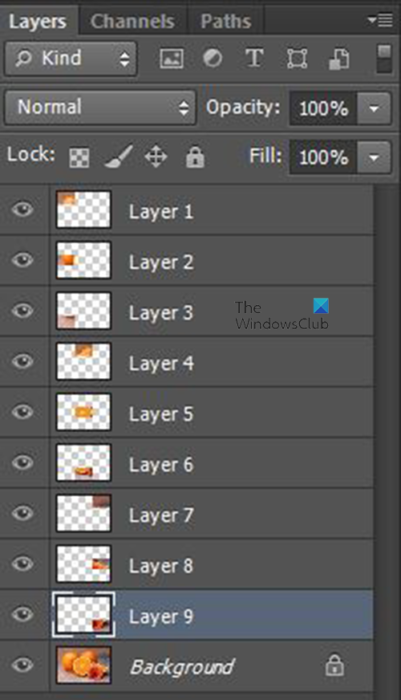
In the layers panel, you will see each cut corresponding to the part of the photo that it was taken from. This is a good way to track if you have made any mistakes when you were selecting.
With all the pieces cut, it is time to remove the guides from the image. to remove the guides go to the top menu bar and press View then Clear guides.
5] Enlarge canvas space using the crop tool
Now that all the images have been cut or copied in from the original, you will want a larger canvas space so that you can rotate the pieces. the extra canvas space can be made using the Crop tool. To use the crop tool to get the extra canvas space, click on the original image then select the Crop tool.
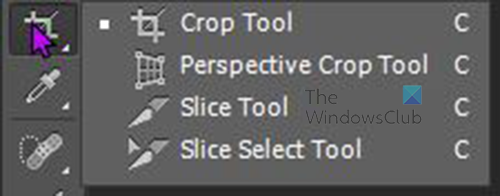
The Crop tool is located in the same group as the Perspective crop tool, Slice tool, and Slice selection tool. If the Crop tool is not the one showing, click and hold any of the tools there and a flyout panel will appear showing all the tools. Select the Crop tool from this menu.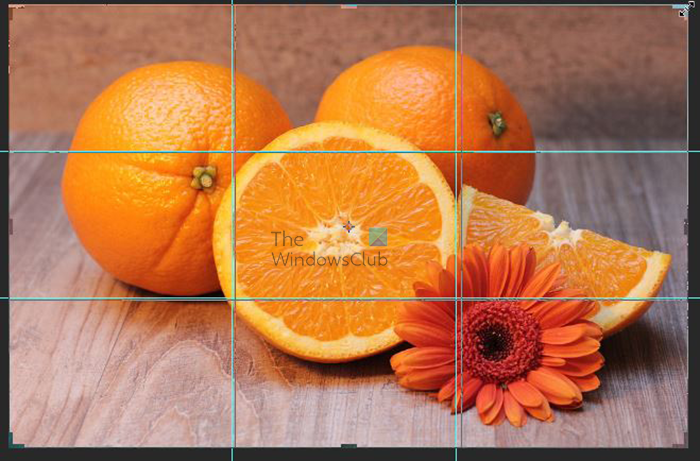
When you select the crop tool, you will see the crop selection appear around the image. Hold Alt and click one of the edges and drag out until you are satisfied with the size. Alt allows it to resize from multiple sides all at once. Be sure to stretch from the edge and not from a side, stretching from one of the sides will only stretch the selected side and the opposite side. Stretching from an edge while holding Alt will stretch all four sides.
When you are satisfied with the amount of extra canvas space, press Enter. You will see the extra canvas space added. Photoshop adds the canvas space as white, you may want to change it to a different color.
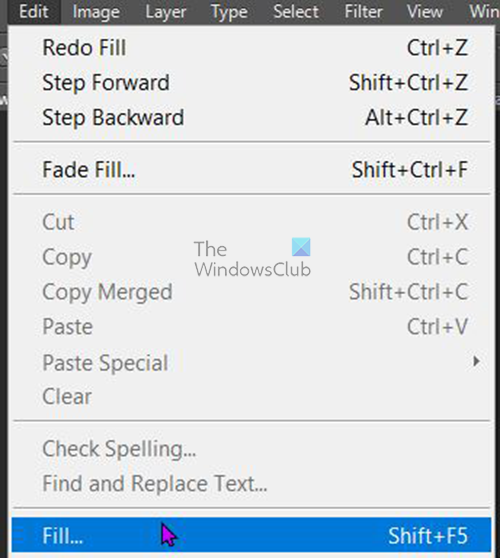
To change the canvas to a different color, select the original image then go to the top menu bar select Edit then Fill.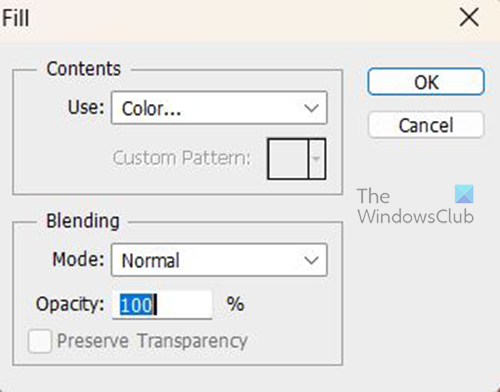
The Fill option window will appear.
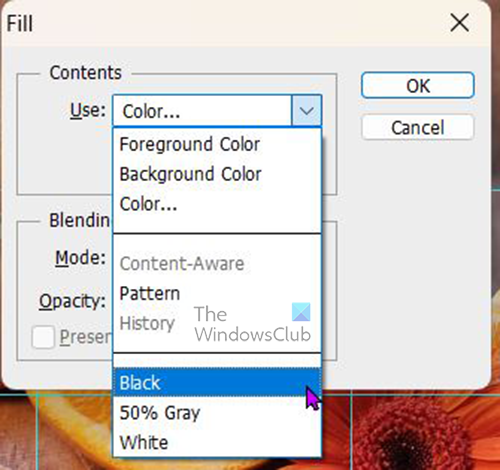
Under Content click the drop-down arrow at Use and then choose Black. Click Ok to confirm your choice.
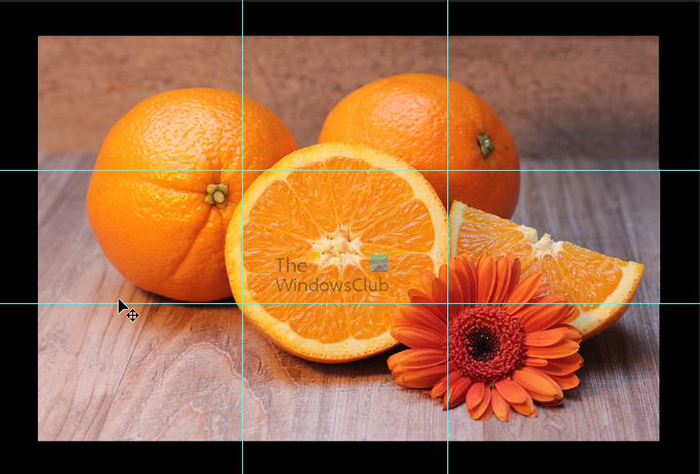
Photoshop will change the background to black.
6] Add a stroke to each piece
You will notice that the images are still looking like one complete image, you will need to give them borders to make them look separate.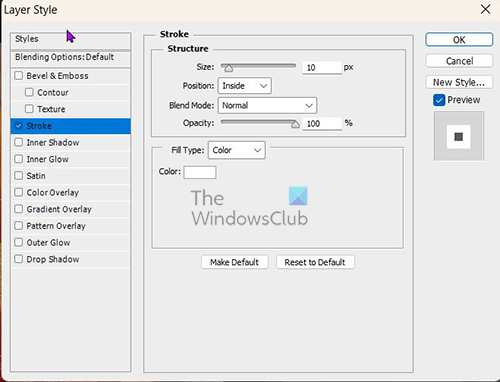
Right-click on the image at the top of the layers panel and choose Blending options. When the blending options window appears, click on the word Stroke then set the stroke color to white and the stroke position to Inside. You will change the stroke size as well. The size of the strike will depend on your image, move the slider and watch the image until you get a satisfactory stroke size. This one has a stroke size of 10 but your stroke size may be different, use what fits your image. When you are finished, press Ok to confirm and keep the changes. The blending option is applied to the first image, however, you want the same blending options to be added to all of the other images. There is an easy way to add the same blending options to all of them at once.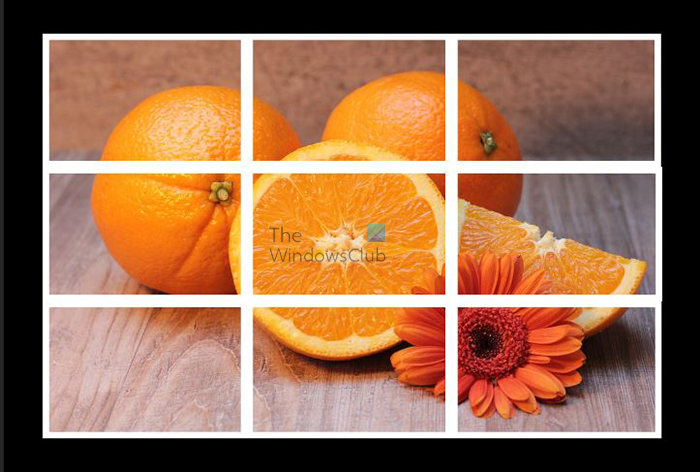
To add the blending options to all of them at once, right-click on the image with the blending options that you want and choose Copy layer style. You then select all the other images by clicking on the second one, holding shift then pressing the last one this will select all of them. You then right-click on any of the selected images and click Paste layer style. You will see all of the images get the layer style added.
7] Hide guides
Now that you are finished with the guides you can hide them. To hide the guides, go to the top menu bar and click View then Clear guides.

These are the images with the stroke around each and the guides hidden.
8] Move and rotate pieces
Move the pieces
It is now time to make the pieces look like a collage by placing them in different positions at different angles. To move and rotate the pieces, click on one piece and select the Move tool, look on the top menu bar and ensure Auto select is ticked. Auto-select will ensure that a layer will be selected when you click it on the canvas without you having to select it in the layers panel. With the piece selected, move it with the mouse or the direction key on the keyboard. Move it away a bit from the other, do so to your preference.
Rotate the pieces
To rotate the pieces, click it then press Ctrl + T to bring up the transform box around the image. hover at the edge of the image until the cursor turns into the rotate cursor then rotate the image to your preference. When you are finished, press Enter to close the Free transform box.
The move and rotate will be done for each piece so just repeat the step. If you will be just moving the image and not rotating it you do not need to open the transform box (Ctrl + T). you will rotate and move all the pieces except the piece in the center.
All the pieces are moved and rotated at a random angle by hand.
9] change the background color
Now the collage is almost finished, you just need to change the background color. To change the background color, click on the background then click the Create new fill or adjustment layer icon at the bottom of the layers panel. When the menu appears, click Solid color. A color picker will appear, you can choose a color from the color picker or you can choose a color from the image by hovering the mouse and sampling any color. The color of the flower petal is sampled and made the background color.
10] Add a drop shadow
The final step is to add a drop shadow to each piece. Don’t worry, you will not have to do all of them individually, there is an easy way to do it. the easy way to add the effect to all pieces at once is to add them to a layer group.
Add to group
To add them to a layer group, select all the image layers by clicking the first one, holding shift then selecting the last one. You then go to the top of the layers panel and click the menu button at the top right edge. The menu will appear and you choose New group from layer. The window for you to name the group will appear, you can name it and press Ok or just leave the default name and press Ok. The image layers will be placed in a group
Add drop shadow
To add the drop shadow right-click on the group folder in the layers panel then choose Blending options. When the blending options window appears, click the word Drop shadow. You then adjust the Opacity, Angle, Size, Distance, and Spread. Look at the image when you adjust each and stop when you are satisfied with the result.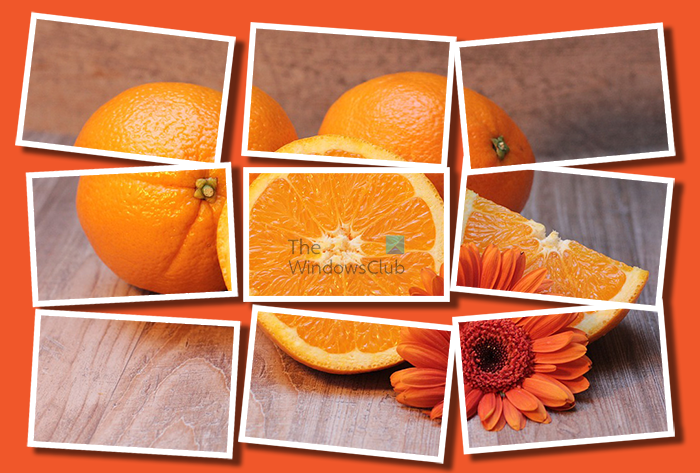
This is the final image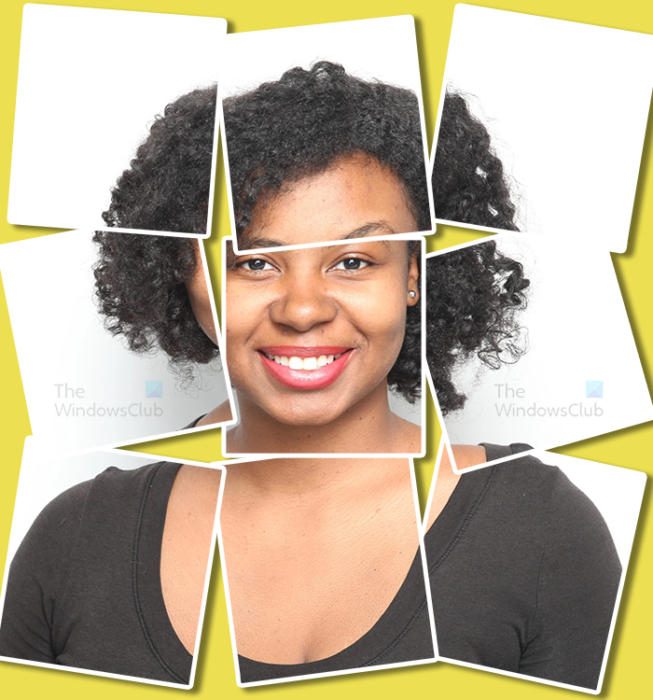
This is another artwork using an image of a person.
Read: How to make a Silhouette in Photoshop
How do I split a picture into multiple pieces in Photoshop?
Open the image in Photoshop and use guides to mark the image where you want to cut the image. you then use the Rectangular marquee tool to cut where the guides create squares. Right-click on each piece and choose Layer by copy. Follow the steps for each piece. Change the background to a solid color. You then add a stroke around each piece and move them apart so that there is a space between them. There you will have the picture in multiple pieces.
Leave a Reply