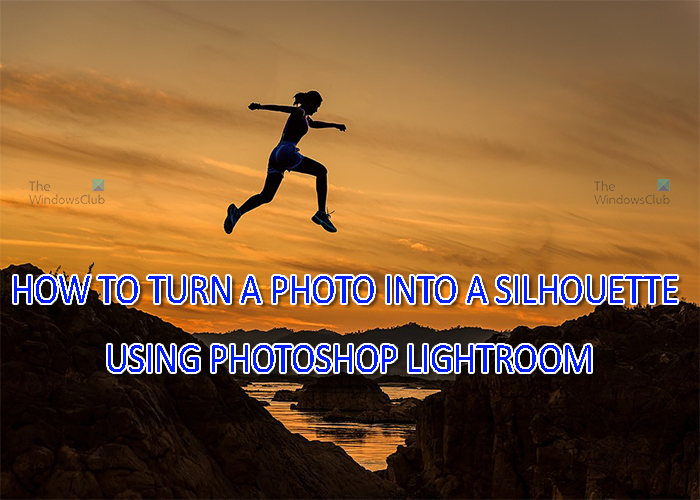
Learning how to turn a photo into a silhouette using Photoshop Lightroom can make boring photos look interesting. A silhouette is an outline of an image, it is usually all black, but it can be any color. Silhouettes usually do not show any details, however, some details may be left in for artistic effect. Silhouettes are great ways to do something different with photos. Silhouettes can be created naturally by taking photos in a certain light and from a certain angle. You may also turn a whole photo or the subject of a photo into a silhouette using graphic apps.
How to turn a Photo into a Silhouette in Lightroom
This article will show you how to turn the subject of a photo into a silhouette but leave the rest of the photo untouched. Silhouettes do needs high contrast for them to be effective. Turning the subject of the image into a silhouette or the photo into a silhouette on a contrasting background is key to a great outcome. In this article, the Brush tool in Photoshop Lightroom will be used to turn the subject of the photo into a silhouette.
Isolate the subject
The first step in turning a photo into a silhouette is to isolate the part of the photo that will be the silhouette. That part of the photo would be known as the subject. A silhouette needs to have strong contrast for it to work, this means that the subject will have to be isolated so that it can be made to have a higher contrast compared to the background.
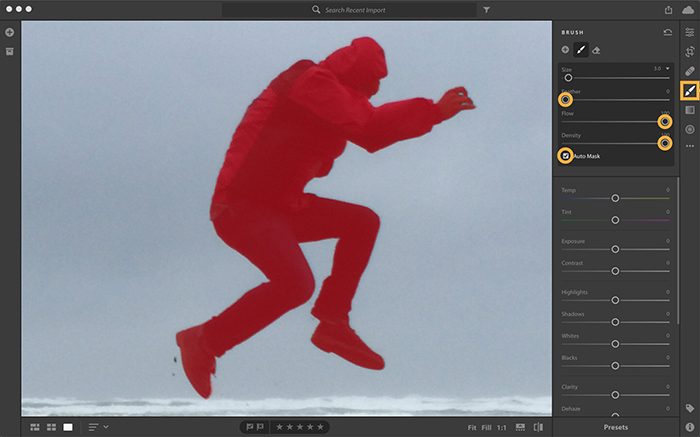
In this article, the subject will be isolated using a brush with Auto mask turned on. Auto mask will identify the edges of the subject so that you do not accidentally paint over other parts.
Choose the brush tool then adjust the brush size to a size that is comfortable for you. You can increase or decrease the brush size by using the [ or ] on the keyboard. The [ decreases the brush size and the ] increases the brush size. Turn on Auto mask in the brush settings, then press O a few times until the red mask overlay appears over the subject. This shows where on the image you have brushed. In the brush settings set Feather to 0 so that there is a sharper brush for crisper edges. You should also increase the Flow so that the brush effects are applied more quickly. You should also increase the Density so that the transparency of the effect is limited.
Darken the subject
It is now time to darken the subject, move the edit sliders to darken the image. The silhouette will start becoming more and more visible as the image gets darker.
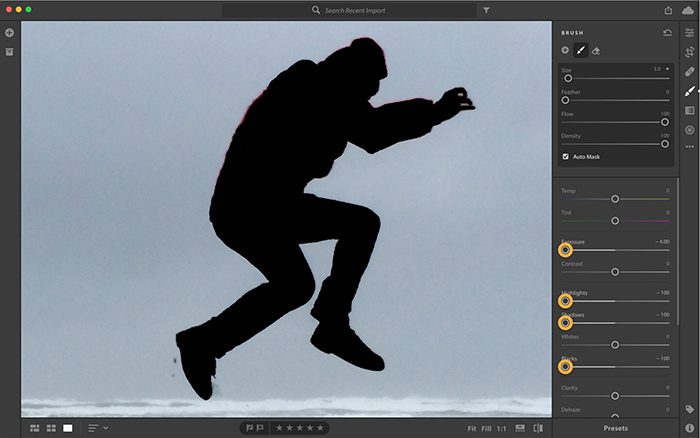
Press O to turn off the red mask overlay, this will make the changes more visible. Adjust sliders to lower the Exposure, Highlights, Shadows, and Blacks. Make adjustments and watch until you get the result you are looking for.
Completing the silhouette
There may be areas on the subject that were not brushed when the Auto mask was on, these areas will need to be fixed.
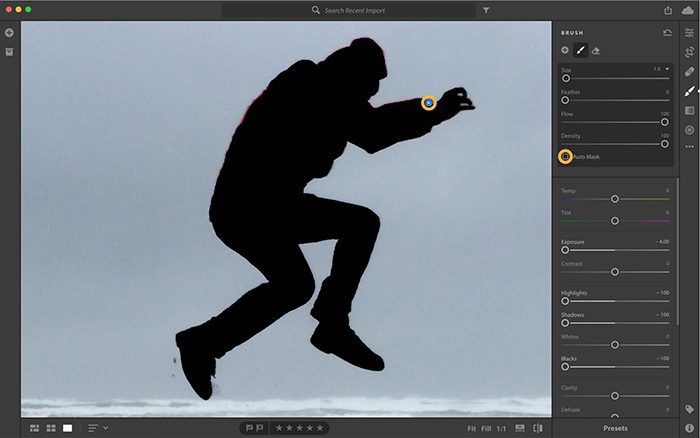
Look for the blue pin where the edit had begun and click it. Uncheck Auto mask and then brush the areas that needed brushing. To see the blue pin, hover over the image with the mouse and press O.
If you need to erase areas that were brushed by accident while Auto mask was enabled, you will have to select the Eraser tool and turn on Auto mask and brush over those areas.
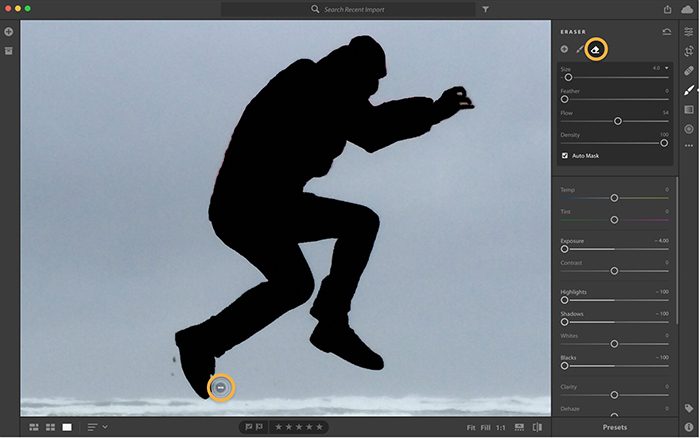
If you need to edit an enhancement, you will have to click the blue pin that is related to that edit then adjust the slider to where you want it. Toggle the Show/Hide original at the bottom of the screen. You may also click I on the keyboard to switch between the before and after view of the image.
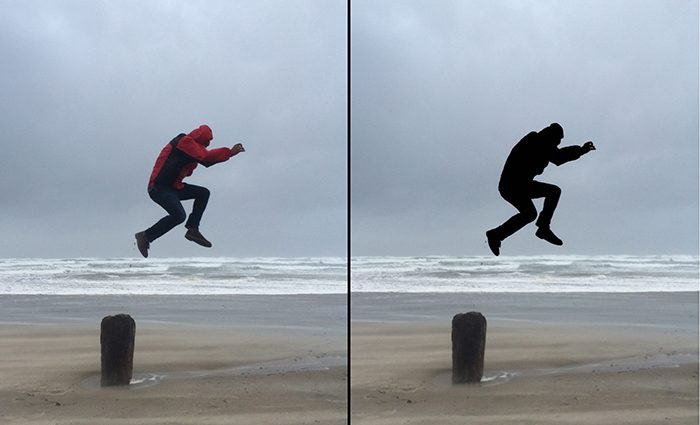
Here is the before and after image of the adjustments made.
Read: How to make a Silhouette in Photoshop
How do I turn a photo into a silhouette?
Before making the silhouette, decide whether you want to turn the whole image into a silhouette or just the subject. Remember that a silhouette has to have two strongly contrasting colors. The silhouette is just an outline so it needs to have a contrasting background so that it can show. To use lightroom to turn the picture into a silhouette. You need to isolate the subject from the background using the brush with Auto mask turned on. You then brush the image to make it darker. When it is dark enough turn off Auto mask and then make the adjustments that are needed. You can then save the silhouette.
Also read: How to create a Silhouette in Illustrator
How do I turn a photo into a black and white silhouette?
You can turn a photo into a black and white silhouette in Photoshop Lightroom. For that, you must have an image and the object on the same window. Following that, you can go through the above-mentioned solutions to make the conversion happen.