After being a default app for almost 30 years, Notepad is now an optional feature in your Windows PC. Notepad is a simple text editor that has been used and loved by Windows users for years. It is designed to create and edit basic text files.
Notepad, earlier, used to be a part of Windows PC, which was not removable, but lately, Microsoft has made it an optional feature, which means that you can uninstall it from your PC and reinstall it when required after downloading it from the Microsoft Store. In this post, we will learn how you can uninstall the Notepad from your Windows PC and then how you can reinstall it when required. Useful if Notepad is not opening!
Uninstall Notepad in Windows 11 via Optional Features
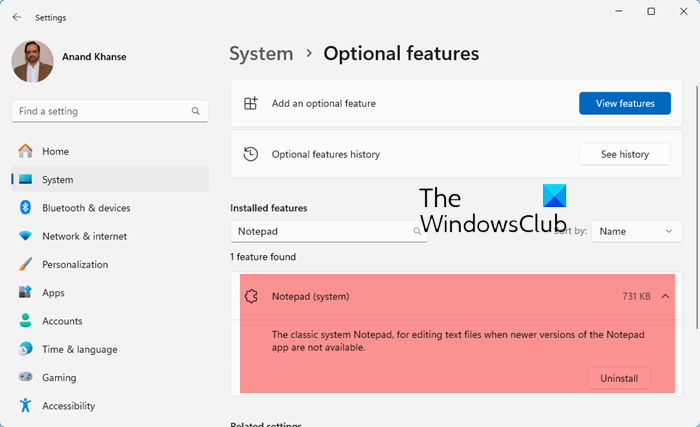
Notepad is among the default text editors for Windows 11. It is perhaps the earliest of text editors used by Windows and even though it doesn’t offer a lot of features, the application is popular since most documents will open in it only. However, if you wish to uninstall Notepad in Windows 11, the procedure is as follows:
- Right-click on the Start button and select Settings from the menu.
- On the list on the left-hand side, select System.
- From the right pane, select Optional features.
- Search for or scroll to the Notepad application.
- Click on the downward pointing arrow associated with it and select Uninstall.
You can also uninstall Notepad using PowerShell, Command Prompt, or Settings app.
Install or Reinstall Notepad in Windows 11 via Optional Features
- Right-click on the Start button and select Settings from the menu.
- On the list on the left-hand side, select System.
- From the right pane, select Optional features.
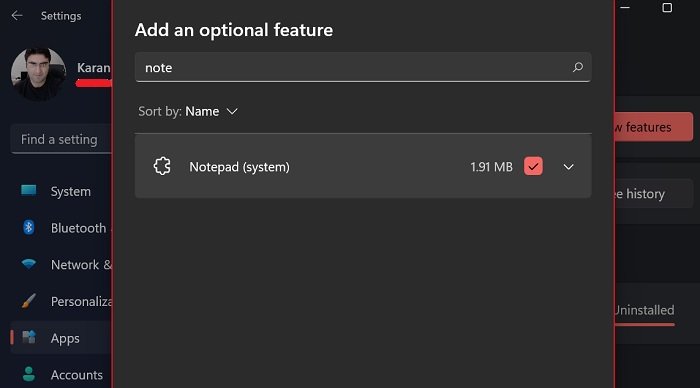
- Click on View Features corresponding to Add an Optional feature.
- Search for Notepad from the list and check the box associated with it.
- Click on Next. On the next page, click on Install.
- Reboot the system after Notepad has been installed.
Uninstall Notepad on Windows 10 via Optional Features
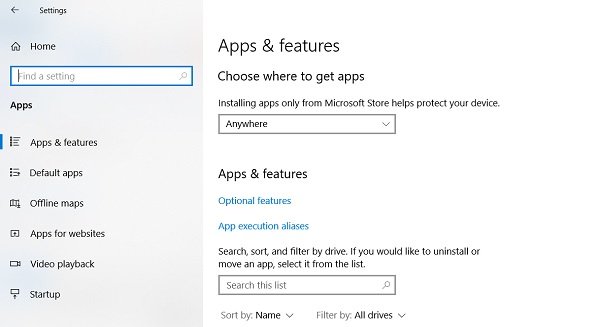
To uninstall Nopetad from your computer that is running Windows 10 v2004 or later:
- Press Win+I to open the Settings.
- Go to Apps > Apps & Features.
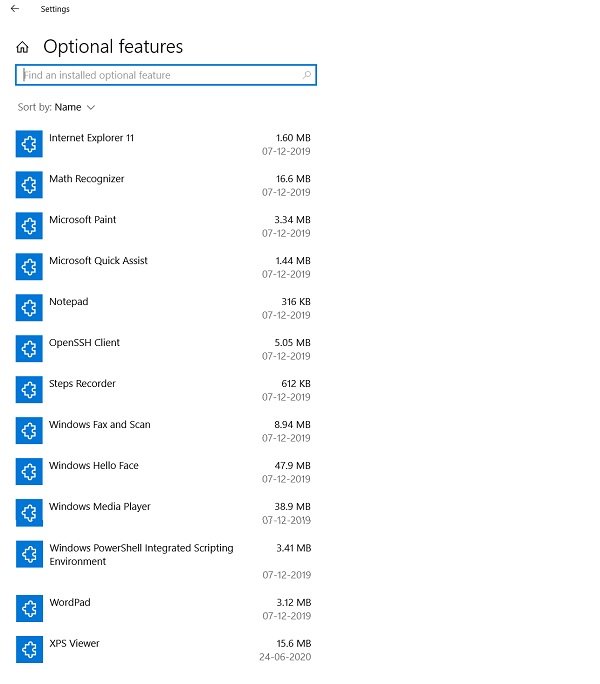
- In the right pane, click on ‘Optional Features’
- Type Notepad in the search box and click on Uninstall.
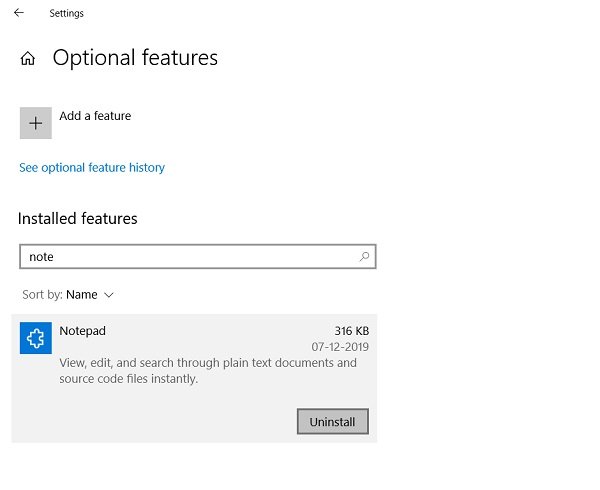
In case you can’t find Notepad in the list of apps in your Settings, you are probably not running the latest Windows 10 version. Update your PC first and try again.
Install Notepad on Windows 10 via Optional Features
If you have uninstalled the Notepad application and now want it back, you can easily reinstall it in a few simple steps.
- Open Settings and go to Apps & Features
- In the right pane, click on Optional Features.
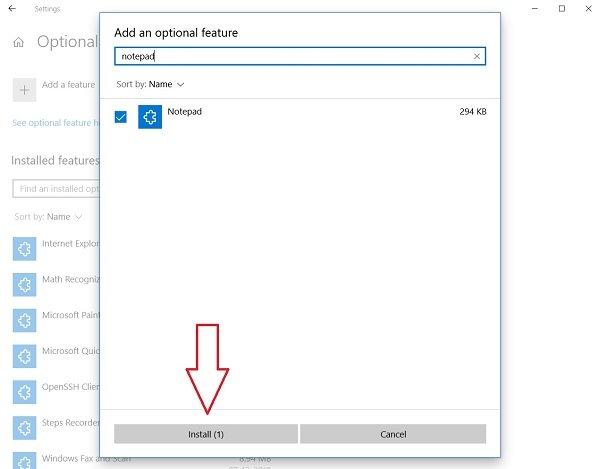
- Click on Add a Feature
- Type Notepad in the search bar or scroll down to find it.
- Click on Notepad and Install.
Alternatively, you can also search for Notepad on the Microsoft Store and download/install it directly from there.
Now when Notepad is available on Microsoft Store as a standalone app, it will get updated independently.
Microsoft is open to user feedback and reviews so that it can add new features to this basic text editing application.
Why would we need to install reinstall Notepad if it is present by default?
The first obvious reason is if you uninstalled it by choice and later realized that the application was necessary. Other than this, a lot of third-party software products can also uninstall Notepad. Thus, this option could be helpful.
What would we use Notepad for in the Windows 11 era? Isn’t it obsolete?
Notepad is still the primary application for a lot of associated applications which want their files to open in the .txt format. Also, the files are very light.
Related read: How to reset Notepad to default settings on Windows.
Leave a Reply