This post will show you how to unlock Layers in Photoshop. Photoshop is one of the top photo editing software available. Photoshop is used by professionals and hobbyists alike. Photoshop is mostly for raster graphics. Photoshop is best for photo manipulations, edits, and retouches. Photoshop uses layers to create documents. Layers are used to break up the work into small parts. This makes it easy to make corrections if there are errors. Photoshop allows for layers to be locked. Some layers are automatically locked to prevent them from being accidentally worked on. Some layers are partially locked, which means that they will allow some editing, and some will not be allowed.
When you open an image with Photoshop, the image opens in Photoshop as a locked layer. It is called Background and it cannot be edited. This lock may be partial and will allow some editing, so hover over the lock icon to make sure. To fully unlock this layer so that you can work on it, you can duplicate it or unlock it. Note however that if you open some PNG images that were saved with background disabled, they will open unlocked in Photoshop. This means that the background was removed in photoshop before it was saved as a PNG. When it is opened in Photoshop it will be unlocked and it will be Layer 0. The unlocked layer can be locked but it will still be named Layer 0 unless you change it. Whenever a layer has the locked symbol on it, hover over the symbol to see if it is fully locked or Partially Locked. Partially locked means that it will allow some editing while fully locked means that it will not allow any editing.
How to unlock Background Layers in Photoshop
Open the image that you want in Photoshop by going to the image then right-click on it and go to Open With then choose Adobe Photoshop. Another method would be to open Photoshop then go to Open, search for the file you want in the Open dialogue box then select it and press Open.
![]()
Look at the image in the Layers Panel on the right, and check for a padlock icon on the right of the image. Regardless of the name of the file, some will be renamed Background and have a lock symbol. Notice I said some, well some images may be called Layer 0 and will not have the lock icon. Others will be named Index and have the Lock icon. Remember that Photoshop locks the image to prevent accidental editing of the original. This is true but you will need to check if the image is Partially Locked or Fully Locked. Some layers are partially locked, which means that some amount of editing can be done on them.
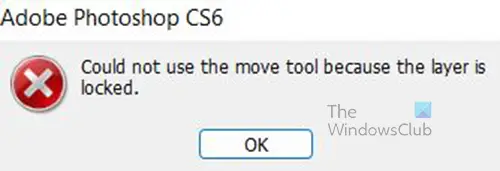
It may allow you to use the Erase Tool or the Brush Tool but will not allow you to move the image. When you try to move or do an edit that is locked, it will display a message. Whatever aspect of the layer is locked, the corresponding message will be displayed.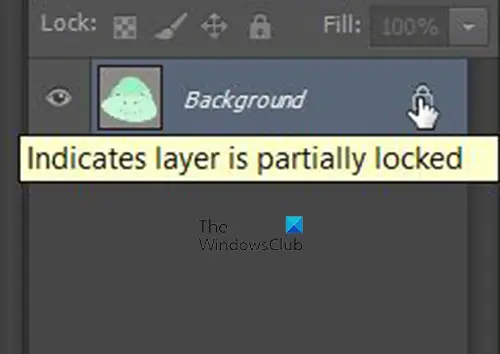
To know if the layer is fully locked, move the cursor to the lock icon and hover over it. A message will appear to say if it is Fully Locked or Partially Locked.
To unlock the background just right-click it and press Duplicate Layer or Press Ctrl + J. you will see another layer called Layer 1 appear above the background layer. This method is the safest way to unlock as you just unlock a copy and the original is kept safe (if it is fully locked).
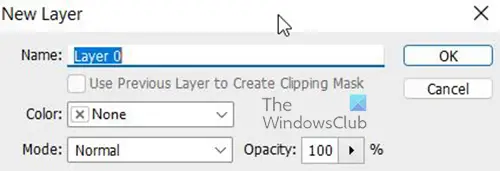
You can unlock the layer by double-clicking it. A New Layer dialogue box will appear for you to make changes. You can choose the layer’s Name, Color (color for layer’s icon), Mode (blending mode), and Opacity. This way to unlock the layer is riskier since you will be unlocking the original layer and not creating a copy.
You can relock the layer by clicking on it and choosing one of the lock options in the Lock option icons above the layers.
You can also lock the layer by going to Layers in the top menu then go to Layer then New, and then Background from Layer. This method applies a full lock to the layer and not a partial lock.
How to fix problems with Unlocked and Locked Layers in Photoshop
Locking or unlocking layers may not function as you expected especially if you have never really experimented with them or you are new to Photoshop. They can be tricky with different file types that may not be fully compatible with Photoshop. Layers may function differently depending on the layer type.
Problem Manipulating Layer
You may have difficulty making certain changes to a layer. The Layers menu on the top menu bar may have all the items greyed out. This issue may be due to a layer with a color mode that is not fully compatible with Photoshop, this is usually an Index Layer with Indexed Color.
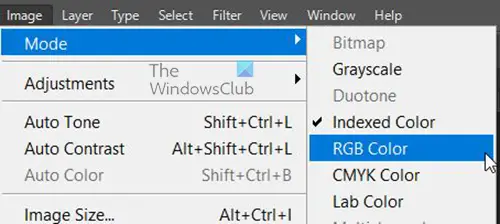
You can fix this by selecting the layer then going to Image then Mode. You may see the Indexed Color checked, change that to RGB or another color mode and the layer will be unlocked, and the name changed to Background with a Lock. You can then unlock the layer by double-clicking it or going to Layer then Layer from Background and filling out the New Layer dialogue box.
Locking or Unlocking Layers From the Layers Panel
The layers in the layers panel can sometimes be locked or unlocked by clicking on the Lock icon. You can also lock parts of a layer by clicking on the other icons beside the padlock icon. Each layer can have two features locked. There are cases when locking or unlocking layers is not happening when you click the icons. In this case, you may have to double click the layer then the layer option appears, and you fill it then click OK. You can also go to Layer then New then Layer from Background. You can also right-click on the layer and choose Duplicate Layer or you can press Ctrl + J. These steps will open the layer.
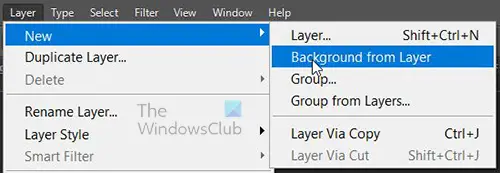
If you need to lock a layer and the icons in the layers panel is not helping, you can go to Layers then New then Background from Layer this will turn the layer into a background with a lock. Note, only some features may be locked so check to be sure if it is a Partial Lock or a Full Lock.
You can re-lock a layer by clicking on the little padlock in the layers palette. The layer’s palette has several buttons above the actual layers. Clicking on the padlock will lock whatever layer you have highlighted. It will also unlock it. Note, however, that this will never work on the background layer. You can have multiple layers selected by holding Ctrl + click on the layers that you want to select.
Locking or Unlocking Layers with Shortcuts
You can use Ctrl + / to lock or unlock all selected layers quickly.
This will lock or unlock selected layers. You can unlock all layers at once (except the background layer) with Shift + Ctrl + /. These shortcuts open all layers for editing except the background layer
These shortcuts may only be available for some versions of Photoshop.
Lock Portions of Layer

Photoshop allows you to lock portions of a layer to allow complex editing. You can lock certain parts of a layer for more precise editing. These buttons are all right next to the padlock button and will display their names if you hover the mouse over them. Try out:
- Lock Transparent Pixels: The icon is a checkerboard. This makes it so that you can’t edit over anything transparent in the layer, meaning nothing underneath the layer will be accidentally affected.
- Lock Image Pixels: The icon is a paintbrush. You cannot edit anything but the transparent parts of the layer.
- Lock Pixel Position: The icon is a cross with four points. Prevents you from moving the layer at all, though you can still paint, re-color, and add text.
Read: How to improve Image Quality in Photoshop CS6
What is the reason for Locking the Background Layer?
The reason for keeping that first (background) layer locked is to prevent accidental editing of the original image. This is important because you may have opened the original and only copy of an image and you may accidentally edit it. You may not have another copy to replace the edited one, so locking the layer prevents that. Note that locked layers may still be able to be edited so hover over the lock icon to see if the image is Fully Locked or Partially Locked.
What do I do if the Layers Panel is Missing
If the layers panel is missing just go to Window then Layers or press F7. If there are still any problems, you can go to the top menu bar and look for the drop-down menu with the list of WorkSpaces. In this case, Essentials is the Work Space used so you will see Essentials at the top. Click essential and the drop-down menu will appear, go to Reset Essentials. This will reset the Essentials Workspace to the default and all the windows that were there will reappear.
Why would you want to Unlock Layers?
When you create a new document to work on, the default color may be white and the name is background. You may want to edit this layer and add color and other effects. You can unlock the layer by double-clicking on it. A layer dialogue box will appear and the layer will be name Layer 0 unless you change the name. You can then edit the color and add other effects to the layer. In this case, you can edit the layer to get it to fit in with your project.
Layers can be unlocked partially to allow certain edits to be done. This partial unlocking will protect the image from being accidentally edited in areas that you don’t need to be done. To allow partial unlocking, go to the lock panel in the layers panel and click on one of the four lock options. You can then fully lock the layer or unlock the layer when you are finished editing.