Intel is extremely popular in consumer laptops, and the Intel Graphics component powers the graphics. It also means, like everything else, Windows users face issues around it. Most of the time, issues can be fixed by updating the drivers. So in this post, we will share how you can update Intel Graphics Driver in Windows 11/10.

Why should you update the graphics driver?
You should go ahead and update it because it resolves graphics-related problems. E.g., For visual corruption when playing a new game, Windows gives a graphics driver error. While most of the recommendations ask you to update the drivers as soon as it arrives, check if there is an issue around it. Along similar lines, if you have updated Windows and face the issue, the driver is outdated and needs to be installed.
Note: If you have a 6th generation Intel processor or higher, your computer manufacturer’s customizations will remain intact after upgrading your graphics driver. It is useful if you have tuned the settings for experiences that work for you.
How to Update Intel Graphics Driver in Windows 11/10
These are straightforward ways to update the Intel graphics drivers using an administrator account.
- Use Intel Driver & Support Assistant
- Manually install the driver from the Intel Download Center
- Check Optional Update in Windows
Make sure to create a system restore point if something goes wrong after installing the graphics driver. We also suggest having a USB bootable device handy because sometimes the graphics driver is not compatible with the system and hence can result in BSOD. With a System Restore and a bootable USB, you should be able to bring back your system within no time.
1] Use Intel Driver & Support Assistant

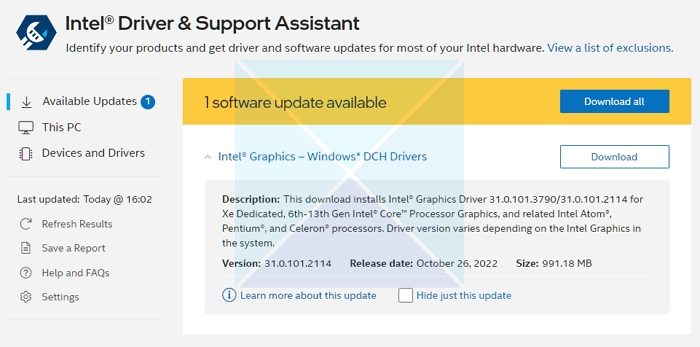
Intel Driver & Support Assistant easily recognizes drivers installed by Intel and third parties. It also provides integrated support and connections to other support resources and checks for Intel driver and software updates and system and device information.
- Download and install Intel Driver & Support Assistant from intel.com and restart your PC.
- Once you get back into your account, locate the assistant in the Start menu and open it.
- It will open a link in the browser, which will then check if you need an update or missing a driver.
- Once it finds it, you will get a list of drivers you can install on your PC.
- Click on the Download button, and install the setup file.
Once everything is complete, restart your PC.
Read: Intel Graphics Driver keeps crashing on Windows
2] Manually Install the Driver From the Intel Download Center

If you are sure you can easily figure out which driver you need on your PC, you can manually install it. However, ensure you have a backup of your PC and a System restore in place.
- Determine the Intel® Processor number and write it down (example: i7-1165G7). Here is how to find the processor number:
- Press the Windows key and type system information. Select System Information from the search results. In the new window, find and write down or copy-paste the number given next to Processor.
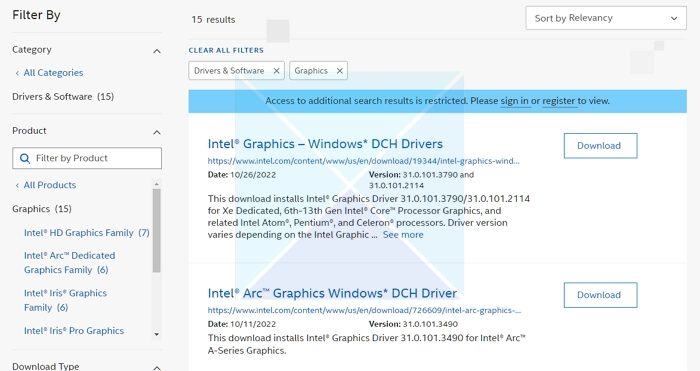
- Next, go to the Download Center and type in the processor number in the search bar.
- Choose the desired driver outcome: For the most recent driver updates, it is advised to choose Intel Graphics – Windows* DCH Drivers, but there are other options.
- Next, click Download and open the EXE file.
- Please continue with the installation until it says Installation Complete in the installer.
- Restart PC.
Ensure you search for the exact driver by matching it with your processor and GPU version, as you can view it in the device manager or System information page.
Troubleshoot: Intel Graphics Drivers problems
3] Check Optional Updates in Windows

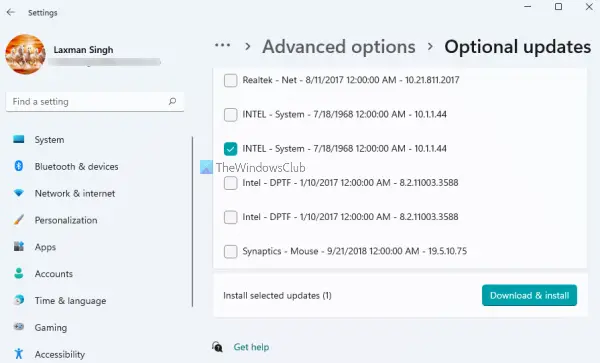
Windows Update provides driver updates for your PC, but they are Optional. Also, the updates arrive late as Microsoft needs to ensure it’s tested enough on similar PCs. Here is how to check for updates:
- Press Windows key + I to open Windows Settings.
- Choose Windows Update from the left pane.
- Next, choose the Advanced options button on the right side.
- Choose Optional updates given under Additional options.
- To check for Graphics or other driver upgrades, expand Driver updates.
Your graphics, often known as your display, are handled by an Intel Graphics Driver. Your screen would be completely black without it, and you would never be able to see anything. So it is essential to update it. So, these are three methods used to update Intel Graphics Driver in Windows. You can choose any method suitable for you. I hope it helped!
How to verify if the driver was successfully Installed?
After running the.exe file and checking the installation: Press the Windows key and type Device Manager in the search bar. Open the device manager. Next, double-click Display Adapters and choose the Intel Graphics device. On the new pop-up window, click the Driver tab. Finally, check if the Drive Date and the Driver Version are accurate.
Does Windows 11 automatically install GPU drivers?
Even though it takes some time for the most recent driver updates to appear on Windows Update, downloading and manually installing them is the best course of action. This is because you are receiving updates from a reliable source. Only packages suitable to your system will be made available through the service, reducing the likelihood of confusion, which may lead to several issues.