Want to upload files to your SharePoint Site? In SharePoint, you can upload various documents to your site that viewers in your organization and group can look at; you can upload numerous documents such as Word, PowerPoint, Excel, Onenote, HTML, and PDF. SharePoint’s purpose is document management. It stores a document on the web or a server. Members of your group or organization can open, read, edit, and repost the document.
In SharePoint, a Site is a Website that contains information. It helps you meet your organization’s needs and organize various content, such as web parts. Web parts are small blocks of user interface that allow users to customize their pages and store documents, events, contacts, and other information.
How to Upload a Document to a SharePoint Team Site
Open your SharePoint Team Site.
There two ways you can upload a document to your SharePoint Site.
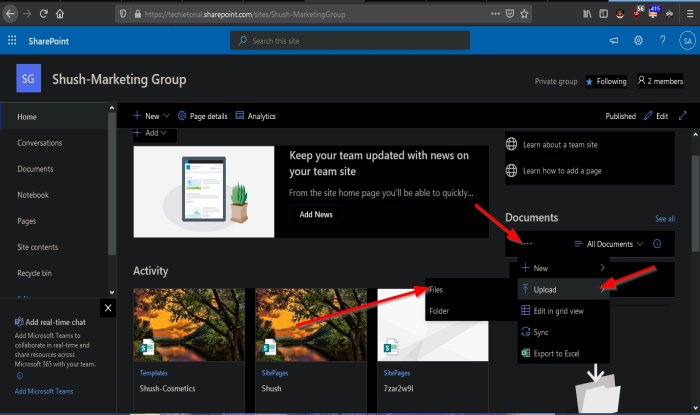
Method one; on your default site page, scroll until you see the Document section on the right.
Click the three dots, and a list will appear.
In the list, click the Upload option and then click Files.
A File Upload dialog box will appear.
Inside the dialog box select, a file, then click Open.
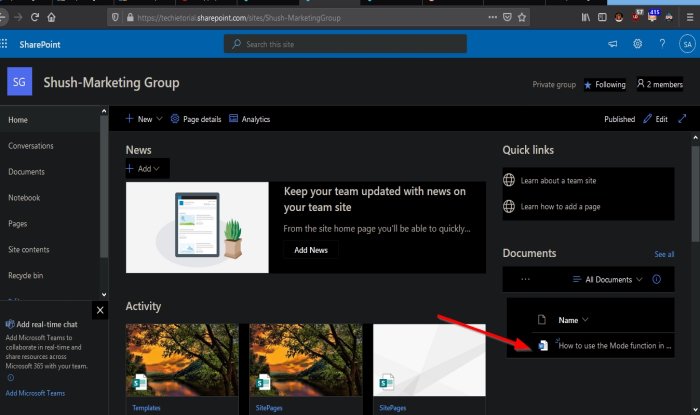
The file is uploaded.
You can also upload a folder by clicking Upload then selecting Folder.
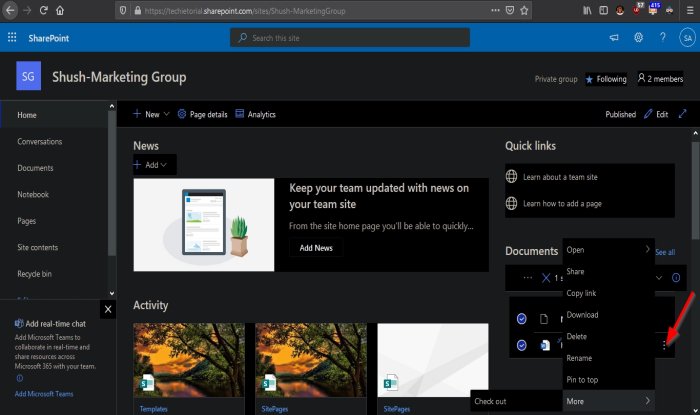
If you click the three dots beside the document, you can Open, Share, Copy Link, Download, Delete, Rename, Pin to Top, and More.
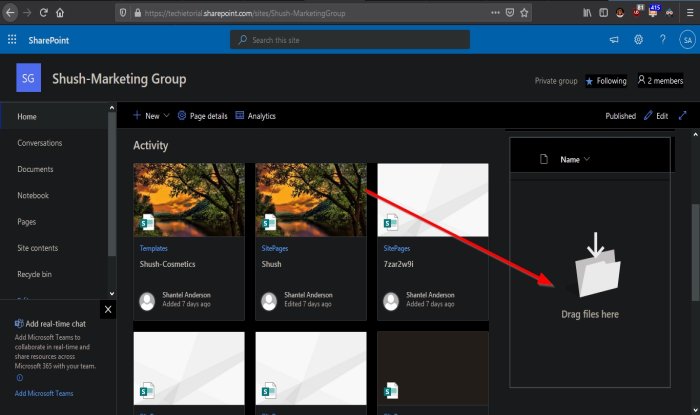
You can even drag a file from your PC files and place it into your Document section, showcasing a folder with the text Drag files here.
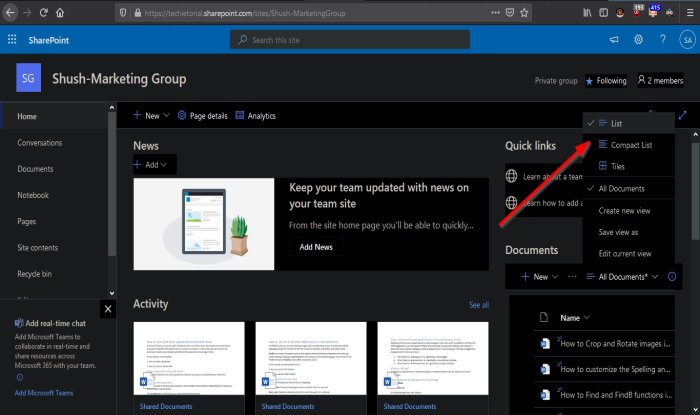
You can organize your files in this method by clicking the All Documents button and selecting how you want it to layouts such as List, Compact List, and Tiles.
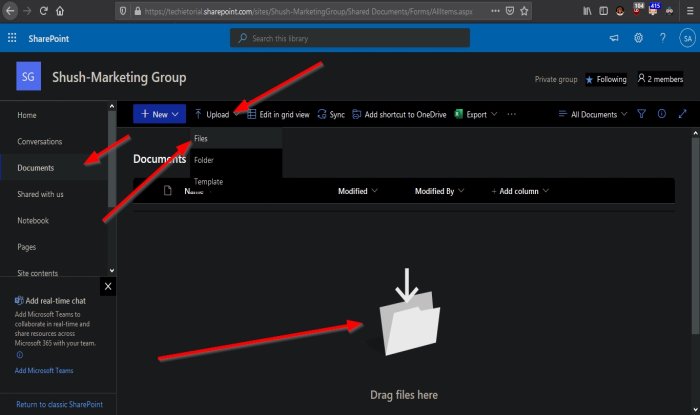
Method two is to on the left pane click the Documents button.
A Document page will open on top of the page; click the Upload button.
A File Upload dialog box will appear.
Inside the dialog box select, a file, then click Open.
In the upload list, you can also open Folders and Templates.
You can also drag files from your PC files and place them into the section with the folder icon with the text Drag file here.
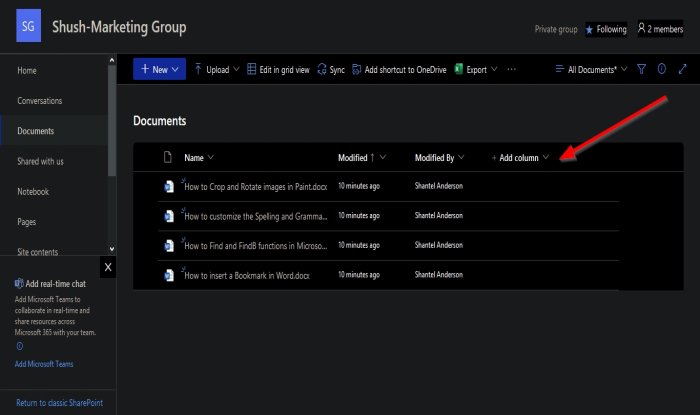
Above the documents uploaded, there are options to organize them.
If you click the Name column drop-down arrow, you will see options to organize them from A-Z or Z-A, the Column Settings to customize the column, and Total if Count is selected. SharePoint will display the total amount of documents in the list.
The Modified column organized the document by clicking the drop-down arrow and selecting options to Older to Newer, Newer to Older, Filter by, Grouped by Modified, Column Settings, and Total.
Modified By is used to organize the person’s name that created the document; it includes Older to Newer, Newer to Older, Filter by, Grouped by Modified, Column Settings, and Total.
You can also add another Column.
How to upload a Document to a SharePoint Communication Site
The Communication site is set differently from a Team site.
There is only one method to upload a document on a Communication Site.

Click the Documents button on top of the default Communication site page.
A document page will open.
Click the Upload button.
A File Upload dialog box will appear.
Inside the dialog box select, a file, then click Open.
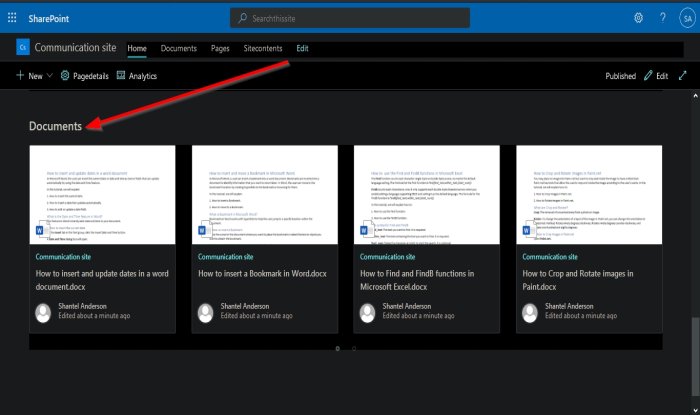
Scroll down to the Document section, and you will see the documents you uploaded.
We hope this tutorial helps you understand how to upload documents to your SharePoint Site.
Read next: How to create a Page for your SharePoint site.
Leave a Reply