If you use YouTube Music, then this post will interest you. In this post, we show you how to upload music to YouTube Music. If you can do this whether you have the Free or the YouTube Premium subscription. You can upload your favorite music to YouTube Music and listen to them on any device, as long as you use the same Google account. Here is how to set things up to get started with this music streaming service.
Recently users had to move from Google Play Music to YouTube Music because of the depreciation of the former service. However, if you are liking the YouTube Music service, you can upload your favorite songs to this service and listen to them on any mobile or computer from being anywhere. Like creating and uploading videos to YouTube, it is also easy to do the same with YouTube Music.
Before getting started with the upload process, you may want to know a few important things-
- You can access your Stored Music Content through your YouTube Music account.
- You can upload Stored Music Content, but all the existing rights will be stored on your behalf.
- You cannot share Stored Music Content with anybody – even if you have a YouTube Family Plan account.
If you are okay with these terms and conditions, you should go ahead and get started with the process.
How to upload music to YouTube Music
To upload music to YouTube Music, follow these steps-
- Open the official website of YouTube Music.
- Click the Sign in to log in to your Google Account.
- Click on your profile picture.
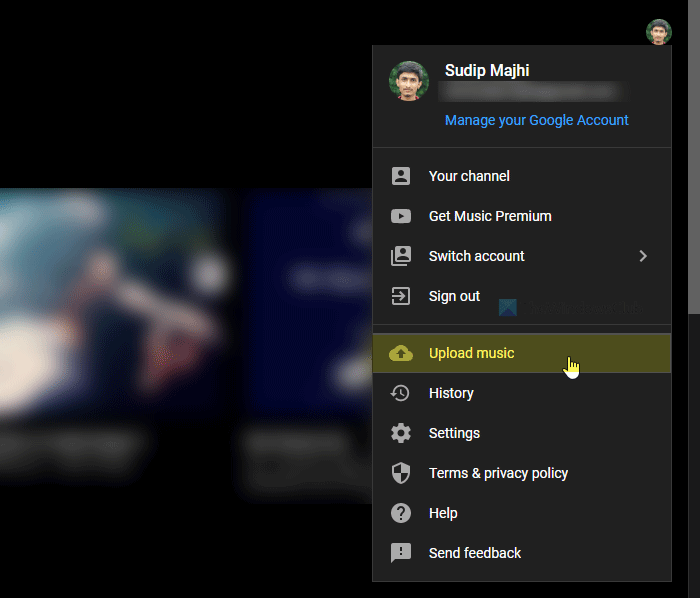
- Select the Upload music option from the list.
- Choose the music from your computer.
- Go to the Library tab.
- Select the Uploads option from the filter list.
- Click on your music to play in the browser.
Let’s delve into the steps in detail so that you can learn the process thoroughly.
First, you need to open YouTube Music’s official website. To do that, open your browser, type music.youtube.com in the address bar, and hit the Enter button.
Now, click the Sign in button and enter your login credentials to sign in to your Google account. It must be the same that you are about to use on all your devices to access uploaded music.
Once you do that, you can see your profile picture on the top-right corner of the screen. Click on your profile picture and select the Upload music option from the list.

Following that, it asks users to accept the terms and conditions. Click on the ACCEPT button to do so.

After doing that, you can find the upload process on your bottom-left corner of the screen. Once it is done, click on the GO TO LIBRARY button.

Alternatively, you can click the Library tab on the top menu bar. From here, you can manage all the uploaded music. To play one, click on the music, and it will start running in the browser window.
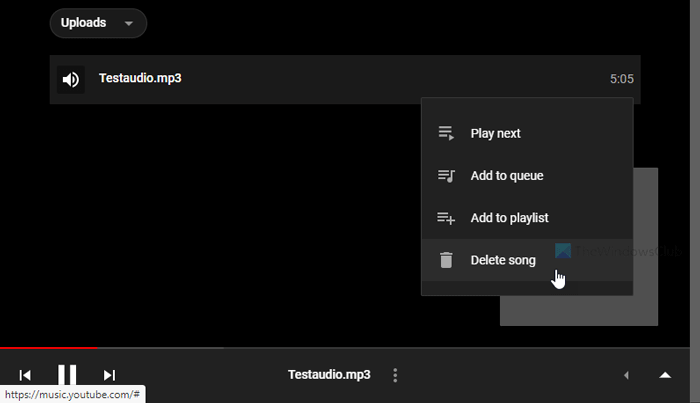
If you have uploaded music by mistake and want to delete it from your uploaded file list, here is how you can do that. To get started, you must visit the Library page and select the music you want to delete. Next, hover your mouse over the music, click on the three-dotted icon, and select the Delete song option on the list.

It shows a confirmation window. Click the affirmative option to remove it from your library.
That’s all!
Leave a Reply