This article will show you how to use Adobe Illustrator using these hidden advanced features. Use them to be at your creative best! Illustrator is among the top vector graphic software that can be found. Illustrator has a vast number of tools to complete just about any task that you might have. If you search hard enough Illustrator will have some tips and tricks that will add excitement and interest to your artwork.
How to use Adobe Illustrator using these hidden advanced features
Illustrator has many hidden features that will make your work easier. There are tips that you never knew were there and you wish you had known before. These are tips and tricks that all serious designers will want to know so that they can save valuable time. We have already seen some Adobe Illustrator Tips and Tricks for Beginners; now let us see some new advanced features in Adobe Illustrator, and how to use them to be at your creative best:
- Multiple Views of the Same Artwork
- Create Grid and Guides Quickly
- Change Default Font
- Delete Overhanging Lines
- Use Precise Cursor (CRTL K then click precise cursor)
- Recolor Artwork
- Rotate Pattern or Shape Independently
- Make Shape Transparent
- Enable or Disable Scaling of Strokes and Effects
- More Swatch Options
1] Multiple Views of the Same Artwork
Sometimes you wish that you could have two views of the one project that you are working on. One view would be the overall view so that you can see what the artwork looks like overall while you work on a close-up of the area that you need to focus on. This would be a live preview of the effect that your edits are having on the overall artwork. Well wish no more, Illustrator allows you to view the same artwork in multiple windows.
I have tried four windows and it has worked. I do not know the maximum number of windows that you can use but this is a cool tip. One window can be a close of the artwork while you are making precise changes and one window can be showing the overall artwork and you can see what the precise changes look like on the overall artwork.
To enable the multiple views, open the project that you want to work on, then go to Windows, then click New Window.
A new window will appear as a tab beside the previous window. You can look closely at the top of each tab, and you will notice some information about each window. You will see the name of the file, there is a number to show the window number (1 would be the first window, 2 the second window) the more windows the more numbers. You will also notice the @ and a number, this is the percent of the zoom of the window. That means @ 300% would mean that the artwork in that window is zoomed at 300%. You will also notice the color mode of the document (RGB or CMYK). You will also notice a little X that is used to close the window.
This information will be available for each new window that you create. Each window can be zoomed in at a different percentage to suit your preferences. You can then work from the main window and watch the changes happen on the other window or windows.

To view each window on the screen, go to Windows then Arrange then Tile. This will arrange all the windows on the screen tiled so that you can view them separately. You can click each window and zoom in or out.
Assuming that your main work window would be the window on the left or window 1. You can click the artwork in the other window and press Ctrl + H to hide the anchor points as you work. Since that window would be for viewing only, hiding the anchor points would help you to see the artwork much better. This is especially good when using the Pen Tool as you can hide the anchor points on the artwork in the viewing window.
2] Create Grids and Guides Quickly
Creating logo designs using grids is a great way to get your logo to align properly and be symmetrical. Grids are also good for making shapes or drawing floor plans. Drawing up the grids for the logo can be time consuming as you have to painstakingly place each line in place an make sure that they are spaced evenly. Well, all that work is in the past with Illustrator. Illustrator makes the grid work so easy with this trick.
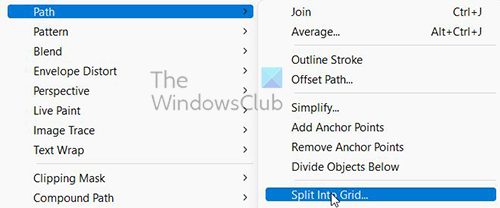
To make the grid open a new document then go to the left panel and get the Rectangle Tool, draw the rectangle on the work area. After drawing the shape go to the menu Bar and press Objects then go to Path then choose Split into Grid.
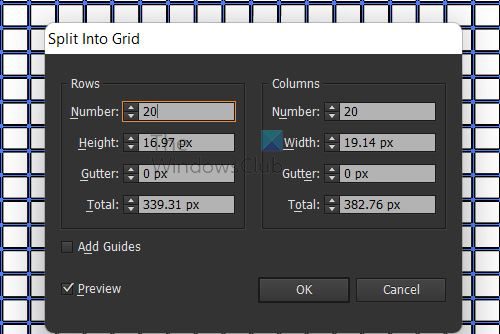
A Split into Grids menu will pop up and you can choose the options you want for the grid. Press the Preview option to show the changes as you make them. Change the Row and the Column Numbers to add the desired number of rows and columns.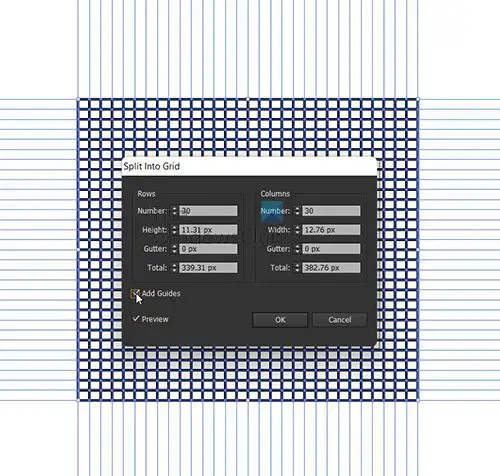
You can click the Add Guides option to show the guides in the grids.
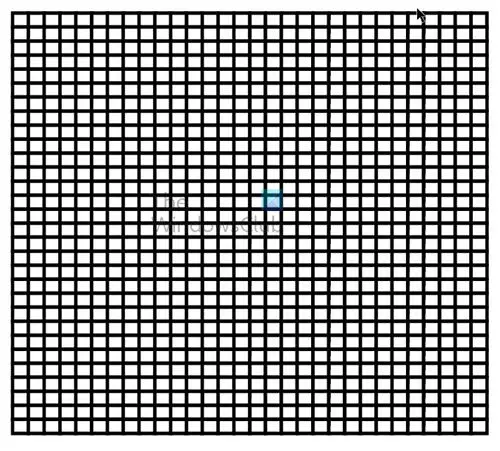 This is the completed grid.
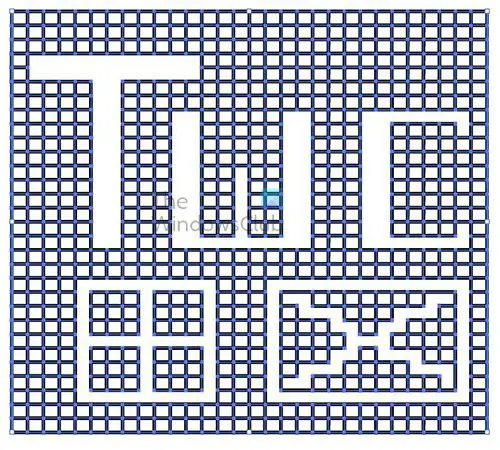
The grid can be used for multiple purposes, things such as cross word puzzles, tables etc. Here is the grid with some artwork and designs.
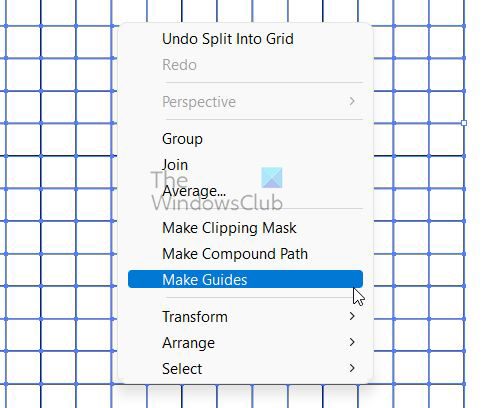
The grid can be then converted into guides that you can use in your designs. To convert the grids to guides select the grid and right-click then select Make Guides.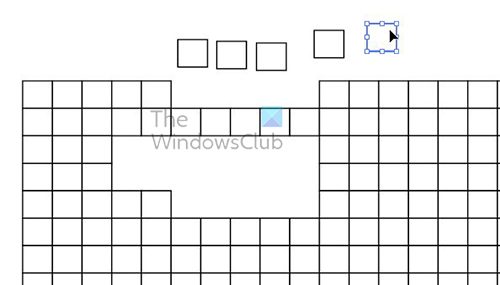
Another trick is the ability to click and drag out the grid or guide pieced. You can also click and delete grid boxes or drag to select multiple then delete.
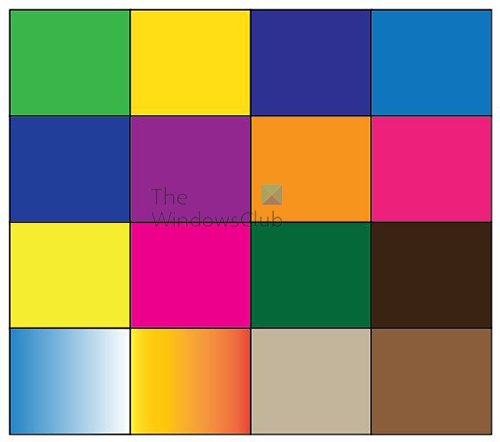
You can also color each of the grid boxes with separate colors. You can do this by making sure that the whole grid has a color. Double-clicking the square to get it into isolation mode then choose a color.
3] Change Default Font
You have so many ways you can customize Illustrator to make it yours if you use it a lot. One thing that you can change in Illustrator to make it feel more comfortable, is the default font. The default font is Myriad Pro, the default font style is Regular, and the default font size is 12.

To change the default character, go to Windows then Type then Character Style.
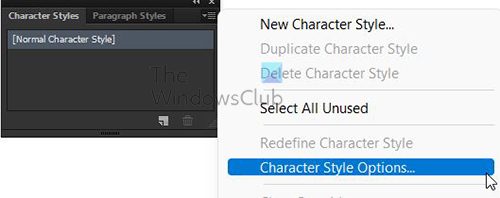 A small window will appear with Character Style and Paragraph Style tabs. Click the Menu Button at the top right and choose Character Style Options.
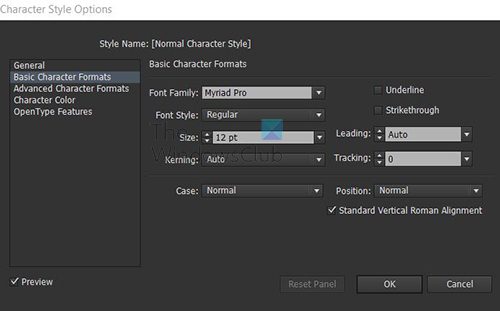
A window will appear with the default character styles. Click Basic Character Formats, here you will see the options that you can change to the ones you want. Here you can choose the Font Family, Font Style, Font Size, The Font Case, and many other options. When you are finished just click on OK and just like that, you have changed the default font and font characteristics.
4] Delete Overhanging Lines
When you are designing and using lines or aligning objects there can be overhanging that can be hard to get right. Well Illustrator thought of a few ways to deal with that. One thing that can be done is to get the design lined up then clip off the excess overhanging.
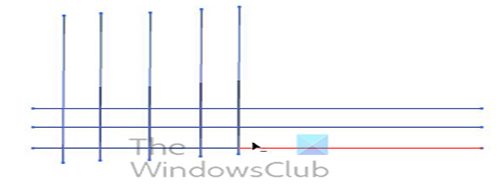 To make this work, select all the artwork, then choose the shape-building tool. While holding Alt hover over the lines that needs to be removed, the parts that will be removed will turn red and the cursor will be an arrow with a minus (-) sign. If you want to delete that part just click with the mouse. No matter how; long or short the overhang is, it can be deleted. Just make sure it is dissected by another line or shape.
5] Use Precise Cursors
Designing can require the fine-tuning of small details, like using the pen tool to get into a small area or using the pencil tool to get to a small spot. The tools themselves can hinder this when they block the view. Thanks to Illustrator again, there is a way to take care of that with the use of Precise Cursors.

To access Precise Cursors, go to Edit or press Ctrl + K then Preferences then General then Check Precise Cursors.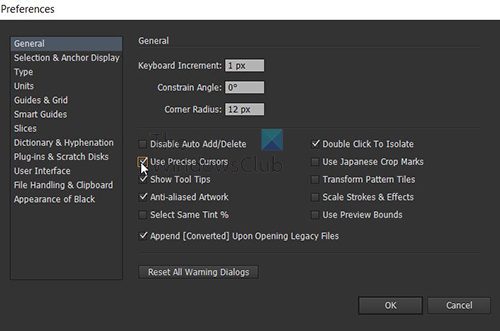
The Preferences Menu will appear you can then press Precise Cursors. The Pen Tool, Brushes and some other tools will become a X. This will make fine tuning much easier as the tool’s icon will be replaced by the X cursor.
6] Recolor Artwork
Ever wondered how you could know how many colors are in an artwork, or how to print a colored artwork with fewer colors? Well, you guessed it, Illustrator has a solution for that. It is called Recolor Artwork and it can be used to show the number of colors in an artwork and print with less colors.

Select the artwork, go to Edit then Edit Colors then Recolor Artwork.
Change the options in the Color box and watch the artwork change. All will show all the colors in the artwork.
This is the original artwork with all the colors.
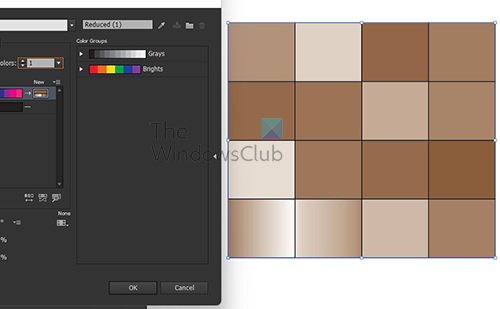
Artwork with one color selected.
The cool thing about this is that you can drag colors and place on other colors and the colors will mix in the artwork. You can drag the color lines and rearrange them, and they will be rearranged on the artwork.
7] Rotate Pattern or Shape Independently
Illustrator allows you to create your own pattern and save it in the swatch. There are also default patterns available that can be used in your artwork. This tip will show you how to rotate the pattern or the shape independently. You may have a pattern, but you want to turn it differently in the shape so that it matches your design idea.
Place the pattern in the shape of your choice select the shape then go to Object then Transform then go to Rotate.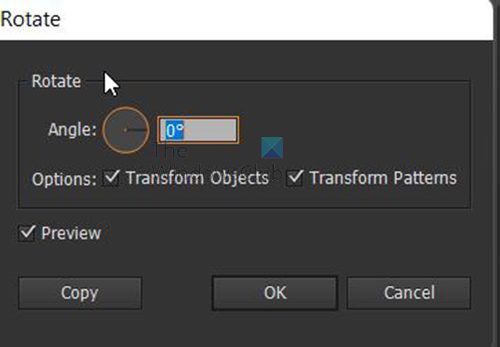
The Rotate option window will appear. Click Preview so that you can see the object or pattern rotate. You can use the little wheel to rotate. If you want the pattern to rotate only then check Transform Patterns if you want the object to rotate only then make sure only Transform Objects is checked. To rotate both, make sure both Transform Objects and Transform Patterns are checked. The rotate will still work after you close the rotate options.
8] See Through Shape
Illustrator has so many great tips and ways to make your artwork more interesting. This next tip or a trick if you want to call it that will show you how to make one shape cause another shape to look transparent. Normally when you use the Minus Front tool on two or more shapes, it makes the shape on top cut out from the shape at the bottom. This can create new shapes for your artwork.
This tip will show you how to use the minus front tool and keep both shapes separate. Whenever the top shape moves it causes the bottom shape to look transparent because you can see the background behind the bottom shape through the top shape even if you move the top shape, it shows wherever the top shape is.
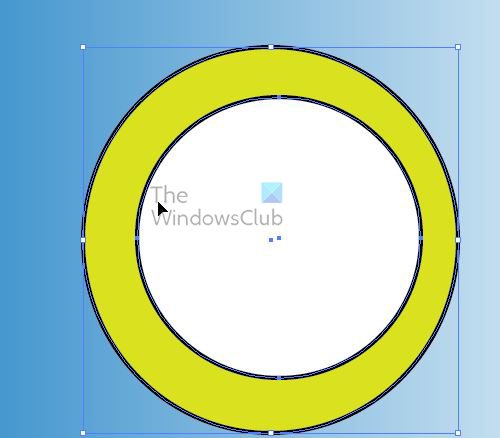
To create this effect, take two shapes and place one on another, making the top shape smaller. Give both shapes two different fill colors.
Select both shapes and go to the Transform window. Hold Alt while clicking the Minus Front option.

Notice how the top shape becomes a hole that shows through the bottom shape. To move the top shape just double-click it to go into Isolation Mode then you can drag it anywhere. Notice how the transparent hole moves as the top shape moves. If the two shapes you used were circles, you can make a crescent moon with the shapes by placing the top shape at the edge of the bottom shape. You can also add some effects to the background.
9] Enable or Disable Scaling of Strokes and Effects
When you create artwork and you want to get it to be exactly as you want, all the lines, strokes and effects are just right. What can throw it all off is when it gets distorted or out of shape when you attempt to scale the artwork up or down. Strokes and effects may start to look different than what they were when they were originally created. This happens because the artwork is shrunk or enlarged, and the strokes and effects can start getting fat. You can enable or disable the scaling to fix this situation.

To enable or disable scaling go to Edit, Preference then Click General or Press Ctrl + K.
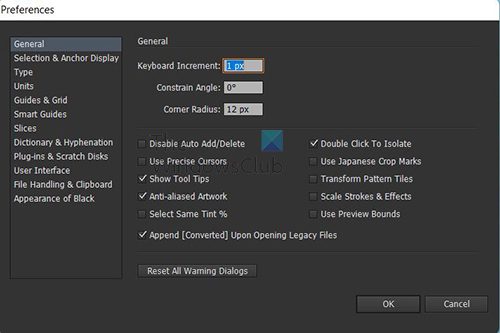
Look for Scale Stroke and Effects. Check or uncheck if you want to turn on or turn off the Scaling of stroke and effects.
10] More Pattern and Color Options
Illustrator has a lot of things hidden away in pop-out menus. Illustrator uses the pop-out menus to save space and keep the workspace from looking too crowded. Two amazing things that are hidden in pop-out menus are Pattern and Swatch Colors. These patterns and swatch colors may be just what you are looking for. Some of the colors fall under categories such as Nature, Metal, Kids Stuff, and food just to name a few. The Patterns fall under categories such as Nature, Basic Graphics and Decorative.
To access these patterns or Swatch colors go to the Swatch Windows and press the menu button on the top right. A menu will appear, Click Open Swatch Library. You will see a lot of colors and patterns to choose from.
When you pick one of these categories, a new Swatch color or Pattern window will appear. You can add this new window to the panel on the left or use and then delete.
Read: Powerful reasons to learn Illustrator for Business or Personal use
Why are these Illustrator Features & Tips hidden?
Tips and tricks may not be deliberately hidden, they can be there, but they are just applicable because of the properties of some tools. For example, they are tools’ natural processes when combined. That means there may be even more tips and tricks to be discovered.
Also, it is hard to learn everything all at once, so people usually learn what is immediately essential then by exploring and researching they find new ways to get things done. Some persons may know one method, and a new one may seem hidden to them.
Why is it important to learn these Illustrator Features?
Learning these tips and tricks can enhance your design skills. These tips and tricks can also help you work faster. For example, you can build grids at lightning speed with the new trick in this article. Printing in fewer colors from Illustrator is now so much easier with the Recolor Artwork tip.
Leave a Reply