Photo correction and photo manipulation will at some point include straightening, cropping, and filling. Cropping means removing parts of the image and filling includes adding content to parts that would be empty. Straightening is when you try to get the image straight. Content-aware is where Photoshop removes or adds content but takes into consideration what is present. Thus learning how to use content-aware crop and fill in Photoshop is important.

Content-aware is very interesting and useful in Photoshop. Content-aware takes into consideration the pixels around the content that you are removing or adding. It then tries to match the pixels as closely as possible. Whenever you straighten an image, there is a chance that parts will be clipped off when the image is rotated. You may lose parts of the image that you want. This is where Content-aware fill will come in to fill those parts. You can use this feature to add more to an image, for example, you can add more sky, grass, sand, or other elements to an image. Sometimes the changes are barely noticeable in images that do not have a lot of details in the area it was applied.
How to use Content-aware Crop and Fill in Photoshop
Follow along and learn how to crop images and save important elements with Photoshop Content-aware Crop and Fill.
- Open and prepare Photoshop
- Place the image into Photoshop
- Straighten the image
- Use Content-aware
- Adding more content to the image
1] Open and prepare Photoshop
The first step is to open and prepare Photoshop. Find the Photoshop icon and double-click it to open Photoshop. You would then go to the top menu bar and click File then New or press Ctrl + N. The New document window will open for you to pick the options that you want for the document. When you have chosen the options that you want, click Ok. You will see the blank canvas created for you to work on. Note that you will not have to necessary open Photoshop this way, you could go straight to the following step.
2] Place the image into Photoshop
You can get the image into Photoshop by finding the image, right-clicking on it, choose Open with, Adobe Photoshop (version). The image will then be opened in Photoshop. Depending on the image’s file type, the image will open as a Background layer or just a regular layer. In the next step, you will see how the Content-aware crop and fill are used.

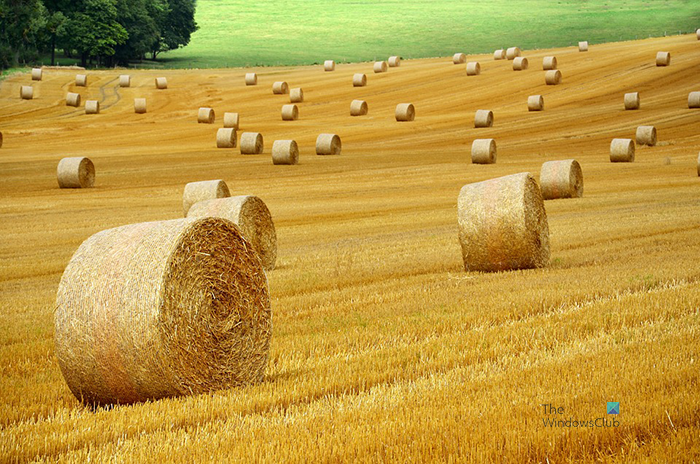
This is the image that will be used.
3] Straighten the image
The Content-aware crop and fill come in very handy in cases where you must straighten a crooked image. Whenever you straighten an image in Photoshop, parts may get clipped off. You may lose valuable elements of the image. Photoshop will prioritize straightening over the content in the image. Keep reading and you will learn how to take care of this issue. This article (https://www.thewindowsclub.com/how-to-use-the-straighten-tool-in-photoshop) will show you how to straighten images in Photoshop.

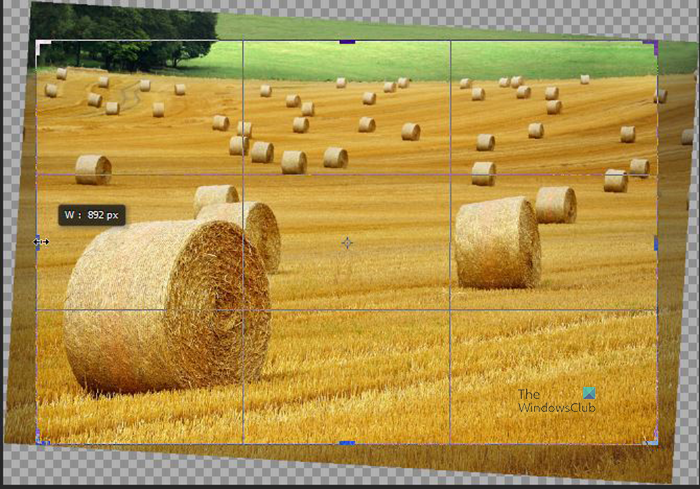
This is the image with the crop grid around it after the Straighten tool has been applied. You can see the mark where the image will be cropped. You will notice that some areas will be cropped off the image. that may be ok for you. However, if you have important objects in that part of the image, or if you just don’t want to lose anything you will need to do one thing.

This is the cropped image, you will notice that there are fewer hay bales in the cropped image.
4] Use Content-aware
![]()
When you selected the Crop tool, the Crop menu bar would have appeared on the top menu bar. Depending on the version of Photoshop you are using, you will see the Content-aware option beside the Delete cropped pixels option. You should select the Content-aware option before cropping the image.
When you perform the crop option, you can click and drag the crop handles to reveal the parts of the image that will be cut off. Drag the crop handles as far back as to uncover more of the parts that you want to keep. When you are satisfied that you have all that you want to keep, press Enter or the Tick on the top menu bar. Photoshop will then keep those parts of the image inside the crop lines. Photoshop will also fill in any of the blank parts that were created when the image was rotated. Remember that the image will be rotated to fit a straight line, this will create parts with blank pixels. the Content-aware option will fill the blank spots with content from the image to match the pixels in that area.
5] Adding more content to the image
You may want to add more content to an image. You may want to add more sky or more grass or any other content in an image. You may want to add more background around the subject of the image.
![]()
You would select the image, click the Crop tool, and when the crop menu bar appears, select the Content-aware option. The content aware option is beside the Delete cropped pixels. Note that the Content-aware option is available in newer versions of Photoshop.
You will then drag any of the handles in the direction that you want more content to appear on the image. When you are satisfied with the space, press Enter or press the Tick on the top menu bar. You will see Photoshop fill in the spot that was previously blank with content from that part of the image.
Limitations
When you add more content using the Content-aware fill, Photoshop will add more content to the image. This will be achieved by filling the blank space based on the pixels of the image close to that area. The limitations of this method are that some images with distinct features will have those features starting to show as you increase the content of the image. In cases where there are not too many flaws, you can correct them. You can use other tools, effects, and color modes along with the Content-aware crop and fill to correct them. If you have to use other tools and effects to fix these flaws that show up, it may take too much to correct. The image may also start to look unrealistic or flawed.
It is good to note that if you are making the image smaller, the image will become distorted if it is made too small.
Read: How to place Transparent Text on Image in Photoshop
What does the Content-aware fill tool do in Photoshop?
Content-aware fill is a feature in Photoshop that can be used to remove content from images and fill the space. This feature allows you to move or remove objects in Photoshop. Photoshop will then fill the space with pixels that are samples from the surrounding pixels. This means that Photoshop will try as best to sample the pixels in that area so that the new pixels will look like the ones close to it.
What does Content-aware scale do in Photoshop?
The Content-aware scale allows you to resize an image without stretching or distorting its subject.
To use Content-aware scale select the subject of your image with any of the selection tools. When the image is selected, right-click on the subject and choose Save selection. You will be prompted to give the selection a name. you would then go to the top menu bar and to Edit then Content-aware scale.
The Transform box will appear around the image and the Content-aware menu bar will appear. Click the word None at Protect and a drop-down menu will appear, click on the name you gave the selection you had saved. You can now use the transform handles to resize the image. You will notice that the subject will not stretch or distort as you resize.
Note that if your subject is very distinct from the background, you can just go to edit then Content-aware scale. Photoshop will automatically pick up the subject of the image and scale the image without distorting the subject.
Photoshop Content-aware Crop missing
Content-aware crop allows you to choose the option to crop the image without losing valuable elements when the image is clipped. When you select the Crop tool you will see the crop toolbar appear at the top. You will see the Content-aware crop option on the toolbar. The Content-aware crop can be missing from your version of Photoshop if you are using an older version than Photoshop CC. if this is the case then you would need to upgrade your version of Photoshop.
Photoshop Content-aware Crop not working
If Photoshop Content-aware crop is available on the Crop toolbar at the top but it is grayed out, you can troubleshoot to see why. Below are some reasons why it may not work.
- Content-aware crop options can be missing if you are in Classic mode. Click the gear icon on the crop menu bar, when the drop-down menu appears, unselect Classic mode.
- The content-aware crop option can be available but grayed out if you are trying to crop a smart object. If the image is a smart object, you can change it to being editable by right-clicking on it in the layers panel and clicking Rasterize layer. This will make the image’s pixels editable and the content-aware crop should work.
- If the content-aware option is grayed out, check to make sure that you have the correct layer selected.
- The content-aware option can be grayed out if the image layer is locked. You will know if the layer is locked if you see a padlock icon on it in the layers panel. To unlock the layer you can double-click on it, or right-click on it and choose Layer from the background. You will see a New layer options window appear, you can name the layer or just press ok. The layer will be unlocked and can be edited. You can also choose to make a copy of the layer by clicking it and pressing Ctrl + J. You would then crop the copy and leave the original intact.