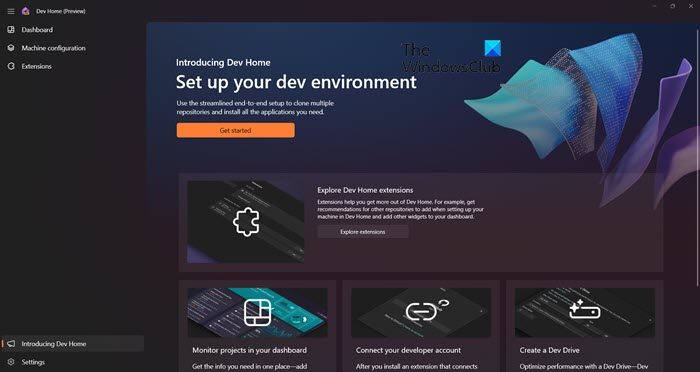
In Windows 11, Microsoft introduced a new feature called Dev Home. This software can be used by developers, where they can access tools and resources and build up their app development process to be more efficient. Developers can configure developer mode on their computer through Dev Home, where they can access deployment settings and debugging options. In this post, we will learn how you can use Dev Home in Windows 11.

What is Dev Home in Windows 11?
Dev Home is a Windows application allowing developers to set up the virtual work environment they need to streamline their workflow. You can set up a new repository or clone one, add applications to your setup, or install new widgets. To know more, check out the guide mentioned hereinafter.
Read: What is Microsoft Dev Box and how to sign up for it?
Setup and Use Dev Home in Windows 11
With the introduction of Dev Home, Developers can simplify their workflow. It offers you a brand new control center that allows you to set up their personalized development environment, install necessary packages, clone repositories from GitHub, monitor projects from a customized dashboard, and even create a separate file system known as the Dev Drive. With Dev Home, developers can focus on what matters most and save time on unnecessary tasks.
It is pretty simple to set up Dev Home. It is available after the latest update of Windows 11 and can be downloaded from the Microsoft Store. To do the same, search “Dev Home” from the MS Store or go to microsoft.com to download it. We will learn about the following:
- Set up a new project using Dev Home
- Add Widgets from the Dashboard
- Clone Repositories
- Install Applications
- Add a Dev Drive
- Configure Dev Home
Let us talk about them in detail.
Set up a new project using Dev Home

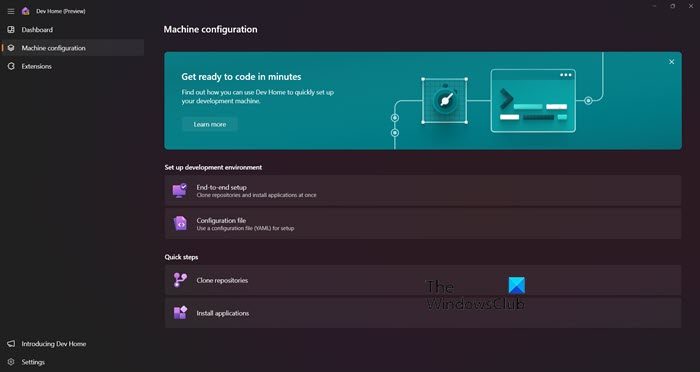
Dev Home allows you to set up a new project. You can just go to the Machine Configuration tab. Once you go there, you will see two options, one allowing you to set up straight from the configuration file, whereas the other allows you to do manual setup, called End-to-end setup. There is nothing to explain about the former. However, the latter gives you great flexibility, allowing you to install applications and add tools required to get this project started.
Add Widgets from the Dashboard
The Dashboard tab allows you to add widgets as per your needs. In Dev Home, go to the Dashboard and then click on Add new widgets. There, you will see various widgets classified by their category – GPU, SSH Keychain, Memory, Network, and CPU. When click on the Pin button, the widget will be added to the dashboard so that, you can easily access them whenever required.
Clone Repositories

With the help of Dev Home, you can easily obtain copies of repositories onto your computer by either entering a URL or linking your GitHub account and selecting from the available repositories using the Clone repositories from the Machine Configuration tab. Once you go to Machine configuration > Clone repositories, click on +Add repository. You can enter the URL or browse the file and click on Add. After adding the repository, click on Next to complete the setup.
Read: Dev Home updating is stuck at 90%
Install Applications

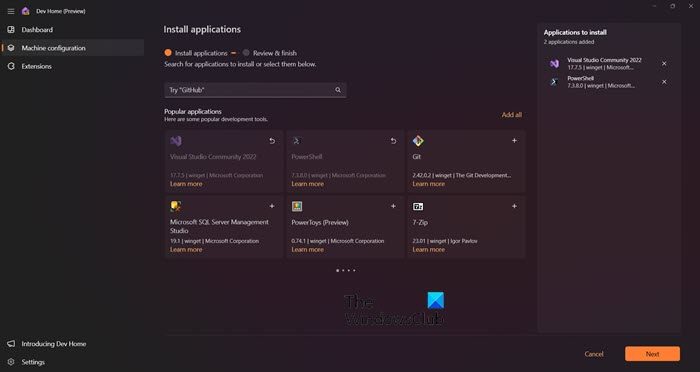
You can install any application from Machine Configuration > Install Applications required in your project. To do the same, just go to the mentioned page, then search for applications you would like to install and click on the add (+) button to select them. You can install useful applications such as MSQL Server Management, Visual Studio, PowerShell, Git, and more. Once you have selected all the required applications, click on Next > Set up. This will do the job for you.
Add a Dev Drive
You might see the Add a Dev Drive option (or might not), it’s just a link to the Disk & volume section from Windows Settings. If can’t see the option navigate to Settings > System > Storage > Advanced storage settings > Disks & volumes. If you want to know more, read our guide to set up a Dev Drive on Windows 11 for Developers.
Read: Enable or Disable Dev Drive Protection in Windows 11?
Configure Dev Home
Now that you know how things work, let us see Configure Dev Home. You can click on the Settings button to start configuring. Once you go there, you will see the following options.
- Preferences: This page allows you to change the theme of the app to Light, Dark, or Windows Default.
- Accounts: You can your GitHub account from the panel by clicking on the Add account button.
- Extension: If you want to view or delete any extension, go to this page.
- About: To know the version of the app or the source code, navigate to About.
- Feedback: The Feedback page allows you to report a bug based on the issue you are having.
Dev Home is a great tool for a developer as it is a one-stop shop for all your development needs. We hope you understand how to configure Dev Home.
Read: How to set Dev Drive as Trusted or Untrusted on Windows 11?
How to uninstall Dev Home in Windows 11?
Dev Home is only designed for developers they can use these features for app development and testing. It is not a feature that all Windows 11 users will use. You can uninstall Dev Home to minimize system clutter. Furthermore, uninstalling useless applications can enhance system speed and free up valuable disk space.
If you are trying to uninstall the app from the Settings > Apps > Installed app option, you will notice that the Uninstall option is grayed out. It means that you can not uninstall this app from the Settings app. This does not mean you can not remove this app from your computer, we will mention an alternative option below that is from PowerShell. Follow the steps mentioned below to do the same.
- Press the Windows key to open the Search option.
- Type Windows PowerShell in the Search bar, right-click, and select Run as administrator when it appears.
- When the UAC dialog box comes, click on the Yes button to continue.
- Once the Windows PowerShell window comes, paste this command in the PowerShell prompt and press the Enter button.
Get-AppxPackage *Microsoft.Windows.devhome* | Remove-AppxPackage
- You will have to wait a bit as this uninstallation process takes some time.
This will do the job for you. If you ever need Dev Home again, do it from the Microsoft Store.
Read: Best Discord Servers for Programmers to join
Is Dev Home free?
Yes, Dev Home is free for Windows users. If you have the latest version of Windows 11, you can install Dev Home from the Microsoft Store. And if you are a developer, you must download and use this tool.
Read Next: Best Free C++ IDE for Windows 11.
What is DevHome.PI.exe in Task Manager?
DevHome.PI.exe is a Microsoft process that is part of the DevHome component. It provides access to software development kits and is not malware or a virus. If in doubt, check its File properties and location.
Leave a Reply