The Draw tab in Office allows users to make drawings in documents or slides. The Draw tab in PowerPoint allows you to make sketches with pen, pencil, and highlighters; it also has features to convert shapes, text, and math numbers and symbols to ink; it has features such as the Ruler and Lasso Select. The Draw Tab is available in Microsoft Word, OneNote, and PowerPoint.
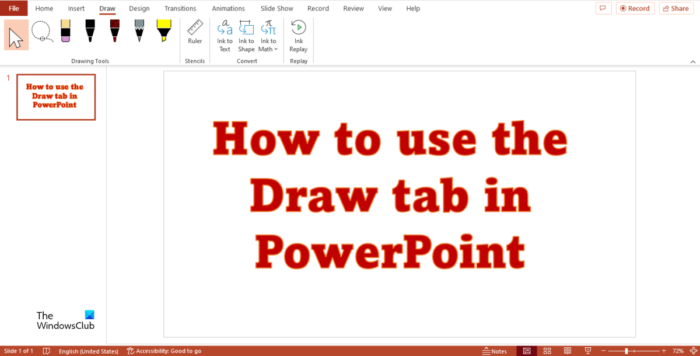
How to use the Draw tab in PowerPoint
This post will show you the different ways you can use the Draw tab in PowerPoint:
- Using the Select Tool in PowerPoint
- Using Lasso Select
- Using the Pen, Pencil, Highlighter and Eraser.
- Using the Ruler
- Using the Ink to Text feature.
- Using the Ink to Shape feature.
- Using the Ink to Math feature.
- Using Ink Replay
1] Using the Select Tool in PowerPoint
The Select tool is used to select objects’ ink, shapes, and text areas.
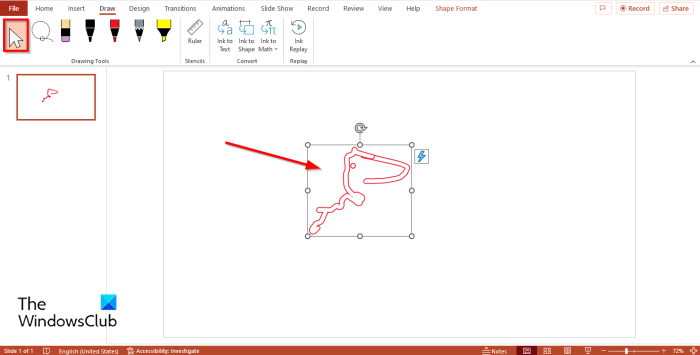
To use the Select tool, click the Select button in the Drawing Tools group on the Draw tab and select the Ink on the slide.
Now your cam moves the ink all over the slide.
2] Using Lasso Select
The Lasso Select feature selects ink by drawing a shape around the Image. The Lasso Effect can be used to separate a drawing from each other.
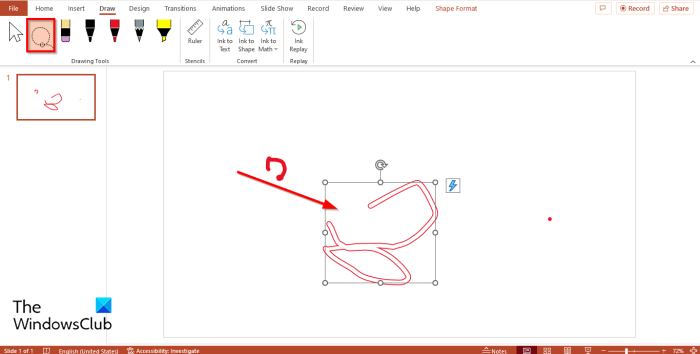
Draw an image into the slide using a Pen, Highlighter, or Pencil.
Then click the Lasso Select button and draw it over the ink that you want to separate from the drawing, and then pull the ink away.
3] Using the Pen, Pencil, Highlighter and Eraser
On the Draw tab, the Pen, Pencil, and Highlighters assist users to make drawings on the slide. The Eraser removes ink from the slide.
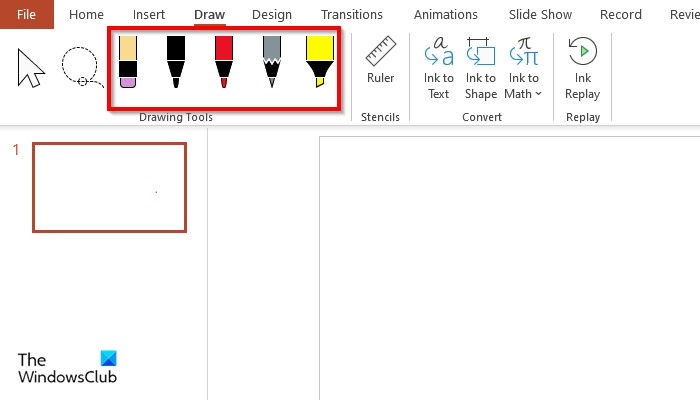
- Pen: Click the Pen button in the Drawing Tools group, select a color and draw on the slide. In the drop-down menu, you can set the thickness of the pen and if you want more options for colors, click More colors.
- Pencil: Click the Pencil button in the Drawing Tools group, select a color and draw on the slide. In the menu, you can set the color and thickness of the pencil.
- Highlighter: Click the Highlighter button in the Drawing Tools group, select a color and draw on the slide.
- Eraser: Click the Eraser button in the Drawing Tools group, select an eraser and erase the ink that you want to remove from the slide. You have 3 types of erasers, namely: Stroke Eraser, Point Eraser, and Segment Eraser.
4] Using the Ruler
The Ruler feature draws lines and aligns objects against a straightedge.
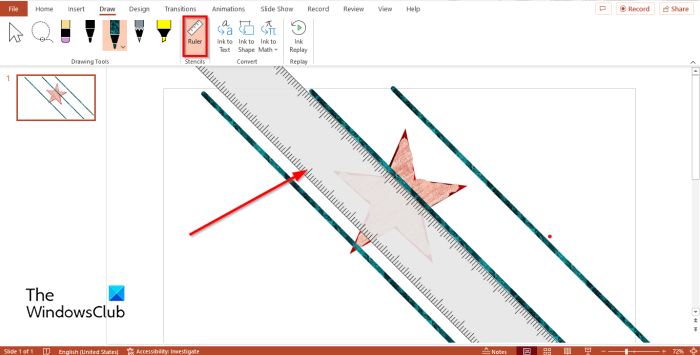
Click the Ruler button in the stencils group.
You will see a large ruler on the slide.
You can use the ruler to draw lines or align your objects.
To turn off the Ruler, click the Ruler button again.
5] Using the Ink to Text feature
The Ink to Text feature converts Ink to Text.
Draw a text in your slide.
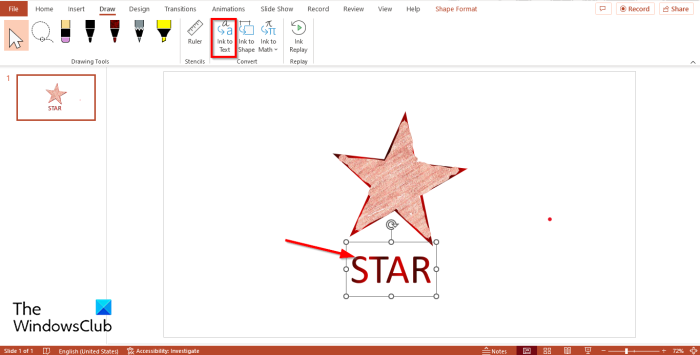
Then click the Lasso Select button and draw around the ink text.
Then click the Ink to Text button in the Convert group.
The ink text is converted into text.
6] Using the Ink to Shape feature
The Ink to Shape feature converts Ink to Shape.
Draw a shape with ink into the slide.
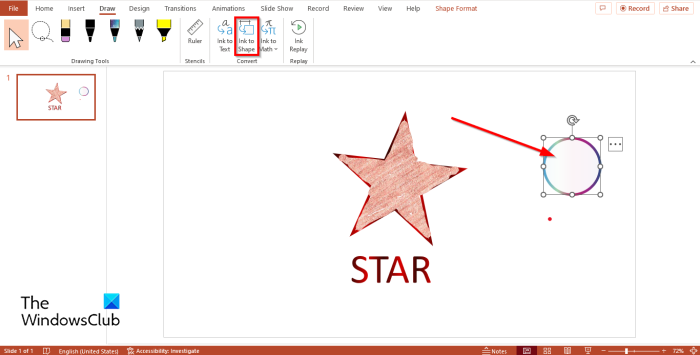
Click the Select button and click the Ink shape.
Then click the Ink to Shape button in the Convert group.
The ink shape is converted to a shape.
7] Using the Ink to Math feature
Ink to Math feature converts the handwritten mathematical expression to text.
Draw the mathematical expression in the slide.
Click the Select button and click on the expression.
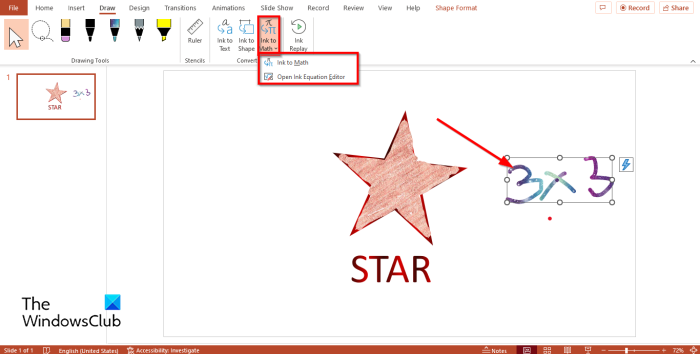
Then click the Ink to Math button, and you will see two options: Ink to Math or Open Ink Equation Editor.
Select Ink to Math, and the Ink will be converted.
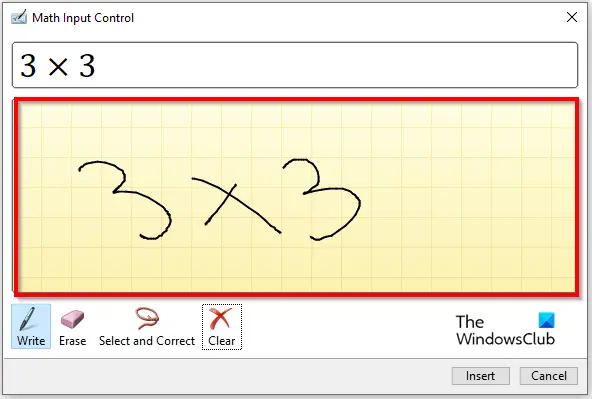
If you select the Open Ink Equation Editor option, a Math Input Control dialog box will open.
Draw the Math expression on the graph in the dialog box.
You will see the outcome in the box above.
Now click Insert.
The Expression is inserted into the slide
8] Using Ink Replay
Ink Replay automatically replays the creation of visible ink strokes.
Click the Ink Replay button in the Replay group.
Is there a Draw option in PowerPoint?
Yes, there is a Draw tab in PowerPoint that provides commands that lets you draw on your slide with digital ink; you can also use a digital eraser to erase your ink. The Draw tab is located on the menu bar.
How do I turn on or add the Draw tab in PowerPoint?
- If the Draw tab is disabled, to turn it on, click File.
- Then click Options in the backstage view.
- A PowerPoint Options dialog box will open.
- Click the Customize the Ribbon tab on the left of the dialog box.
- Now check the check box for Draw, then click OK.
How do you draw in PowerPoint 2016?
In PowerPoint 2016, the draw tab is missing from the menu bar, so you must go to the Customize the Ribbon settings to enable it.
Once it is enabled and you click on the Draw tab, you will see features such as Pen, Eraser, an option to change the color and width of the Ink, Lasso Select, Ink to Shape, Ink to Math, and Ink Replay.
READ: How to add or remove Border from Text Box in PowerPoint
How do you get out of Draw mode in PowerPoint?
If you are drawing on your slide using a Pen, Pencil, or Highlighter, but then you want to stop using the Pen, Pencil, or Highlighter. Press the Esc button on the keyboard to stop using the pen to draw on the slide.
How do you draw in Microsoft Office?
In Microsoft Office, to draw, you must use the Draw tab. The Draw tab is available in Microsoft PowerPoint, OneNote, and Word. These are some of the Draw features they contain:
- PowerPoint: Select, Lasso Select, Eraser, Pencil, Pens, Highlighters, Ruler, Ink to Text, Ink to Shape, Ink to Math, and Ink to Replay.
- Word: Select, Lasso Select, Pencil, Eraser, Pens, Action Pen, Ink to Shape, Ink to Math, Drawing Canvas, and Ink Replay.
- OneNote: Select Objects or type text, Lasso Select, Insert or Remove Extra Space, Eraser, Pens, Highlighters, Pencil, Shapes, Ink to Shape, Ink to text, and Math.
READ: How to create a Spinning Wheel animation in PowerPoint
We hope you understand how to use the Draw tab in PowerPoint.
Leave a Reply