If you want to use Event Viewer in Windows 11 to diagnose a crash or troubleshoot problems effectively, this detailed guide will help you understand every part of the Event Viewer so that you can get started with this in-built utility on your Windows 11/10 computer.
How to open Windows Event Viewer?
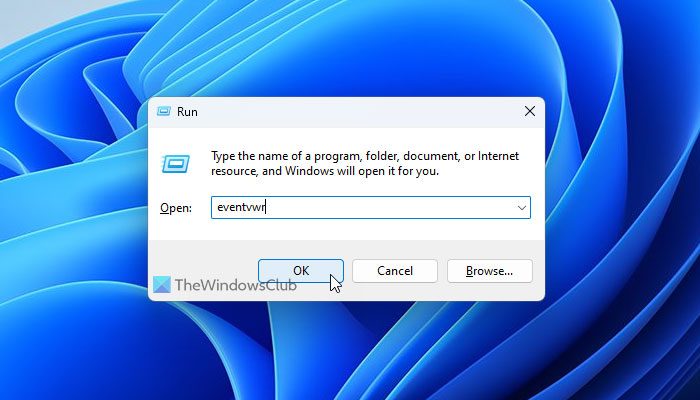
Although there are several ways to open the Event Viewer in Windows 11, you can use the Taskbar search box, Start Menu, or Run prompt to open it on your computer. Follow these steps to open the Event Viewer using the Taskbar search box:
- Click on the Taskbar search box and search for “event viewer”.
- Click on the individual search result.
Follow these steps to open the Event Viewer using the Run prompt:
- Press Win+R to open the Run prompt.
- Type eventvwr and hit the Enter button.
How to use Event Viewer in Windows 11
We will now take a look at the various features of Windows Event Viewer and how to use them.
Event Viewer sections and definitions
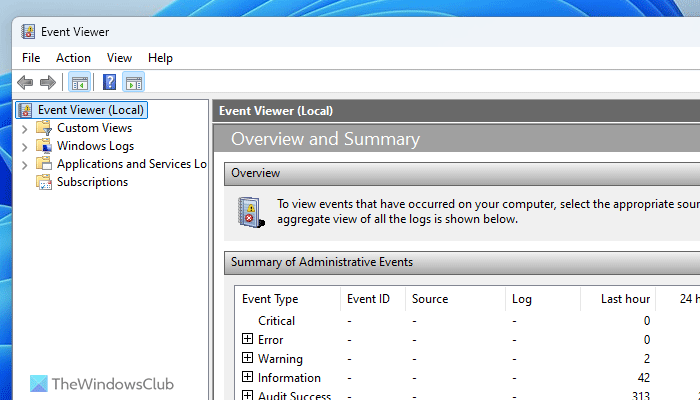
There are four different sections of Event Viewer and they are:
- Custom Views
- Windows Logs
- Applications and Services Logs
- Subscriptions
Custom Views: The Custom Views panel allows you to create custom views with different filters. For example, if you want to see only the error logs, you can create a custom view in this section.
Windows Logs: This is one of the most important sections that you should understand if you want to troubleshoot various problems with Event Viewer.
You can find five sub-sections: Application, Security, Setup, System, and Forwarded Events. You need to learn more about the Application and System sections of these five. The System section is intended for logs related to the core system. Windows Update, restart, shutdown, etc.: you can find almost everything. On the other hand, the Application panel displays information about your apps.
Applications and Services Logs: This section houses many options, such as Hardware Events, Key Management Service, OpenSSH, and Windows PowerShell. It is the best place to get information about these utilities.
Subscriptions: Let’s assume you want to see information about a specific type of errors in a specific application. You can create a subscription according to your requirements.
Read: How to create Custom Views in Event Viewer
Event Viewer levels and definitions
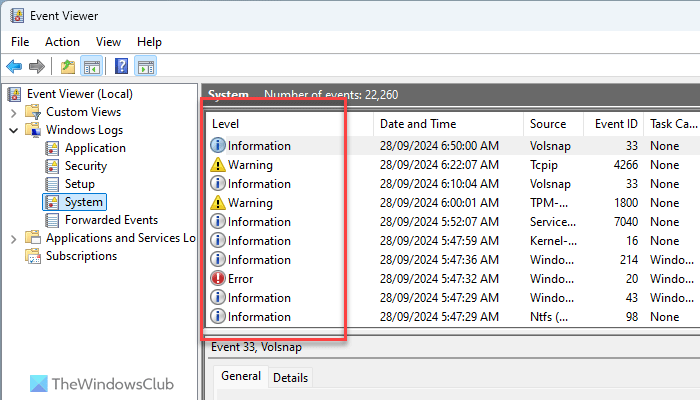
There are four main levels that Event Viewer displays at various times: Critical Error, Error, Warning, and Information. Apart from that, you can find another level called Verbose. These levels indicate the kind of data. For example, if there is a Windows Update-related error, you can find the log as Error. On the other hand, if you have restarted your computer, you can find it as Information.
The levels can be found when you open different sub-sections. For example, if you open Windows Logs > System, the levels are on the right-hand side.
Read: How to enable Print Logging in Event Viewer
Add or remove columns of details in Event Viewer
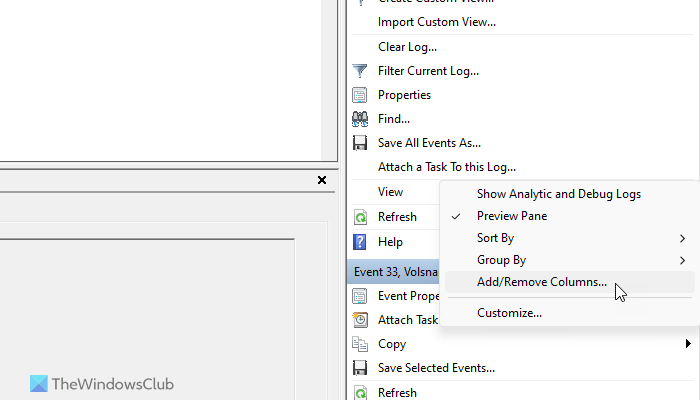
By default, Event Viewer displays a few columns such as Level, Date and Time, Source, Event ID, etc. However, if you want to find more information about a log, you should add more columns of data. To add or remove columns in Event Viewer, follow these steps:
- Open the Event Viewer on your computer.
- Navigate to a path.
- Click on the View button on the right-hand side.
- Select the Add/Remove Columns option.
- Choose a column you want to display and click the Add button.
- On the other side, choose a column and click the Remove button.
- Click the OK button to save the change.
Read: How to check the Shutdown and Startup Log in Event Viewer
Use Event Viewer to filter and find details of any log
It is one of the most important things you can do using Event Viewer. It is possible to find every possible detail of any logged item. First, open the Event Viewer and navigate to a path. For this example, we are selecting Windows Logs > System.
Here, you can find the window that displays all the logs. Click on any log to go to the General/Details panel.
You can find the date/time, the involved app, and more information. However, to filter the data, you need to click on the Filter Current Log option visible on the right-hand side.
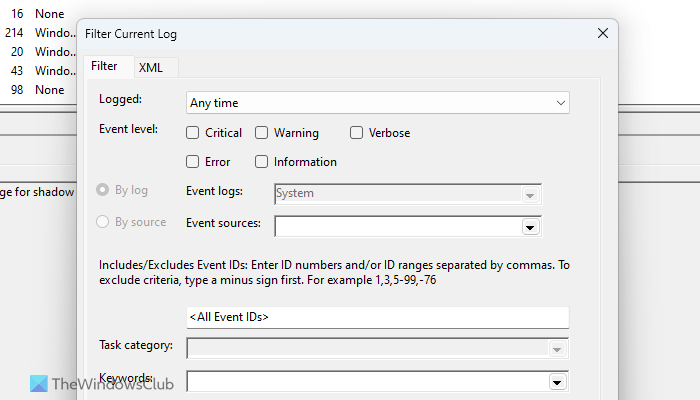
After that, you can choose the time, Event level, event ID,
Category, keyword, user, etc. If you use a networked computer, you can also choose the computer.
Once you click the OK button, your data will be filtered immediately. For your information, you can apply the same filters in multiple sections.
Read: Use Event Viewer to check unauthorized use of Windows computer
How to copy log details in Event Viewer?
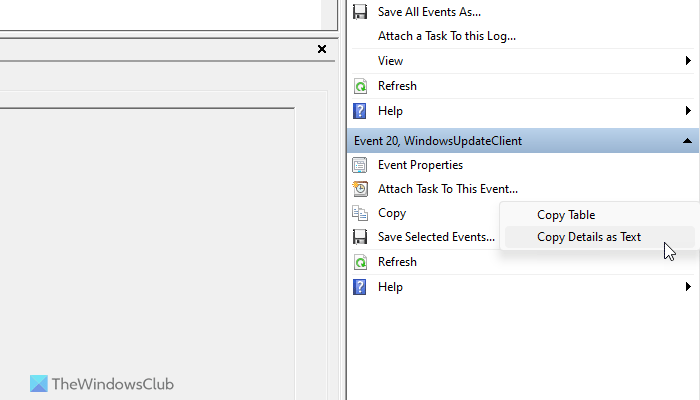
To copy log details to the clipboard, follow these steps:
- Open any section in Event Viewer.
- Select any log you want to copy.
- Click the Copy > Copy Details as Text option on the right-hand side.
- Open Notepad or any text-processing application and paste it.
Read: How to find ChkDsk results in Event Viewer
How to save all events of Event Viewer?
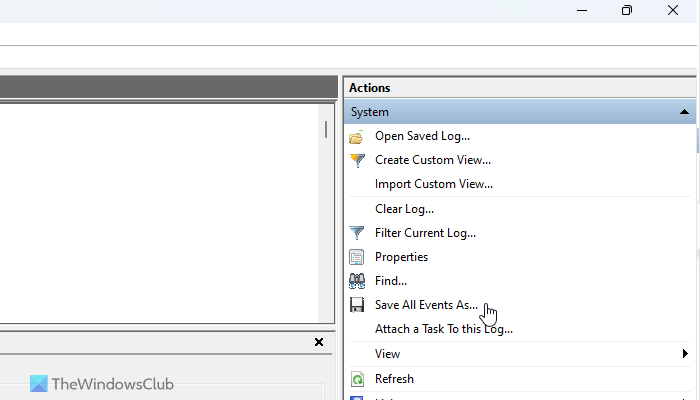
At times, you might need to save the events for further investigation of an error or something like that. In such a situation, you can use the built-in Event Viewer option to get the job done. You can follow these steps to save all logged events of Event Viewer:
- Open the Event Viewer on your computer.
- Navigate to a path.
- Click on the Save All Events As option.
- Select a path where you want to save the file and choose a name.
- Click the Save button.
If you want to open a saved logged file, click on the Open Saved Log option and choose the file you created earlier. Then, click the Open button.
Read: How to export Event Viewer logs in Windows
How to create custom view in Event Viewer?
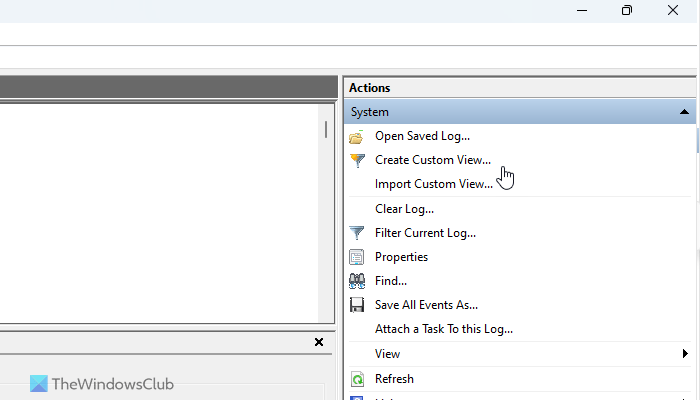
To create a custom view in Event Viewer, follow these steps:
- Open the Event Viewer and click on the Custom Views section.
- Click the Create Custom Views option.
- Enter the filters as per your requirements.
- Click the OK button.
It will be added as a custom view in the Event Viewer.
Read: Event Viewer is missing in Windows 11.
How to clear log or activity history in Event Viewer?
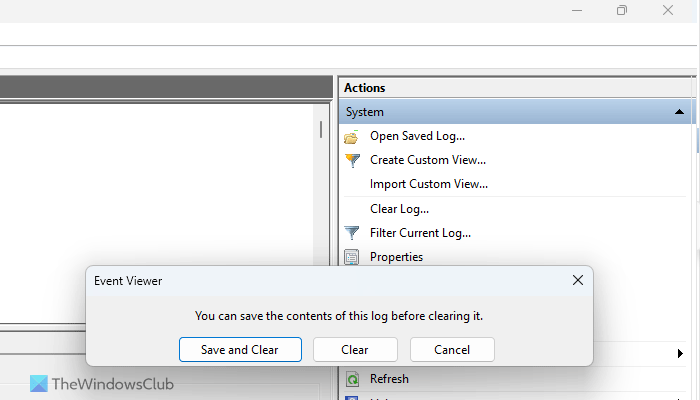
Sometimes, you might want to create a log or activity history from Event Viewer. At such a moment, you can follow these steps:
- Navigate to a specific path in Event Viewer.
- Click on the Clear Log option on the right-hand side.
- Click the Clear button.
However, if you want to save the logged events before clearing, click the Save and Clear button instead of the Clear button.
I hope this guide helps you to use Event Viewer more effectively.
Read: How to clear the Event Log in Windows
How do I see Windows 11 crash logs?
To see Windows 11 crash logs, you need to use Event Viewer. Open the Event Viewer on your computer and go to Windows Logs > System. Then, find the red-marked or “Error” logs. Following that, read the error description in the General and Details tabs.
Read: Event Viewer not working on Windows Server
How do I view Activity log in Windows 11?
There are two separate activity logs in Windows 11. Open Windows Settings and go to Privacy & security > Activity history. You can also open the Event Viewer and go to Windows Logs > System. Here you can find all the activity logs that meet your requirements.
Leave a Reply