If you are wondering how to use the Explain with Copilot feature in Notepad on Windows 11, we have covered it for you. Copilot also has control over the quintessential Notepad. With the Explain with Copilot, you can do a lot more than create and save the text in the app. So, here’s a quick expert guidance on how to use Explain with Copilot in Notepad on Windows 11.

What is Explain with Copilot in Notepad?
Explain with Copilot in Notepad is an AI-powered feature that now helps you understand log files, offers insights into large-sized documents, makes complex matters easy, explains selected content or code segments, and more.
The feature took off with the Notepad version 11.2401.25.0 and turns out to be very useful for those who want to learn something new. You also get a clear picture of the Copilot content.
So, for example, if you do not understand a certain portion of Notepad text, you can select the content, which is then sent to the Copilot. It will then generate the explanation related to the selected content.
NOTE: Copilot in Notepad is currently available for those signed up for the various Windows Beta Channels, but will soon be rolled out to the Windows Stable versions.
How to use Explain With Copilot in Notepad on Windows 11
However, the Explain with Copilot feature in Notepad is available for only those devices with Copilot enabled in Windows.
To enable Copilot in Windows, you must update your OS to the latest version which is applicable for only selected devices. Moreover, to use it for Microsoft 365 apps, you need to have an Office 365 license.
1] Enable Explain with Copilot in Notepad

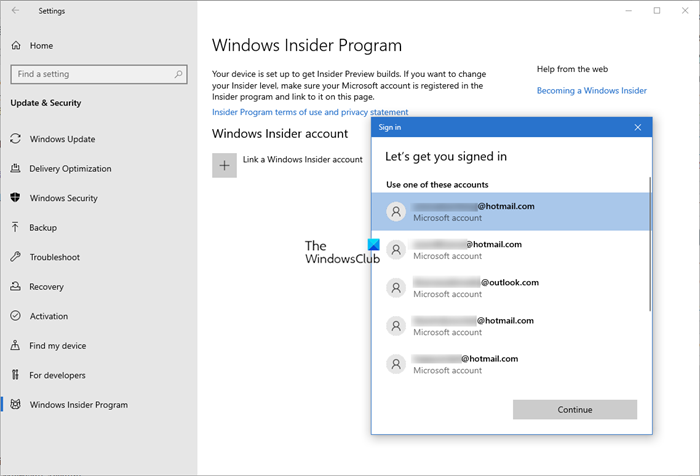
To enable the Explain with Copilot feature in Notepad now on Windows 11, you must first join the Windows Insider program. But before you sign up for the program, create a backup of your device data to avoid losing anything important. You can also join the Windows Insider Program even without a Microsoft account.
Once you have successfully joined the program, restart your PC, and Windows 11 will download and install the Insider preview builds.
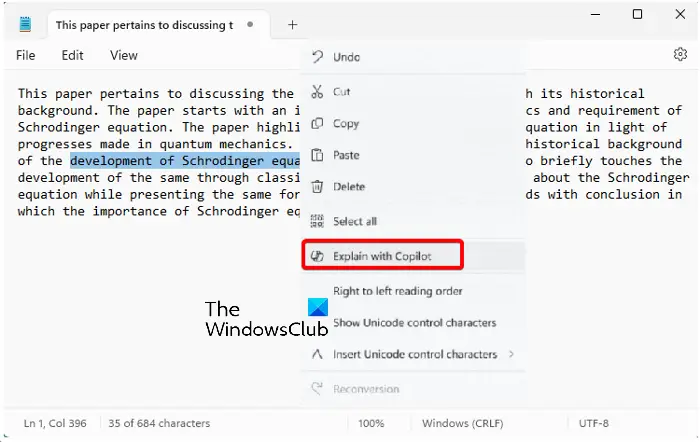
After the updates are installed, you will see the Explain with Copilot option in the Notepad.
Read: Copilot not working in Windows 11
2] Using Explain with Copilot in Notepad

Now that you have joined the Windows Insider Program, and the updates are installed, here’s how you can use the Explain with Copilot feature in it:
Launch the Notepad with the text or open a blank Notepad document and paste the target text.
Now, right-click anywhere on the document and select the Explain with Notepad option.
Next, you will see a pop-up, Send to chat? asking for your consent. Hit Send to accept and continue. This will pass on your information to the Copilot.
Copilot will now generate a response and it will show up on the right sidebar. Scroll down to read the complete details.
In the Ask Me Anything field, you can ask questions for more clarification and insights and Copilot will generate responses based on online research.
Read: Add Copilot to Context Menu on Windows Desktop
How do I use Copilot in Windows 11?
To use Copilot in Windows 11, click the taskbar icon or press the Win + C shortcut key combination. However, this is possible if you have the latest OS update (available only on certain devices), or if you are signed up for the Windows Insider program on the Canary or Dev channel.
Read: How to use Rewrite AI in Notepad
How do I enable Copilot in Microsoft?
To enable Copilot in Microsoft Office, firstly, you must have an Office 365 subscription. Then, launch Word or PowerPoint, click on the File tab, and select Options. Now, go to the Copilot section within the settings menu, click on the toggle to Enable Copilot, and it will activate.
Leave a Reply