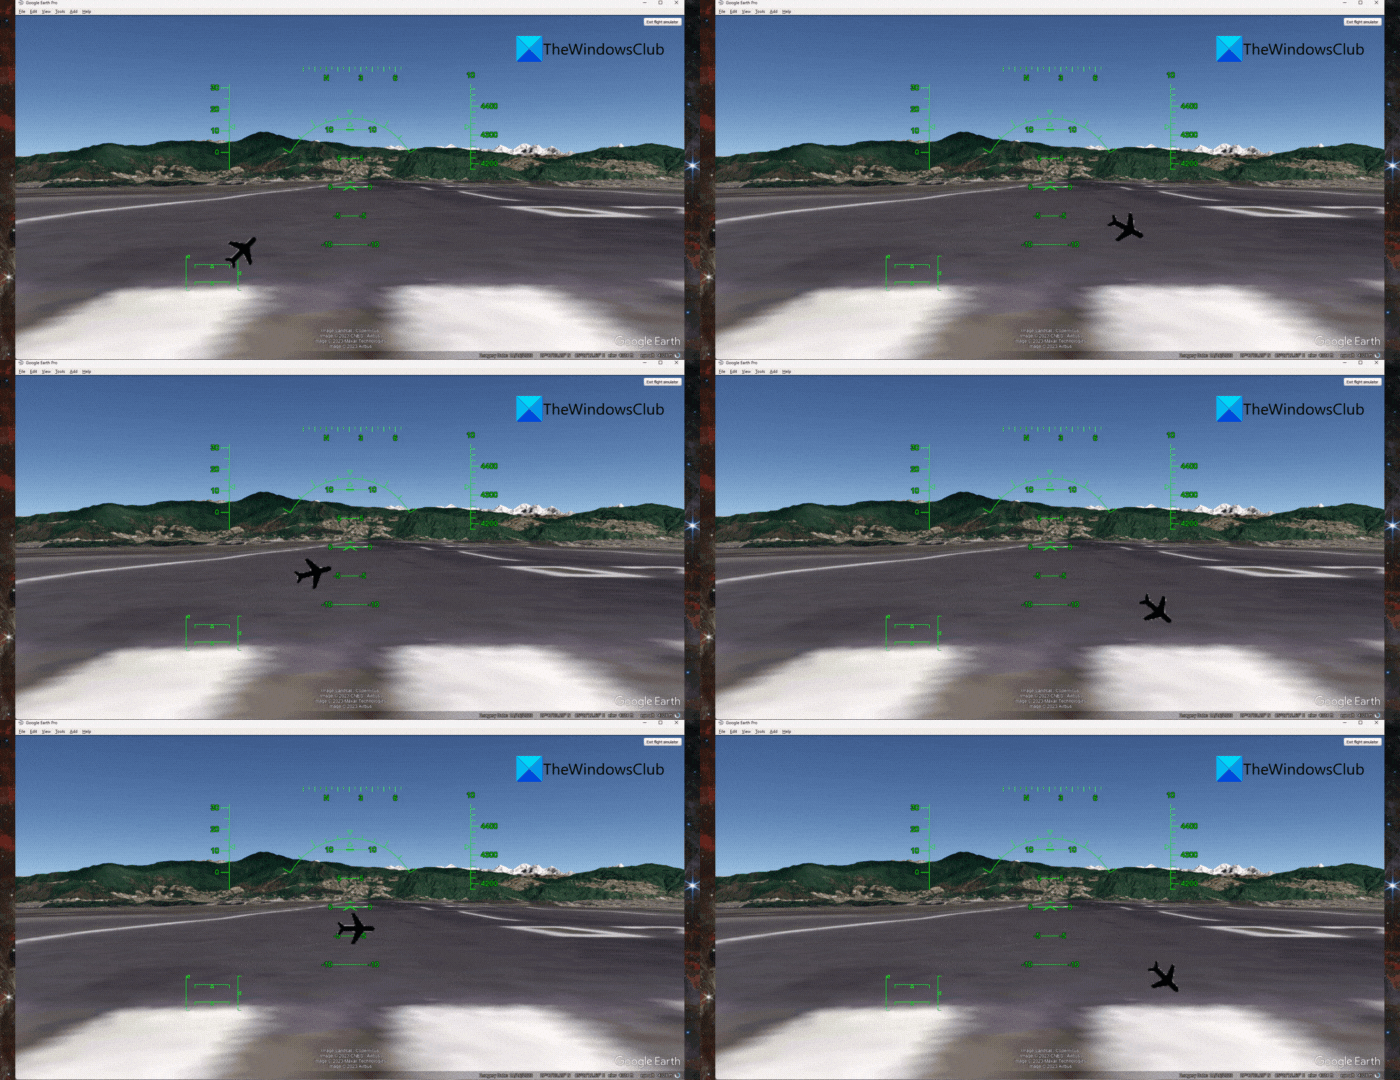
Did you know Google Earth offers a hidden flight simulator? Well, it’s true, and it uses satellite images to provide a realistic experience. So fasten your seatbelt and keep reading this post to learn how to use the free Google Flight Simulator in Windows 11.

What are the prerequisites to use Google Flight Simulator?
There are two main things you need to have before using the Flight simulator by Google Earth:
- The latest version of the Google Earth Application
- Compatible Joystick or Keyboard and Mouse
How to use Free Google Flight Simulator in Windows 11?
Follow these steps to use the Free Google Flight Simulator in Windows:
Install the Google Earth application and launch it.
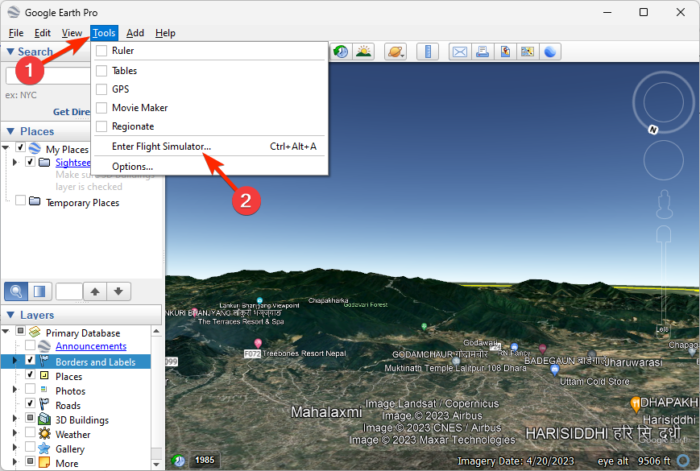
Once the application opens, navigate to Tools > Enter Flight Simulator or simultaneously press Ctrl + Alt + A.

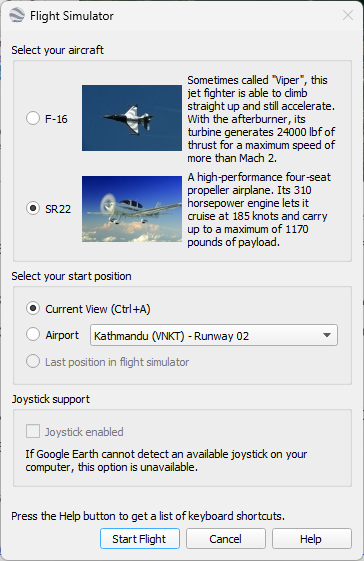
Now, you’ll be asked to Select your aircraft; if you’re a beginner, use SR22 to learn how to fly. However, if you have experience, use the F-16 jet fighter aircraft.
Next, select your start position and choose Current View to start from your current location. However, if you want to start from an airport, choose one from the drop-down list.
Check the Joystick enabled option if a joystick is connected. If not, Google Earth will use your keyboard and mouse by default.

Click on Start Flight and the Flight Simulator will begin.
Read: How to find Addresses by Coordinates on Google Earth
Knowing the Heads Up Display, Joystick, and Keyboard, Mouse Controls to fly your Aircraft
Now that your Flight Simulator has started, let’s learn the controls to fly your aircraft and embrace sky-high lanes:
Heads-Up Display
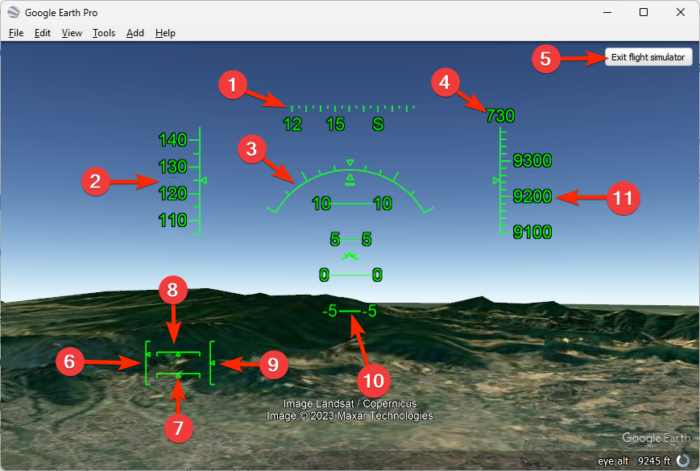
You’ll see some signs on the heads-up display once the Flight Simulator starts. Here’s what these mean:

- Heading: The direction in which the aircraft is headed
- Speed: Current speed of the plane in Knots. A knot is a unit of speed used in aviation to measure aircraft speed.
- Bank angle: The angle used to turn the plane in a new direction
- Vertical speed: Rate the aircraft ascends or descends
- Exit flight simulator: Click on it to exit the simulator
- Throttle: Shows the intensity of the engine’s power
- Rudder: Vertical axis angle of the aircraft
- Aileron: Rolling or banking angle of the plane
- Elevator: The angle and lift of the wings
- Pitch angle: The angle between where the plane is headed and the horizon
- Altitude: Shows the height at which the aircraft is flying
Joystick Controls
- Press the joystick forward for your aircraft to pick up speed.
- Pull the joystick slightly back to lift off once the plane starts moving quickly on the runway.
- Centre the joystick once your aircraft reaches flight altitude and the wings are leveled.
- Lastly, to go right or left move the joystick in the desired direction.
Keyboard/Mouse Controls
- Click the Page Up key for your aircraft to catch up speed on the runway.
- Once the speed is appropriate, move the mouse slightly down for your aircraft to take off.
- Centre your mouse after your plane reaches flight altitude and the wings get levelled off.
- Use the arrow keys to go left or right, change directions and flight path.
- Lastly, press the arrow keys + Alt to turn slowly or the arrow keys + Alt + Ctrl to make a sharp turn.
Note: Make small movements as the controls are sensitive, and your aircraft may take an unexpected nap.
Read: Best Alternatives to Microsoft Flight Simulator
Is Google Earth flight simulator free?
Yes, the Google Earth Flight simulator is free to use. It is a hidden feature in the Google Earth Pro application that users can install and use on Windows, Mac, and Linux devices. It doesn’t need any subscriptions, purchases, or hidden fees.
How do I access Google Flight Simulator?
To access the Google Flight Simulator on your Windows device, download and install the Google Earth Pro application. Once done, launch it and click on Tools > Enter Flight Simulator.
Leave a Reply