You can use your host printer inside your virtual machine in VMWare. This allows you to print anything from the VM itself without having it send it to the host device. In this post, we will see how to use a host configured Printer on a VMware Workstation VM.
Use a Host Configured Printer on a VMware Workstation VM
If you want to use a Host Configured Printer on a VMware Workstation VM, follow the steps mentioned below.
- Enable virtual printer
- Install the virtual printer software
- Check if the printer has been added
Let us discuss them in detail.
1] Enable virtual printer

First of all, we need to enable the virtual printer inside your virtual machine. This will install the required driver on your virtual computer allowing you to access the printing device. To do the same, follow the steps mentioned below.
- Start your virtual machine and connect to it.
- Then, go to Edit > Preferences.
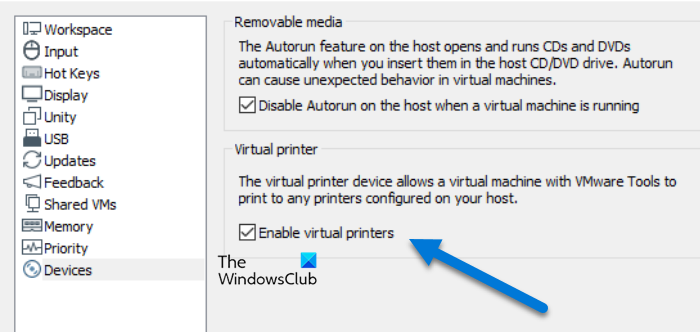
- Now, click on the Devices tab and make sure the Enable virtual printers option is selected.
- If it is not ticked, click on Change settings and tick the respective box.
If you have enabled it now, your system may download a few drivers if it doesn’t have them already and set up the virtual printer for you.
2] Install the virtual printer software

Next up, we are required to download and install virtual printer software on your computer. To do the same, once you are connected to the machine, click on the VM tab and then click on Install Virtual Printer.
A dialog box will appear asking you to confirm your actions, click on the Yes button when prompted. This will download the printer software, which you can access from the File Explorer. Just open the File Explorer and double-click on the downloaded utility. You then have to follow the on-screen instructions to complete the installation process.
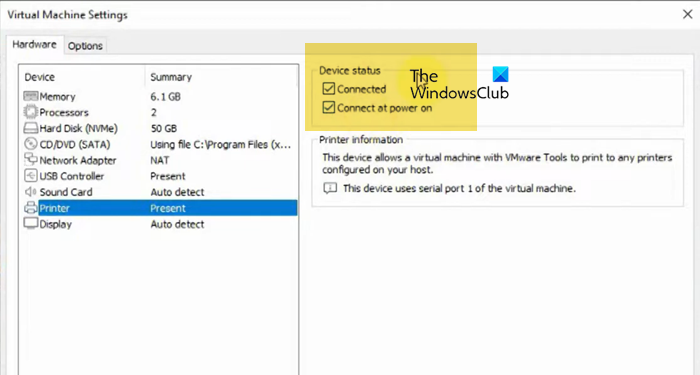
Once the utility is installed, you will be prompted to reboot the machine, but before that, click on VM > Settings. Now, go to the Printers tab and make sure that Connected and Connect at power on is ticked.
Finally, you are good to reboot the system.
3] Check if the printer has been added

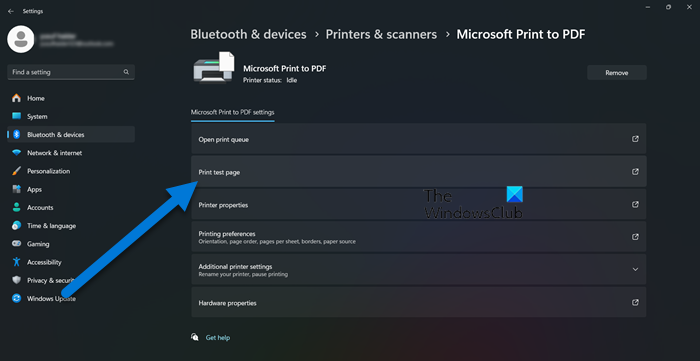
Now that we have installed the printer driver and software, let us check if the printer has been added. For that, we will test print a page. So, once your computer starts back up, go to Settings > Bluetooth & devices, select your printer, and click on the Print test page.
Once the printer prints the page, you can rest assured that the device works fine.
Read: Install VMware Tools greyed out [Fixed]
How to enable printer in VMware Workstation?
To enable the printer in VMware Workstation, you need to find the virtual machine, start and connect to it, then, click on File > Preferences > Devices and then tick Enable virtual printer option. If it is greyed out, click on the Change Settings option and then do the same.
Read: How to speed up a VirtualBox Virtual Machine and make it run faster
How do I access my host printer in VirtualBox?
To connect the VirtualBox printer, use a USB port on the physical host. Navigate to Devices > USB and select the printer. Then, share the printer and access it in the virtual session. Once the USB connection is established, VirtualBox printer sharing will be enabled.
Also Read: Install Ubuntu in VMWare Workstation.