This post explains how to use Kling Image to Video AI. Kling is a cutting-edge AI model developed by Kuaishou, a prominent Chinese tech company known for its expertise in short video and live-streaming technologies.
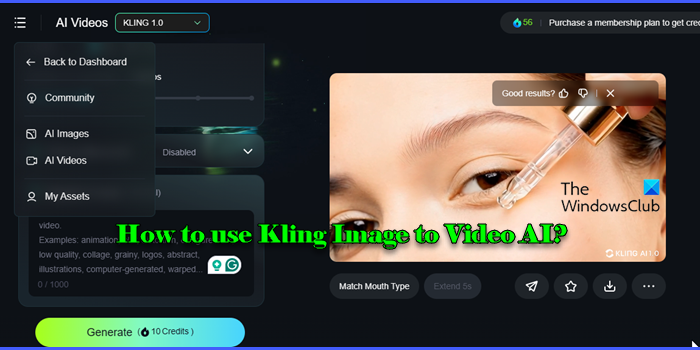
Kling AI is known for its two main generative models: Text-to-Video and Image-to-Video. The Image-to-Video model takes an image as input and animates it based on additional prompts or predefined motions, transforming still visuals into dynamic, lifelike videos. In this post, we will show you how to use Kling Image-to-Video AI to create stunning, animated videos.
Use Kling Image to Video AI
To use Kling Image-to-Video AI on your Windows 11/10 PC, follow these steps:
- Create an account on KlingAI
- Navigate to Image-to-Video
- Upload image
- Add a prompt (optional)
- Adjust settings
- Generate the video
Let us see this in detail.
1] Create an account on KlingAI
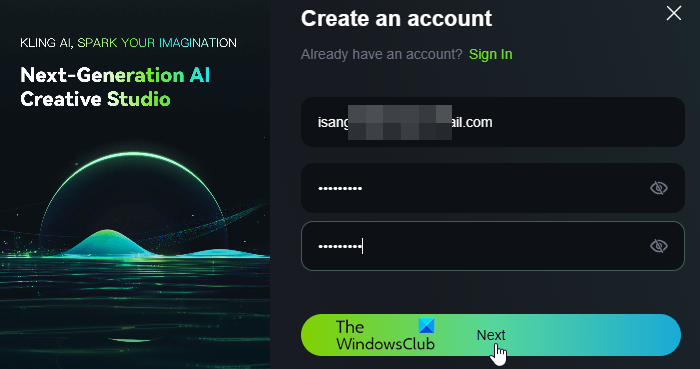
Open your browser and visit KlingAI.com. Click the Sign In button in the top-right corner. Click the Sign up for free link in the Sign In prompt.
Enter your email and set up a password. Click Next to proceed.
Kling will send you a verification code. Check your email for the code and enter it on the website. Click Sign In to get the code verified and access your account.
2] Navigate to Image-to-Video
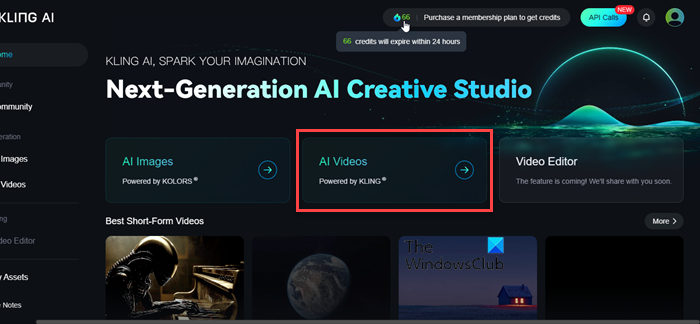
Click the AI Videos option in the center of your Kling AI account’s dashboard. You’ll be redirected to Kling AI’s Creative Studio. Switch to the ‘Image to Video‘ tab in the left panel.
3] Upload image
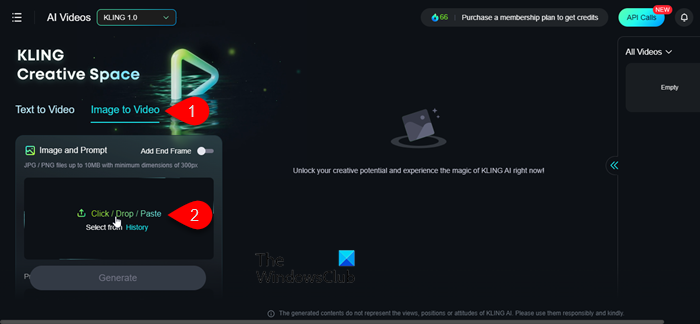
Next, upload the reference image by clicking the Upload icon. The reference image serves as a visual guide for the AI to generate video content. You can also drop, paste, or select the image from history. The image should be in JPG/PNG format and should not exceed 10 MB (minimum 300px) in size.
4] Add a prompt (optional)
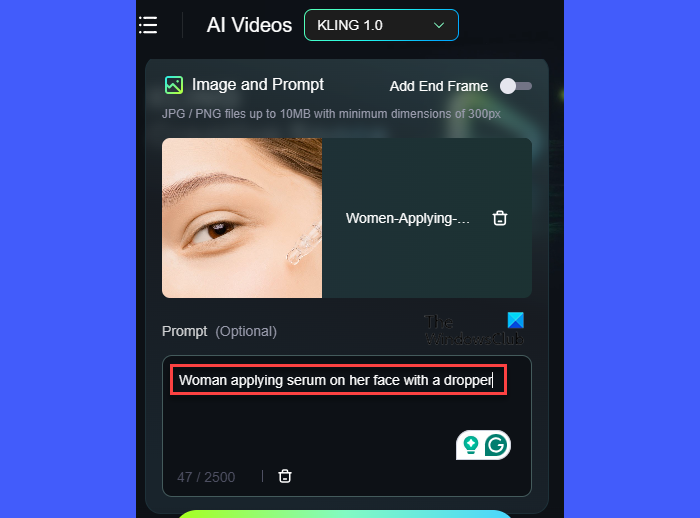
Next, enter the Prompt. A prompt is a descriptive text input that guides the AI in generating video content. Prompts can specify actions, scenes, emotions, and other elements you want to see in the video. Though it’s optional, it can help create content that aligns closely with your vision.
As per Kling, you should frame the prompt in the following format:
Prompt = Subject + Movement, Background + Movement........
- Subject: The subject is what viewers will pay the most attention to. It could be anything from a person or animal to an object or scene that embodies the theme you want to convey.
- Movement: This describes how the subject is moving or interacting within the scene. This could include actions like walking or running to help convey the energy and dynamics of the scene.
- Background: The background can provide additional information about the setting, mood, or atmosphere of the scene.
Basically, the Subject and the Movement serve as the most fundamental elements of the formula. For example, “Woman (Subject) applying serum on her face with a dropper (Movement)” clearly describes the subject and its movement to create a vivid scene for the AI to visualize and animate.
5] Adjust settings
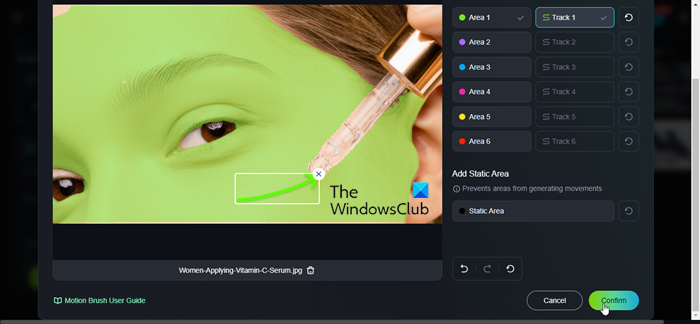
Apart from the image and the prompt, there are a few additional settings that you may adjust to have better control over the generated video. These include:
- Motion Brush: Lets you specify the desired motion for certain areas or elements. You can select the areas and specify the corresponding tracks for motion generation.
- Mode: Supports Standard (for cost-effective video production) and Professional (for intricate video production) modes.
- Camera Movement: Lets you control the camera movement in the video frame with absolute commands and displacement parameters (disabled by default in free plan).
- Length: Lets you select the length of the final output (5s/10s)
- Negative Prompt: Though a negative prompt, you can specify what you do not want to see or include in the generated output.
6] Generate the video
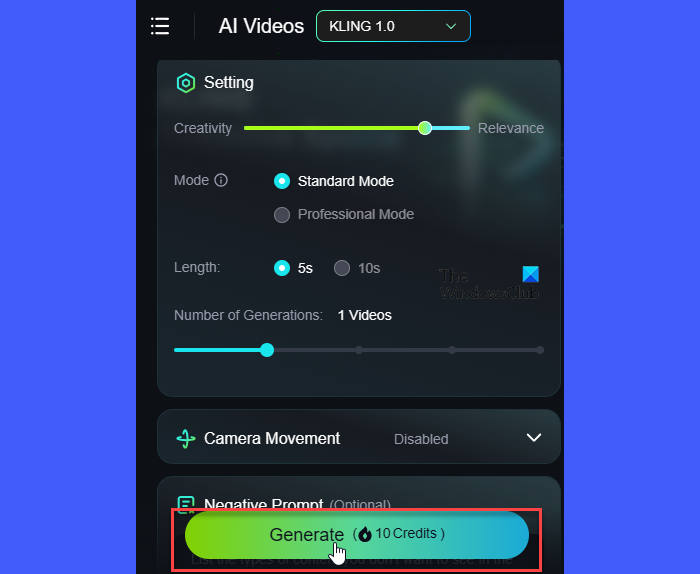
Once you’re done, click the Generate button at the bottom. Kling AI operates on a credit-based system where you receive 66 free credits daily. Each video generation costs 10 credits.
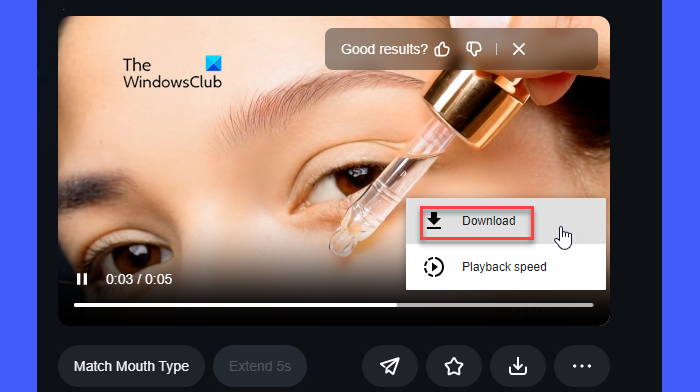
After a brief processing time, the AI will produce a video (.mp4) based on your inputs, which you can then download or share.
Key Features of the Kling Image-to-Video model
- Video Generation: Transforms images into 5 or 10-second animated videos.
- Text Integration: Allows users to input text descriptions to enhance the narrative.
- Modes of Generation: Offers “Standard Mode” for quicker outputs and “Professional Mode” for superior visual quality.
- Aspect Ratios: Supports 16:9, 9:16, and 1:1 aspect ratios for diverse video formats.
- Video Continuation: Enables extension of videos up to 3 minutes with adjusted prompts.
Watch the video below.
How to convert image to video AI?
Various tools and platforms allow you to convert images into videos using AI. These include AI video generators such as Kling AI and DALL-E that can generate videos from static images by applying animation techniques and integrating text prompts, and software like Adobe After Effects that can animate images using keyframes, effects, and AI enhancements.
Read: How to install MSTY LLM for Windows.
How can I use AI to make a video?
Kling AI is ideal for generating videos from images and text prompts. Start by creating an account on the Kling AI website. Once logged in, navigate to the Image-to-Video section, upload the image you want to animate, and add the prompt describing the desired movement or scene. Finally, initiate the video generation process, and the AI will create a short video based on your input.
Read Next: VideoProc Converter AI: Best AI Video Enhancer to enhance video quality.
Leave a Reply