Photoshop offers lots of tools and features that can make creating and editing images easy and interesting. Photoshop uses Layers to make and edit artwork. You can use layers to manipulate artwork and add effects to them. To change the way how different parts of an artwork interact with each other, different Layer Blending Modes can be used.

How to use Layer Blending Modes in Photoshop
In Photoshop you can use the blend modes to change how layers interact with each other, thus producing interesting artwork. Think of each layer as a transparent glass canvas, what is placed on the top layers will affect how the content on the bottom layers gets shown. The blend modes allow for different aspects of the bottom images to show through. Think of blend modes as ways that you can mix colors or paint. The blend modes allow the mixing of aspects from the layer above and below it.
Five most useful Blend Modes in Photoshop
There are twenty-seven (27) blend modes in Photoshop. However, there are five (5) that get used very often. The five most used blend modes are Multiply, Screen, Overlay, Color, and Luminosity. This article will discuss the five most used blend modes and show examples of each.
- Multiply blend mode
- Screen blend mode
- Overlay blend mode
- Color blend mode
- Luminosity blend mode
Blending mode overview

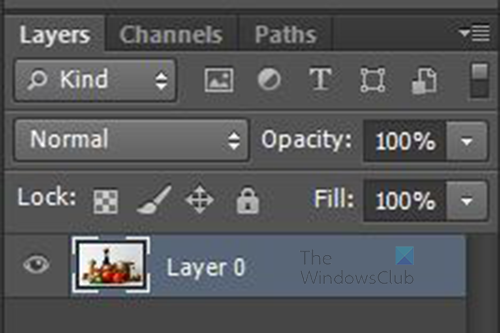
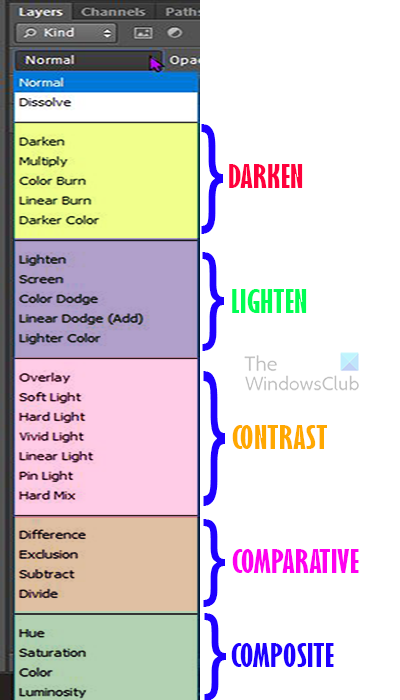
The blend modes are located at the top of the layers panel across from the Opacity controls. When you click on the blend mode list you will notice that the blend modes are grouped into six groups. The groups are based on what the blend modes do to the image. this means that the blend modes in each group will behave quite similarly. This is true for all the groups except the first group with just two blend modes in it. These first two blend modes have nothing in common.

Here is a list of the bend modes and how they are grouped.
Not that each blending mode will be best used on certain images and for certain purposes. As you work in Photoshop you will have different images with different properties. You can experiment with the blend modes, and you will see that some work better for certain images. In some cases, you will need to use other tools and effects along with the blend modes to make your image look even better.

In this image, you will see all the categories that the blend mode fall in. You will see the names of the group that the five most useful blend modes fall under. The group names give an idea of what the blend mode does when it is used.
1] Multiply blend mode
The Multiply blend mode is used when you want to darken an image. Remember that the blend modes allow for the blending of elements from layers above and below. The Multiply blend mode is named after the mathematical computation used to get its darkness value. Photoshop takes the colors from the layer that’s set to the Multiply blend mode and multiplies them by the colors on the layer(s) below it, then divides them by 255 to give us the result.
When the multiply blend mode is selected, the whites in the image will disappear, the blacks remain black and the grays will get darker, The Multiply blend mode can be used in cases where you want to darken an image. The Multiply blend mode can be used when you have images that need restoration. The Multiply blend mode can darken washed-out areas of the image.

This is what the image looks like with the Multiply blend mode used.
2] Screen blend mode
The screen blend mode is used when you want the image to be lightened. The Screen blend mode falls in the group with the other blend modes that also lighten images when they are used. The other blend modes in the group are Lighten, Color dodge, Linear dodge (add), and Lighter color. The Screen blend mode is used if you want to brighten an image. The Screen blend mode is the opposite of the Multiply blend mode, it lightens instead of darkens when it is used. The Screen blend mode will not lighten black areas or areas close to black. Note that different blend modes will have a different effects on different images. Some images will appear extremely bright if the screen blend mode is used. Images that have light colors may have the edges disappear or become hard to see.

Image with Screen blend mode used.
3] Overlay blend mode
The Overlay blend mode helps to create contrast in the image that is used. The Overlay blend mode creates light and dark in the image thus creating contrast. The dark areas are made darker, and the bright areas are made brighter.

The image with the Overlay blend mode.
4] Color blend mode
The Color blend mode falls in the same group as the Luminous blend mode which is the next blend mode that will be discussed. The Color blend mode is a combination of the Hue and Saturation blend modes. The Color blend mode is a part of the group with the Hue, Saturation, and Luminosity blend modes. These blend modes have to do with the colors of the layers. When the blend mode of a layer is changed to Color, it blends only the colors (Hue and Saturation) of the layer or layers below. Think of it as telling the layer to admit only the colors of the layers below. When the Color blend mode is used, the luminous (brightness) values of the layers below are not used. The Color blend mode is great when you want to change the colors in a layer without affecting the brightness level.
When you use the Color blend mode on the top layer, you may not see any difference, if the layer below is a duplicate, or it is white. However, if you place a color background layer below the image layer then you will see some interesting artwork.

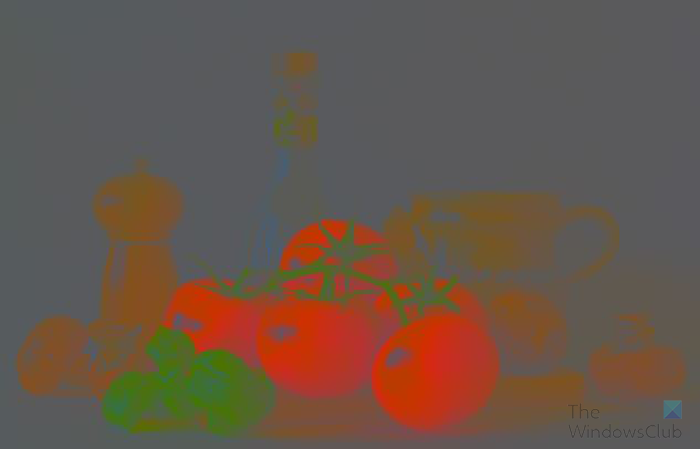
The image layer above with the Color blend mode than a plain dark green background layer below. You can see how the image looks like a painting.
5] Luminosity blend mode
The Luminosity blend mode is the fifth and final blend mode in the five most useful blend modes in Photoshop. This blend mode is in the same group as the Color blend mode but it does the opposite of what the Color blend mode does. While the Color blend mode blends the colors of the layers and ignores the lightness values, the Luminosity blend mode ignores the colors and blends the lightness values.
When the Luminosity blend mode is used, on an image, you may not see any changes, especially if the layer below it is a duplicate of it or a white background layer.

To see what would happen when the Luminosity blend mode is used, you can place a color background below the layer that has the Luminosity blend mode. You will see the image take on the color of the layer below, it would be bright, and it would not have any of its original color of the image.

You can also use a gradient on the layer below and you will see the gradient integrate into the image above that has the Luminosity blend mode.
Now that you see how the Luminosity blend mode looks, it can be used to create monochrome images.
Read: How to make a Patterned or Textured line in Photoshop
Where are the blend modes located?
To use the blend modes, you need to know how to find them. The blend modes are located close to the top of the layers panel.
Whenever you place an image in Photoshop you will see it placed on a new layer in the layers panel. Close to the top of the layers panel, you will see the word Normal with arrows beside it. You can click on the arrows or on the word Normal to get a drop-down list of all the blend modes.
Why is blend mode grayed out?
The blend mode option can be grayed out for a few reasons. The blend mode will be grayed out if the image is opened as a background. Backgrounds are locked so they cannot be fully edited, this means that the background will have to be converted to a layer or duplicated and the duplicate used for the blend mode.
Why does the image remain unchanged when I choose a blending mode?
The blend mode will not make any change if there is only one layer so you will have to duplicate the layer or add another layer. The image can also remain unchanged if you try to apply the blend mode to the last layer in the layers panel or the layer just above the background. Remember that the blend mode will blend the layer below with the layer above it.
Why is the blend Mode called Multiply?
The Multiply blend mode is so named because of the method that is used to adjust the color of the layers.
Leave a Reply