Writing an essay and want to find a little more information to add to it without having to visit a browser? There is a feature called Researcher that enables users to research topics, find reliable sources and add content with citations within Microsoft Word. The Researcher tool is powered by Bing and has a search tool to search for what you want.
How to use Researcher in Microsoft Word
Follow the steps below to use Researcher in Microsoft Word to research for Papers and Essays:
- Launch Microsoft Word
- Click References and select Researcher in the Research group
- A Research pane will appear on the right
- Type a term into the search engine
- Press Enter
- Wait for sources to load
- Choose a topic in the result pane
- Highlight the text in the result pane and select any one of the following: Add or Add and Cite
- A pop-up will appear asking to update your Bibliography; select Update to automatically create a bibliography or update an existing one.
- Now, edit your citations; select Edit Citations from the drop-down menu.
Launch Microsoft Word.
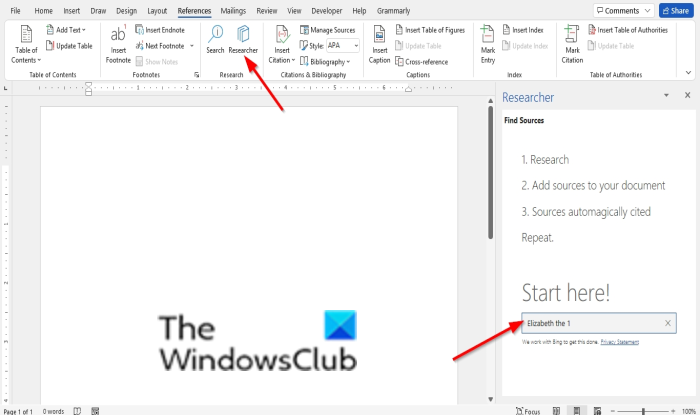
Click References and click Researcher in the Research group.
A Research pane will appear on the right.
Type a term into the search engine.
Press Enter.
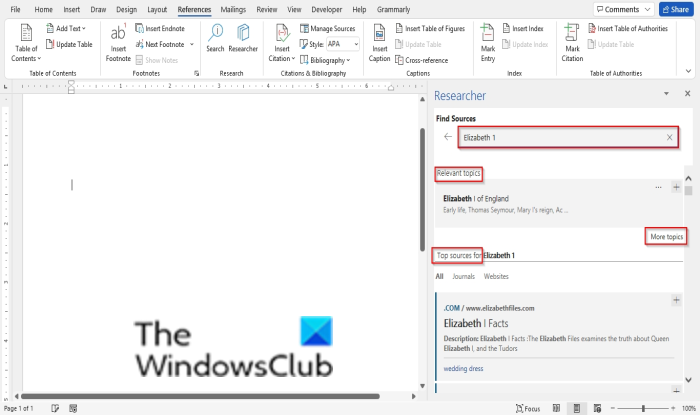
Now we are on the result pane. The result pane has three sections: Relevant topics, Top sources, and a search bar.
You can click More Topics under the Relevant Topics section to look up more relevant info about the term you want to research.
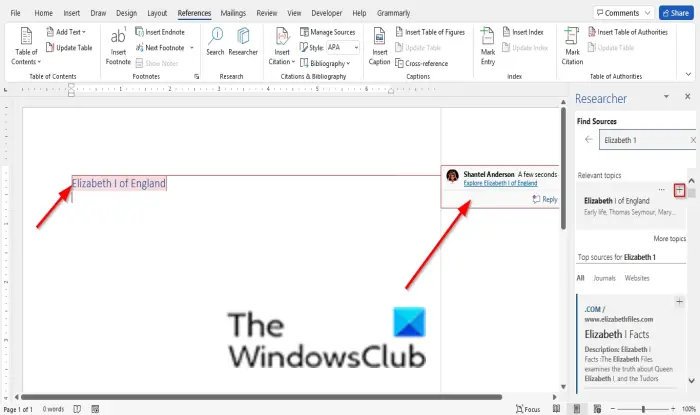
There is a plus sign on all the results on the result pane. The plus sign enables the user to add a topic as a heading or add a source as a citation.
If you click a plus sign for a result under Relevant Topics, Word will add the topic as a heading in your document along with a comment.
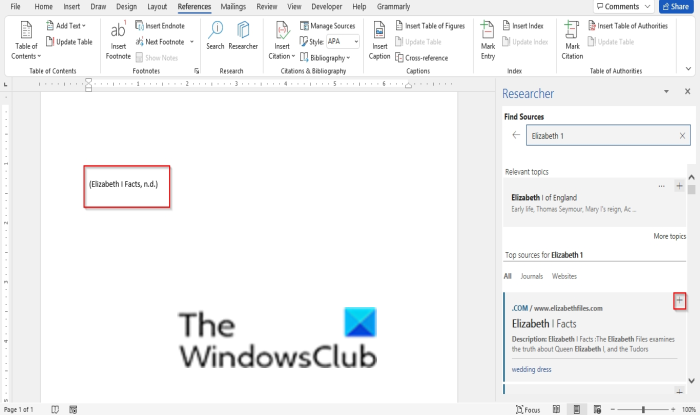
If you click the plus sign under the section Top sources, it will add a source as a citation in your document. A pop-up will appear asking to create a bibliography; you can choose if you want to create one or not.
If you choose to create a Bibliography, the Bibliography will appear in the document.
If you choose to add another source as a citation and your document has a Bibliography, the pop-up will ask to update the Bibliography.
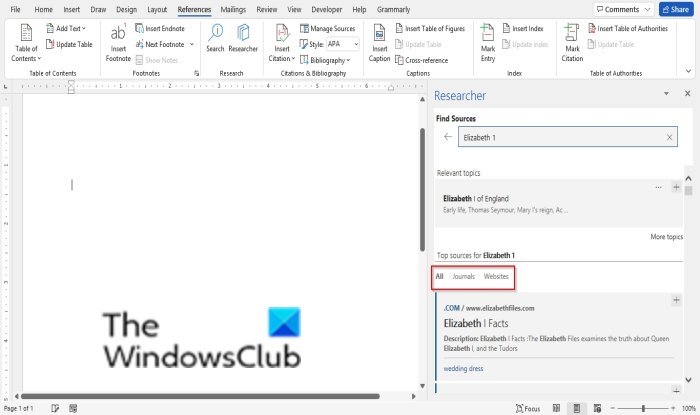
Under the Top sources section, you will find three categories that you can select to search for information; these are All, journals, and websites.
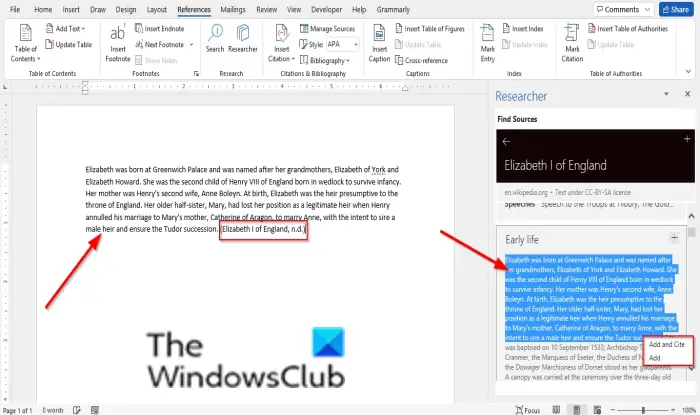
If you select a result and want to add some of the information from that website, highlight the text and select Add and Cite or Add.
The Add and Cite option enables the user to add both the text and a source as a citation.
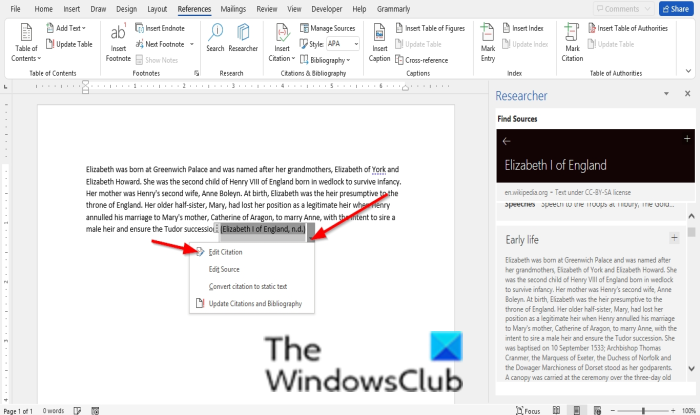
After inserting the text and citation into the document, you can edit the citation by clicking the Citation, then click the drop-down button and click Edit Citation; the citation menu also consists of Edit Source, Convert Citation to static source, and Update Citations and bibliography.
The Add option adds only the text into the document.
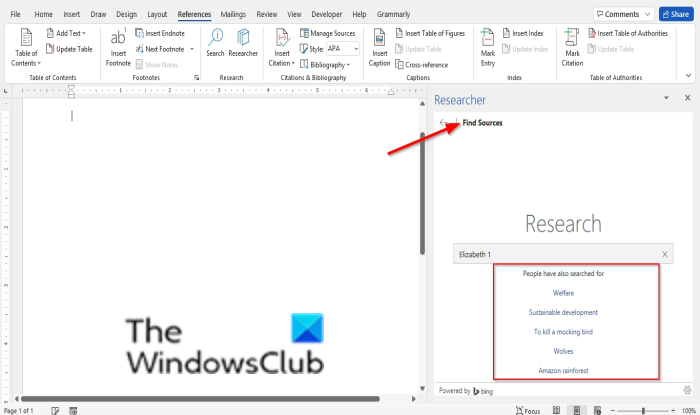
If you click Find sources at the top of the left corner of the panel, it will take you back to the Research pane and display a list of terms that people search for often.
How do I show the Research pane in Word?
To open the Research Pane in Word, You will have to click the Research button available, where it will appear on the right of the window with a search bar to search for people, events, concepts, and places.
How do you use Researcher in Word?
There is not that much difference in using Researcher in Word from Word 365; they follow the same procedure, the difference is that the Researcher icon has changed and the photo gallery is missing; the Word Researcher Icon looks like a quotation mark, while the 365 Researcher icon resembles a book. In this tutorial, we have explained how to use Researcher in Microsoft Word 365.
We hope this tutorial helps you understand how to use Researcher in Microsoft Word; if you have questions about the tutorial, let us know in the comments.