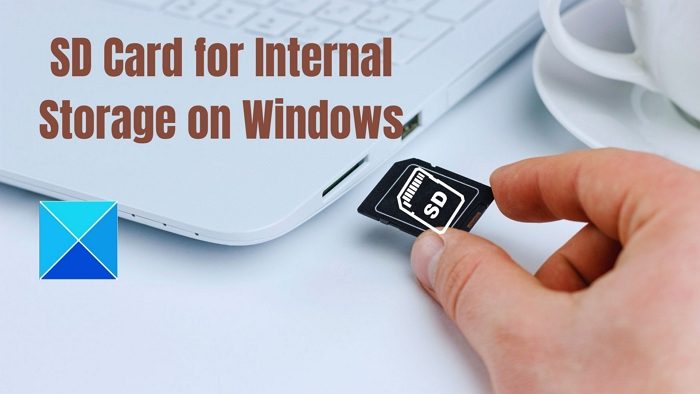
The lack of storage space on a PC is something that we all come across, and we wish there were a cheap and effective solution to expand the storage without affecting the overall look and adding extra cables to our PCs. In such a case, you can use an SD Card as internal storage in Windows. In this article, we will learn how to use an SD card as internal storage on Windows somputers. We will also discuss the pros and cons and the necessary precautions you will need to take.
Why use SD card as internal storage on Windows – Pros and Cons
Using SD cards as internal storage on Windows has its fair share of advantages and disadvantages. Assessing the weightage is essential. Here are the pros and cons of using an SD card as internal storage on Windows.
Pros:
- Cheap Storage Solution: SD Cards are generally much more affordable than HDDs or SSDs. They also don’t bulge out or involve opening up your PC, which may incur additional costs.
- It does not require shifting data: While some PCs and laptops have extra HDD or SSD slots, expanding the storage via an HDD or SSD will require going all the data to the new one. This is not the case with SD cards.
- Uses Less Power: An SD card uses minimal power on your PC and is reliable for long-term use. It can also be taken out and used as storage on another device.
Cons:
- Slow read and write speeds: Most SD cards can’t even match HDDs’ read and write speeds, let alone SSDs. They can be suitable for regular files but not those required to run your PC’s software.
- Inaccessible apps after removal: Once you remove the SD card, any app that was installed on the SD card will become unavailable.
Before proceeding with the steps to use your SD card for internal storage on your Windows PC, back up all the data stored in the SD card, as the steps also involve formatting the SD card, which results in complete data loss; let’s now learn how to use an SD card for internal storage on Windows.
How to use SD card for internal storage on Windows 11/10?
You must go through multiple simple steps to use an SD card for internal storage. We have divided them into three sections:
- Format the SD card to NTFS
- Create an SD Card Folder
- Mount the SD Card
Let’s proceed with the steps.
1] Format the SD card to NTFS
The first thing that is required is to format the card to NTFS. For an SD card to be used as a permanent internal storage, it should be formatted to your computer’s file system. Generally, Windows 11 PCs are formatted to NTFS. Here’s how to format the card to the NTFS file system:
- Open File Explorer and head over to This PC from the left pane.
- Now, you will see the SD card there. Right-click the SD card icon, and click on Format.
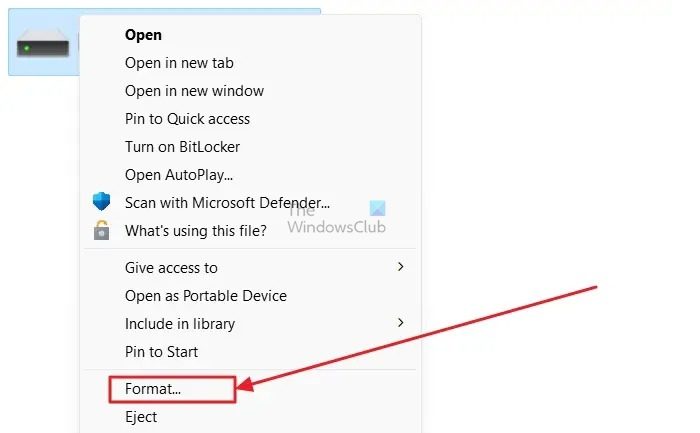
- A new window will open. Select the File system as NTFS in the window and click the Start button.
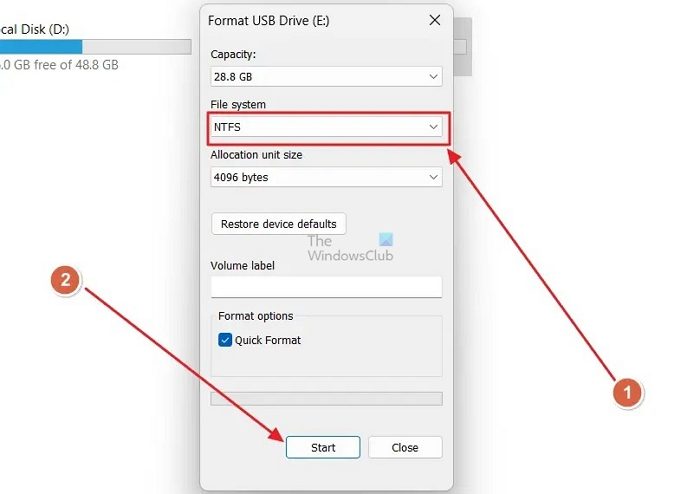
- A warning window will appear next. Click OK on it.
This will format your card to NTFS file format and erase all the SD card data.
2] Create an SD Card Folder
After the SD card is formatted to NTFS, you must create an SD card folder where the SD card storage will be mounted on your PC. Here’s how to do it:
- Open the C drive from the file explorer on your PC.
- In the C drive, right-click the space, then click New>Folder.
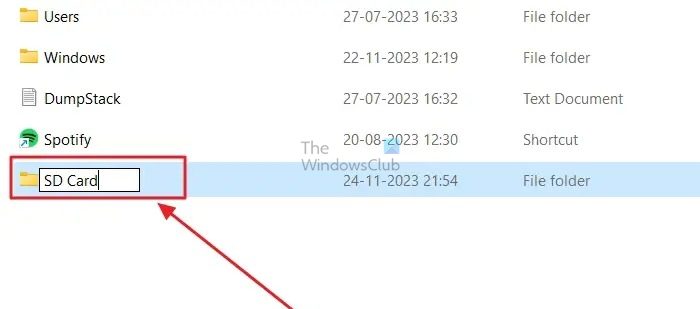
- Now, name the folder as an SD card and save it.
3] Mount the SD Card
The final step involves mounting the SD card folder created in the C drive using Disk Management in Windows. Here’s how to do it:
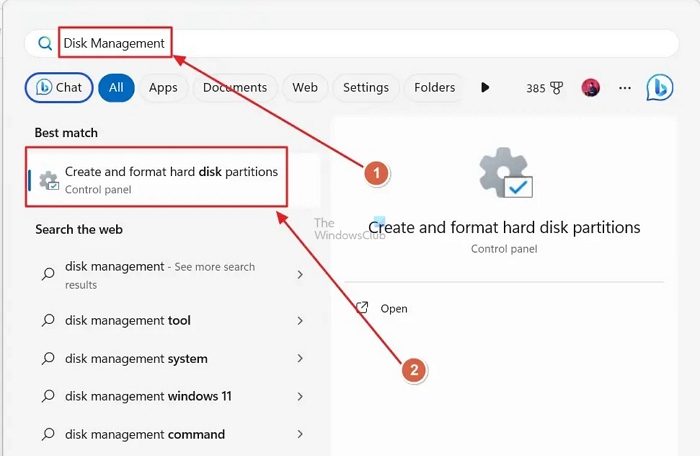
- Open the Start menu in Windows by pressing the Windows key on your keyboard and search for Disk Management.
- Now, open the Create and Format hard disk partitions option. This will open the Disk management window.
- Find your SD card in the Disk Management window, which will be listed as removable.
- After finding the SD card, right-click it and click Change Drive Letters And Paths…
- Click on the Add button in the window that opens.
- Now, click the browse button beside Mount in the following empty NTFS folder. Select the SD card folder in the next window, then press OK.
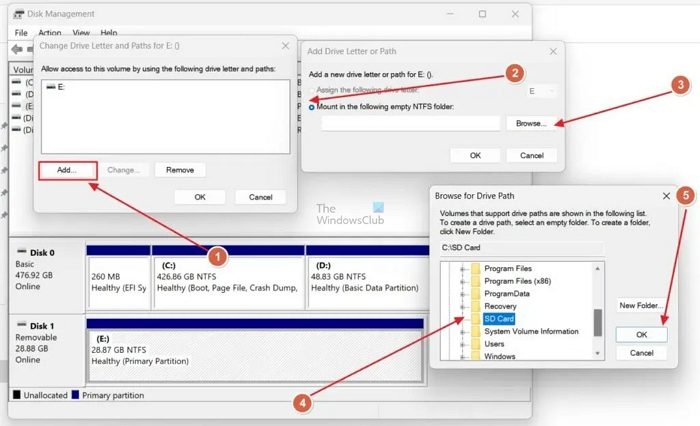
Once complete, the storage drive will become part of the C driver, and the space will look more than the usual storage. It also takes away the headache of managing another drive. That said, make sure to remember it; otherwise, if it comes to formatting, you need to return to the Disk Management tool and then do it from there.
Conclusion:
In this article, we learned how to use an SD card for internal storage on Windows. While you use the SD card for internal storage on Windows, exercise due caution. The read and write speeds can also be slower, so refrain from using the SD card for larger files and installing applications. We hope you found the article to be insightful. Please make sure that you share it with everyone.
Can you use an SD card for Windows?
Yes, you can use an SD card for Windows; using the SD card for internal storage on Windows requires reformatting and mounting the SD card to the PC. Make sure you have a dedicated SD card slot on your PC to use it.
Why don’t computers use SD cards for storage?
SD cards are slow and unreliable for most PCs, not designed for multitasking and quickly loading files. They are designated for storing and accessing files quickly, but not as quickly as SSDs or HDDs, primarily used in laptops and computers.