In this post, we will show you how to use Snap Bar in Windows 11. If you are a Windows 11 user, you probably know that Windows 11 has a Snap Layouts feature that lets users align multiple apps on one screen. Using Snap Layouts, you can optimize your screen space and boost your productivity. In this article, we will show you how to use Snap Bar in Windows 11.

How to use Snap Bar in Windows 11
When you hover your mouse cursor over the Maximize icon on an opened window, the Snap Layout menu appears. In this menu, you can select the desired layout to place your apps on your display. The Snap Bar does the same thing as the Snap Layouts but it appears on your screen when you start dragging an opened window.
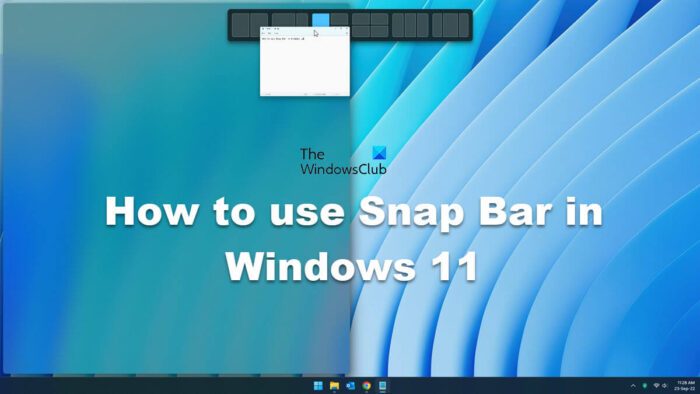
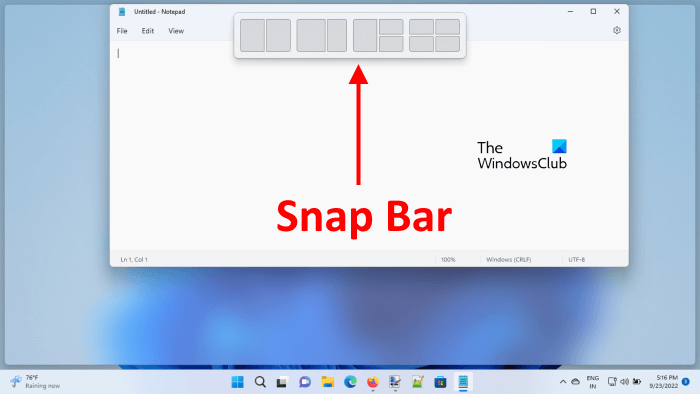
The Snap Bar has made it easier to organize your screen by placing multiple apps simply by the drag and drop method. Drag an app window to the very top of your screen to initiate snapping grids. The menu will peek out at the top of your display when you drag a window and begin moving it to the top, then it will completely reveal itself allowing you to move an app window into a specific grid layout.
The following steps summarize how to use Snap Bar in Windows 11:

- Place your mouse cursor at the top of the app.
- Press and hold the left-click of your mouse and start moving the app.
- Drag the app to the top of your screen to make the Snap Layouts visible in the Snap Bar.
- Drop the app to the desired space shown in the Snap Bar.
When the Snap Bar is visible, you will see four different Snap Layouts. All these layouts are the same as those that appear when you hover your mouse cursor over the Maximize icon. Now, you can place your app in any Snap Layout to organize your screen.
How to enable or disable Snap Bar in Windows 11

By default, the Snap Bar is enabled in Windows 11. But if you don’t like this feature or for any other reason, you want to disable it, you can do so via Windows 11 Settings. The following steps will help you with that:
- Open Windows 11 Settings.
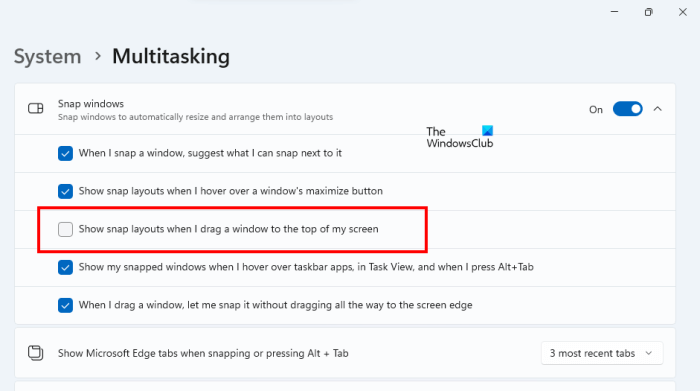
- Go to “System > Multitasking.”
- Click on the Snap Windows tab to expand the list of features.
- Uncheck the Show snap layouts when I drag a window to the top of my screen checkbox.
If you want to enable this feature again, enable the checkbox again.
How do I completely disable Snap Layouts feature in Windows 11?
Microsoft added the Snap Layouts feature to Windows 11 to boost productivity. By default, this feature is enabled in Windows 11. But if you want, you can disable it. To disable the Snap Layouts feature in Windows 11, open the Settings and go to “System > Multitasking.” Now, turn off the switch next to Snap windows. You can also just disable Snap Layouts when you hover over Maximize button.
Can you save Snap Groups in Windows 11?
Windows 11 does not allow you to customize the Snap Layouts and save Snap Groups. But you can do so by using a tool named PowerToys. PowerToys is a set of utilities developed by Microsoft. It helps users customize Windows and boost productivity. The FancyZones feature in PowerToys lets you create and save Snap Groups on Windows 11.
Leave a Reply