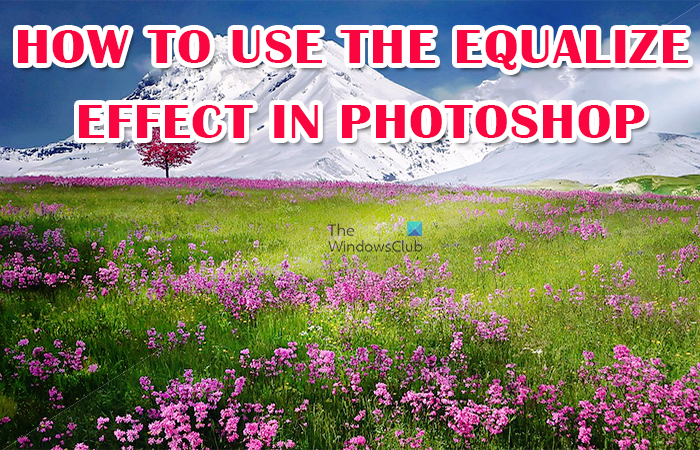
Photoshop can enhance the photos that you take or the artworks that you make. There are tools and effects in Photoshop that can enhance photos with one click. The Equalize effect is one that can enhance images with one click. In this post, we will show you how to use the Equalize effect in Photoshop to enhance your image.

What is the Equalize effect in Photoshop?
The Equalize effect works by redistributing the brightness values in an image so that they represent the entire range of brightness levels. Photoshop finds the brightest areas in the image or the selection and makes them white. Photoshop also finds the darkest areas in the image or selection and makes them black. You can do the whole image or just select areas that you want to equalize. It may be best to use the Equalize effect with other methods for the best result. You can duplicate the original image and then fade the equalized image to blend with the original. As you use the Equalize effect, you will notice that the results will be different for each
How to use the Equalize effect in Photoshop
To use the Equalize effect in Photoshop, you will need to place the image in Photoshop, click on the Equalize option, and then make some minor other adjustments to the image. Let’s see how it is done.
You can use a few methods to place the image in Photoshop. You can open Photoshop then find the image and drag the image into Photoshop. You can also find the image, and right-click on it, then click Open with then Adobe Photoshop (version number). Another way to add the image in Photoshop is to open Photoshop then, go to File, then Open or press Ctrl + O. You will then see the Open dialogue box; you then search for the image, click on it, and click Open.
Equalize the whole image
Equalizing the whole image is about just using the Equalize effect without selecting any special area. Note that Photoshop will automatically choose where to apply the Equalize effect and that may not be the spot where you want it.
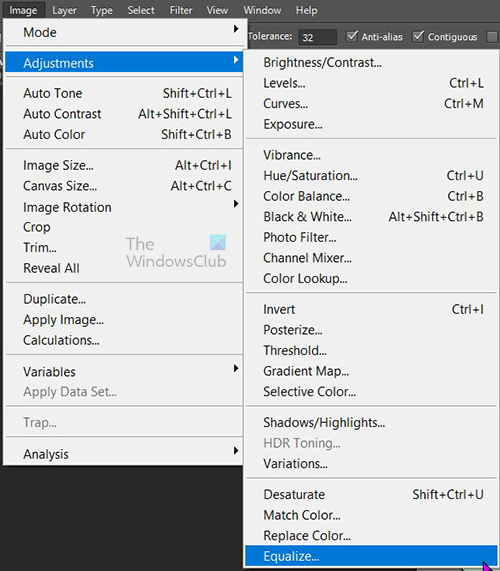
To use the Equalize effect on the whole image, select the image then go to the top menu bar and select Image then Adjustments, and then click Equalize.
A few images will be used to show the effects that Equalize can have on different images.

This is the original image before the Equalize effect is used.

This is the image after Equalizing, you notice that the Equalize effect lightened the overall image.

This is the original image before the Equalize effect is used.

This is the image after Equalizing; you will notice that the Equalize effect affected not only the background of the image. however. The background is the darkest of all the other colors.

This is the original image before the Equalize effect is used.

In this image, you will realize that the items in the image are sharper and the background changes after Equalizing effect.
Equalize selected parts of the image

This is the image that will be used
In this section, the images will have parts of them equalized to show what will happen. Remember that different images will look different when equalized. Some colors will not be changed when equalized.
To Equalize parts of an image, you can use any of the selection tools to select part of the image. In this article, the Magic wand will be used.

Select the Magic wand tool and click on the image. The parts of the image with similar colors will be selected.

You then go to the top menu bar and select Image then Adjustments and then Equalize.

When you click Equalize you will see the Equalize option appear and you have two choices. You can click Equalize selected area only or Equalize entire image based on selected area. Both options will produce a different outcome.

This is the image with Equalize selected area only used.

This is the image with Equalize entire image based on selected area only used.
You will notice the changes in the equalized image compared to the original image. both options produce a different look in the image.
The Equalize effect alone may not make the image appear the way you want. The Equalize effect can sometimes make parts of the image too bright and parts too dark. This means that you will have to use other effects to get adjust the image some more. One way that you can enhance the Equalized image is to add an adjustment layer.

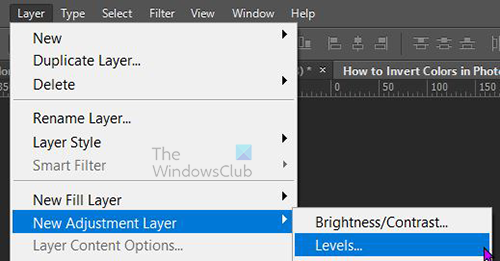
To add the adjustment layer select the image layer in the layers panel then go to the top menu bar and select Layer then New adjustment layer then Levels. You can also create the levels layer by going to the bottom of the layers panel and click the Create new fill or adjustment layer icon. A menu will pop up, click Levels.

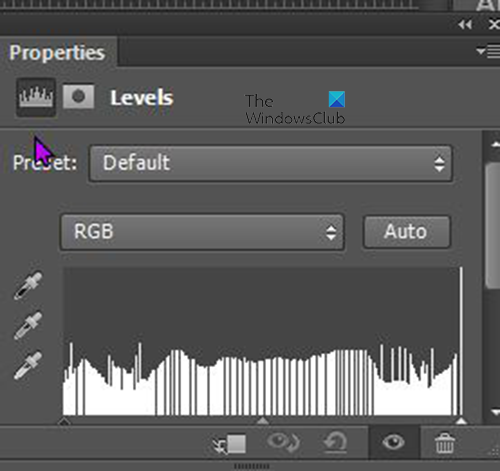
The Levels properties window will appear, click on the sliders and drag them while watching the changes in the image. You can stop when you see satisfactory changes.
Read: How to place Transparent Text on Image in Photoshop
Why is Equalize grayed out in the menu when I select an image?
The Equalize effect and other adjustments will be grayed out on any image that is a smart object. You will know a smart object if it has a square on its layer in the layers panel. Smart objects protect the pixels of the image from being changed. To use the Equalize effect on the image, right-click it in the layers panel and click Rasterize layer. You will then be able to use the Equalize effect on the image.
Can text be equalized?
Photoshop can equalize text but the text has to be Rasterized. To rasterize the text, go to the layers panel and right-click on the text layer. A menu will pop up, and from the menu click Rasterize type. You can also rasterize the text by clicking on it and then going to the top menu bar. From the top menu bar select Type then click Rasterize type layer. When the text is rasterized you can then use the equalize effect, note that some colors and gradients will show no change when equalize is used on it.
Leave a Reply