The Highlighter Pen in OneNote are tools that individuals can use to handwrite notes or draw into their notebook displaying an ink look. The pen can be customized in various colors and thicknesses to your liking.

How to use the Highlighter Pen in OneNote?
To use the highlighter pen in Onenote, follow the steps below:
How to draw using the OneNote highlighter pens

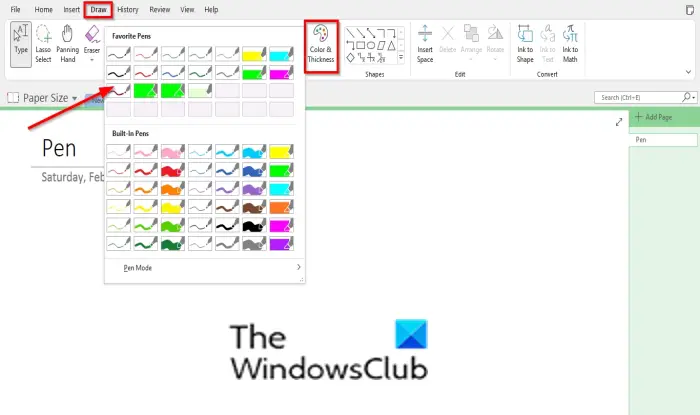
Click the Draw tab.
Click any of the highlighter pens in the Pen gallery; you can choose from the built-in section or the favorite section.
Draw into your notebook.

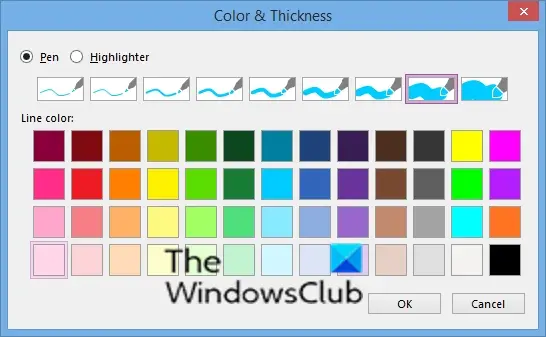
If you want the pen ink to have a particular shape outline or thickness, click the Color and Thickness button and select a color or thickness.
Then click OK.
Now, draw into the notebook.
The color and thickness you choose will add to your favorite section in the Pen Gallery.
How to use Pen Mode in OnenOte
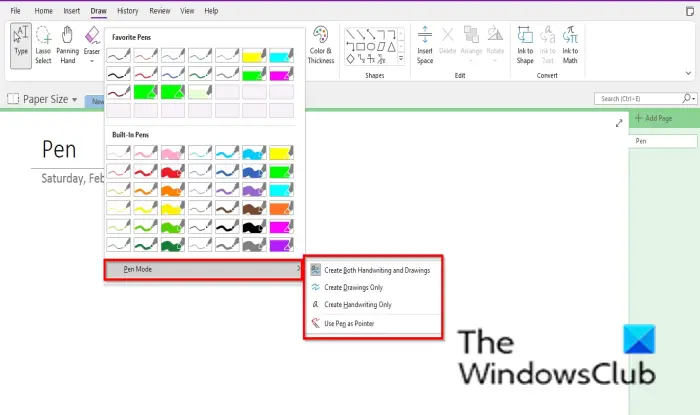
The Pen Mode available in the Pen Gallery lets you switch between the options, ‘Create both handwritings and drawings,’ ‘Create drawings only,’ ‘Create handwritings only’ and ‘Use pen as pointer.’
Follow the steps below to access the Pen Mode:
Click the Pen Gallery’s more button.

Hover the cursor Pen Mode and choose any of the options.
Depending on the option you choose, that’s what the command would do.
How do I make Highlighter straight in OneNote?
If you want a straight line to be highlighted, click the Draw tab, select a highlighter pen from the Pen Gallery, click a line shape from the Shapes Gallery, then draw the line into the notebook.
How do I move a drawing in OneNote?
To move an Ink drawing in OneNote is not difficult; follow the steps below to move a drawing in OneNote.
- After drawing in your notebook, press ESC.
- Take your cursor and move it across your drawing.
- Now, the Drawing is inside a box.
- Hover the cursor over the drawing in the box until you see a double-cross arrow.
- Move the drawing.
If you have questions about the tutorial, let us know in the comments.