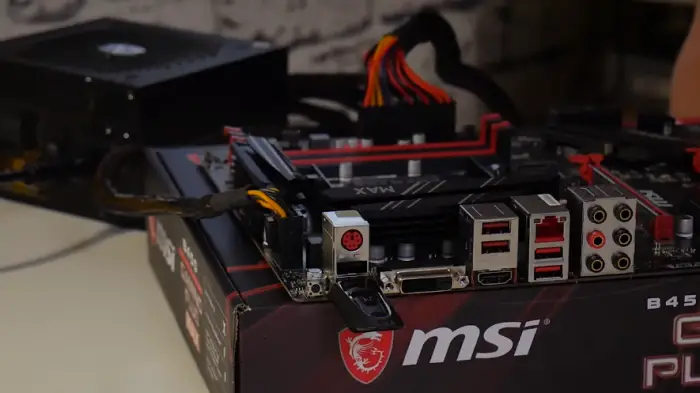
If you look at the back of your Windows computer, you may see a strange button. Chances are, it is the Quick Flash BIOS button, but not everyone knows what it’s all about. We tend to see the Quick Flash BIOS button on modern motherboards from the past couple of years ago.
The button usually enables the user to update the BIOS or UEFI on your particular motherboard without installing any form of hardware. This is great if you purchase a motherboard that does not yet have support for specific processors.
What is a BIOS Quick Flash?

We expect most people to already have an idea of what a motherboard is. You should also know the type of motherboard inside of your computer. The button is primarily there for users to update their motherboard. If your motherboard now supports a particular CPU, you will have to update it, and that’s where the button comes into play. Both AMD and Intel processors support this BIOS Flash button, and that’s a good thing since these chips are the leaders in the space.
How to use the Quick Flash BIOS button on your computer?
From what we can tell, the BIOS Flash button is effortless to use. Still, there are some things you should take into consideration. For example, the button itself must be marked clearly on the motherboard in order for users to tell if it is the BIOS Flash button.
Not only that but in most cases, this button is found close to or in the I/O area.
Note that the processing of using the button is not the same for all hardware manufacturers. However, we will discuss general ways to use the BIOS Flash button in hopes it works well for you without issues.
- Go to the manufacturer’s website
- Rename BIOS file
- Be sure to have a USB 2.0 drive
- Set drive to use FAT32 file system
- Copy BIOS file to the USB drive
- Update your BIOS using the Flash button
1] Go to the manufacturer’s website
The first thing you should accomplish here is to fire up the manufacturer’s manufacturer’s official website, where you must download the BIOS file and be sure it is the correct one for your motherboard.
2] Rename BIOS file
Once you’ve downloaded the file, please go ahead and extract it from the archive. From there, rename the file name to [manufacturer name].bin. Now, some manufactures may tell you which name to use from within their official instructions file.
3] Be sure to have a USB 2.0 drive
You will need to equip yourself with a USB 2.0 thumb drive. We recommend 32GB in size or smaller, and it must always be of the USB 2.0 variety unless the manufacturer requires something else.
4] Set drive to use FAT32 file system

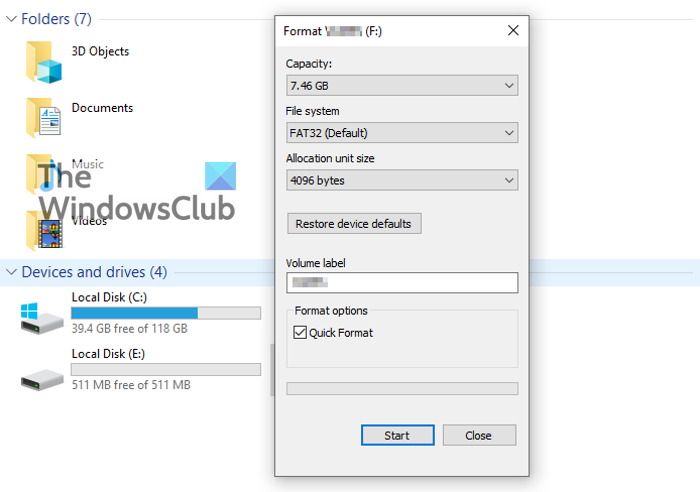
Additionally, the thumb drive must use the FAT32 file system over all else. By default, most such drives are set to FAT32 by default, but if yours isn’t. then right-click on the drive after inserting, then select Format. After that, go to File System and choose FAT32.
Finally, check Quick Format, then hit the Start button to get things moving. If the drive is empty, then the task should only take a few seconds.
5] Copy BIOS file to the USB drive
After completing the quick Format of the drive, you must now copy the renamed BIOS file directly to the thumb drive’s root.
6] Update your BIOS using the Flash button
The final step here is to plug the thumb drive into the USB port close to the Flash button, then from there, press the button and wait for the task to complete.
Bear in mind it might take up to 10 minutes for the update to complete, so please try not to forget.
How to Flash BIOS from USB with Flash button?
To flash BIOS from USB with a Flash button, you need to obtain a USB device first. Then, format it to FAT32 format and copy all BIOS files to the USB drive. Next, you need to use the Flash button to update your BIOS. No matter whether you use Windows 11, Windows 10, or any other version, you can use the same steps to get the job done.
That’s all! Hope it helped.
Read: Chipsets and Motherboards that support Windows 11 operating system.
Leave a Reply