The Shadow/Highlights effect in Photoshop is an easy way to fix your photos. If you take or edit photos, you will find that they will sometimes need some correction. Learning how to use the Shadows/Highlights effect in Photoshop is a great easy way to edit photos.
The Shadows/Highlights effect will brighten or darken parts of images based on your adjustments. The Shadows/Highlights Will help in images that have a bright background and you need to brighten the subject. You can also adjust images that are looking a bit washed out.
If you want to get creative, you can also use the Shadows/Highlights effect to make some interesting changes to photos. You can make certain colors more vivid while making others more subtle. You can be creative with the different elements and make creative changes to your photos.
How to use the Shadow/Highlights effect in Photoshop
The Shadows/Highlights effect is an easy way to adjust your photos. It can be used to lighten dark areas of a photo or adjust washed-out portions. Take these steps to use the Shadows/Highlights effect in Photoshop to adjust your photos.
- Open and prepare Photoshop
- Place the photo in Photoshop
- Make the image a Smart object
- Go to Shadows/Highlights
- Adjust the Shadows/Highlights sliders
- Save the photo
1] Open and prepare Photoshop
This is the step where you will open and prepare Photoshop for the procedure. Click on the Photoshop icon to open Photoshop. You will then click File then New or Ctrl + N to open the New document options window. you will then choose the options that you want for the new document and press Ok. A blank canvas will be created where you can place the photo that you want to edit.
2] Place the photo in Photoshop
There are a few ways to place the photo in Photoshop. Since you have created the canvas in the above step, you can drag the photo onto the canvas. To do this, find the photo on your device, click + hold + drag into Photoshop. Your photo may be larger or smaller than the canvas so you need to resize it.
You can also place the image in Photoshop by right-clicking on the photo and then clicking Open with then Photoshop (version).
You can also open the image in Photoshop by opening Photoshop then going to File then Open or press Ctrl + O. When the Open dialogue window pops up, search for the image, click it, and press Open. Your image will be placed in Photoshop but it will be placed in a separate document, from the new document you created, you can just click it and drag it onto the precious document. you can also choose to just work on it right where it is.
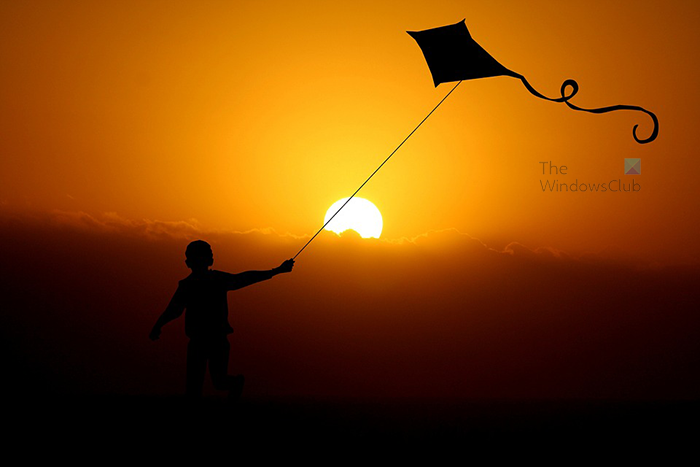
This is the photo that will be used to demonstrate how to use the Shadows/Highlights effect in Photoshop.
3] Make the image a Smart object
The Shadows/Highlights effect will make destructive changes to the photo. These changes cannot be undone when you close out Photoshop. The best way to make the changes is to either duplicate the image or make the image a Smart object.
Make the image a Smart object
To make the image a Smart object, go to the layers panel then right-click on the image.
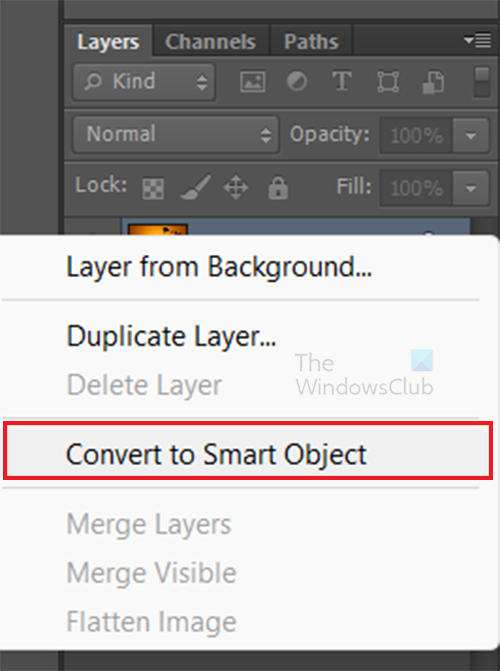
A menu will appear select Convert to Smart Object. The image will be converted to a smart object and you will see a little square symbol appear on the thumbnail of the image. making the image a smart object will preserve the image, the Shadows/Highlights effect will automatically be placed on a Smart filter layer that will be placed below the image layer. Below the smart filter layer, you will see the Shadows/highlights effect. Another advantage of making the image a Smart object is that you can edit the Shadows/Highlights effects later. Just click on the effect in the layers panel.
4] Go to Shadows/Highlights
Read: How to make Natural Shadow for a composite image in Photoshop
Now that the photo is in Photoshop and you are satisfied with it, you can now start the Shadows/Highlights effect.
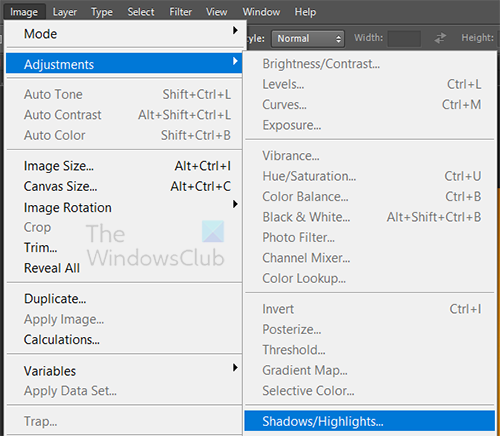
Select the image then go to the top menu bar and click Image then Adjustments then Shadows/Highlights.
When you click the Shadow/Highlights you will see the Shadow/Highlights menu appear. You will also notice that the photo changes immediately.
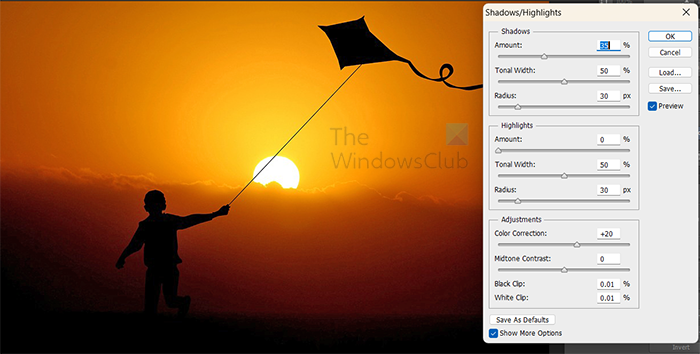
These are the default settings in the Shadow/Highlights options menu. The photo will be changed according to these settings. You can make changes to the different slides to adjust the Shadows/Highlights of the photo.
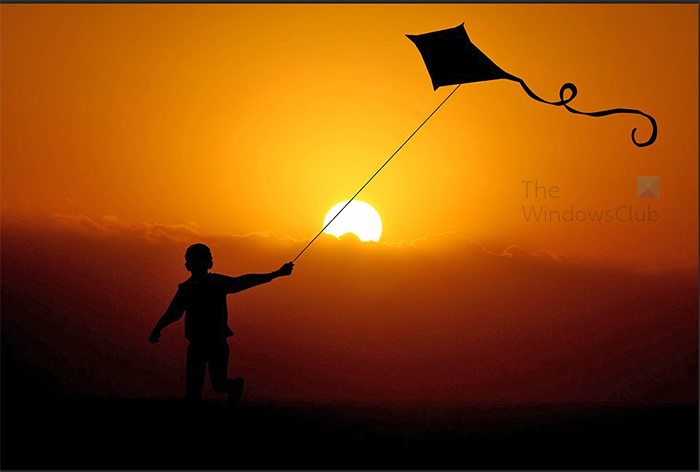
This is the image that is changed based on just the default Shadows/Highlights settings.
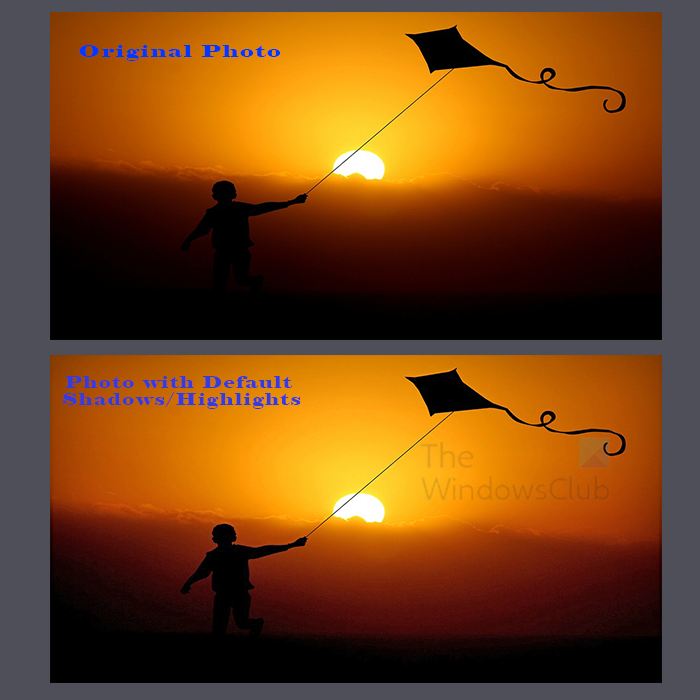
This is an image showing the photo before and after the default Shadows/Highlights was added. You will notice that you can see the subject’s outline much clearer. If you want to make more changes, you can adjust the sliders for each.
5] Adjust the Shadows/Highlights sliders
Now that you are adjusting the shadow and highlights you may want more changes than the default settings offer. make sure that Show more options is selected on the Shadows/Highlights options window.
Shadows/Highlights Options window categories

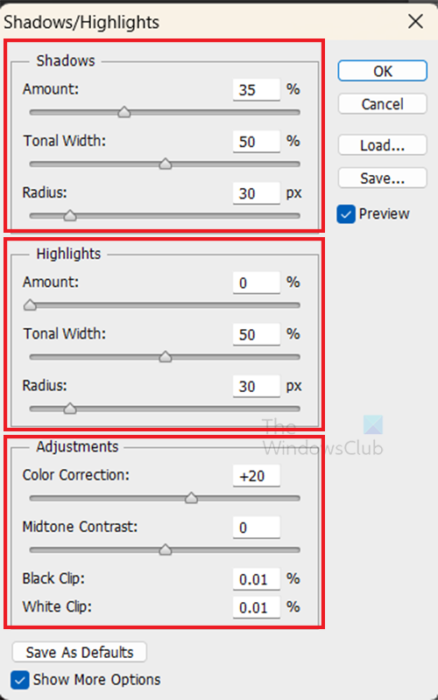
The Shadows/Highlights options window is divided into three categories, Shadows, Highlights, and Adjustments. These groups have sliders to adjust the highlights, shadows, and other aspects of your photo.
You can Save or Load the Shadows/Highlights setting that you want to use on your photos. If you have a Shadows/Highlights settings that you like, you can save it and then load it whenever you want to use it again.
The Shadows category
In this category, the sliders will adjust the shadows of the photo. The three categories are Amount, Tonal Width, and Radius.
Amount
The Amount subcategories will decide the amount of shadow that comes out in your image depending on the value you choose. When you just open the Highlights/Shadows options, the default Amount in the Shadows category is 35. You can adjust the sliders until you are satisfied with the result. Different results will depend on the image and also the settings of the other sliders in this and the other categories. After adjusting other sliders, you may still need to come back and finetune.
Tonal Width
The Tonal Width when adjusted will make darker or brighter shadows come up depending on the value you choose. A value below 50% will make shadows darker. A value above 50% will make shadows brighter. The default value is 50%, you should adjust it according to your image and what you want it to look like.
Radius
The radius will make adjustments to the shadow based on the pixels around it. the bigger the radius percent, the more pixels will be analyzed. The default value for the radius is 30%. Adjust until you get the look that you want in your photo.
The Highlights category
The Highlights category controls the lighter parts of your photo. The three subcategories of the highlights category are Amount, Tonal Width, and Radius.
The Amount subcategory will control how dark or how light the lighter part of your image gets. The default value is 0. As you go above 0, the lighter sections of the photo will get darker.
The Tonal Width subcategory will make highlights in your phone get darker or lighter. The default value is 50%. If you go below 50% it will show darker ad above 50% it will get lighter. This subcategory may not seem to make any difference in some photos.
The Radius subcategory will adjust the highlights depending on the neighboring Pixels. The higher the Radius percentage, the more pixels will be analyzed.
The Adjustments category
In the Adjustments category, you can make further adjustments to the photo. The subcategories in the adjustments category are Color correction, Midtone contrast, Black clip, and White clip.
Color correction
The default value for color correction is +20. As you adjust you will see the colors change. The lower you go you see the light areas getting a bit darker and the higher you go the color areas get lighter.
Midtone contrast
The midtone contrast subcategory affects the contrasts in the photo. When you go lower the colors and blacks get softer, the higher you go they get more rigid and you can see the contrasts get more obvious. The default value is 0.
Black clip
The Black clip subcategory will increase the black colors in the photo. The default is 0.01%.
White Clip
The White clip subcategory will adjust the white colors in the photo based on the percentage you choose. The default value is 0.01.
6] Save the photo
Now that you have adjusted the Shadows/Highlights of the photo, you will now save all that hard work. First of all, you will want to save it as a Photoshop PSD so that you can edit it later if you need to. Go to File then Save as or press Shift + Ctrl + S. When the Save as dialogue appears, choose a file name then make the file format Photoshop (.PSD PDD).
Save for sharing and using online
Now that you have saved it as a Photoshop PSD it can be edited later. You now need to save the photo in a format that you can share or use online. The best file format to use for these are JPG or PNG. You would go to File then Save as or press Shift + Ctrl + S. When the Save as dialogue appears you can choose to give the file a name. You would then go to the Format section and choose JPG or PNG.
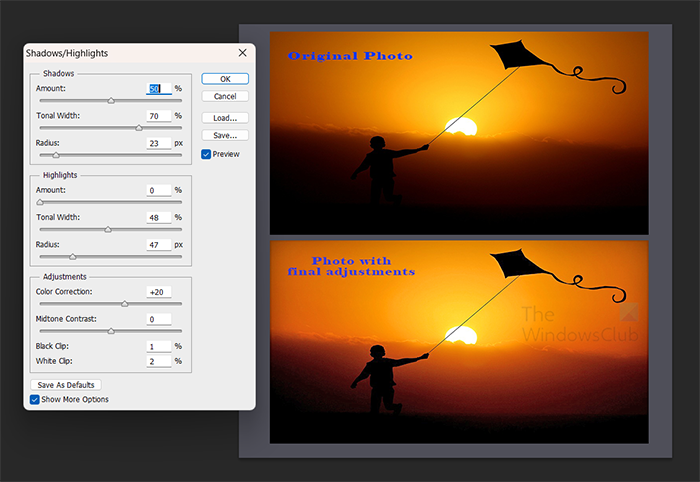
This is the original and final image with the Shadows/Highlights adjustments that were used.
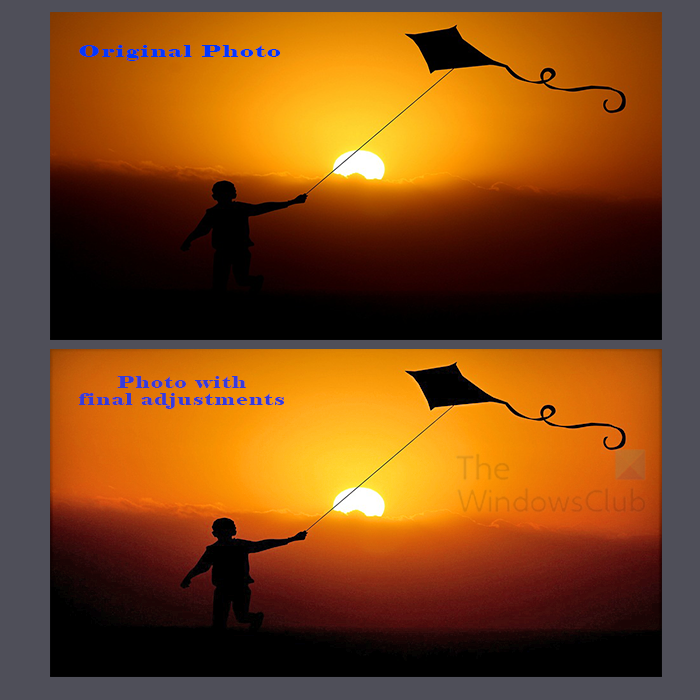
This image shows what the image looked like before and then after the Shadows/Highlights were adjusted.
Read: How to get Realistic Shadow for an Image in Photoshop
How do I add a drop shadow to an image in Photoshop?
To add a drop shadow to an image in Photoshop, select the images in the layers panel. Right-click on the layer then choose Blending options from the menu that appears. The Layer style window will appear, click on the word Drop shadow. You can then select and adjust the options that you want for the drop shadow. When you are finished, press Ok to keep the changes.
How can shadows make an image more realistic?
Adding shadows to your images in Photoshop can make them look more realistic. Shadows help t make images look more realistic because we naturally look for shadows to form whenever there is a light source. Placing shadows in the correct position relative to the light source makes the image more realistic.
Leave a Reply