The Slide Master is a feature that is used in Microsoft PowerPoint whose purpose is to control the look of the presentation’ including fonts, colors, backgrounds, effects, or anything else that you include in your slide. You can also insert a shape or logo on a slide master, and it will show up in all the slides with the same layout. The Slide Master feature in Microsoft Power helps with the consistency of your slides, especially if you want the same fonts, heading, and colors to all your slides in your presentation.
How to use Slide Master in PowerPoint
To use the Slide Master feature, follow the steps below:
- Launch PowerPoint
- Click the View tab
- Click the Slide Master button
- Customize the Master Slide
- Click the Close button on the Master Slide tab.
Launch PowerPoint.
Create some slides in your presentation.
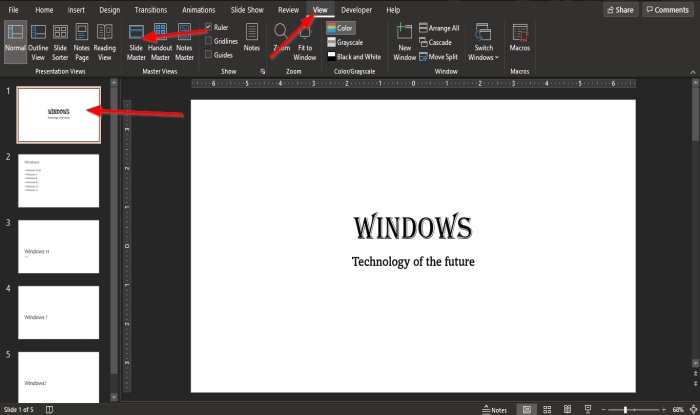
We will click the first slide in the presentation.
The first slide is a Title Slide.
Click the View tab.
Click the Slide Master button in the Master View group.
A Slide Master tab will appear on the menu bar.
The Slide Master tab will showcase features available to customize your slides, such as Fonts, Themes, Colors, Effects, and Background Styles. You can also insert Placeholders such as Text, Picture, Online Pictures, Charts, SmartArt, and Media.
The Slide Master is the navigation pane on the left of the Slide Master window. The slide on the top of the Slide Master navigation pane is the slide selected in your PowerPoint presentation.
Each slide in the Slide Master navigation pane represents a slide in your presentation.
We want to change the font and background color for the slides in the first slide layout.
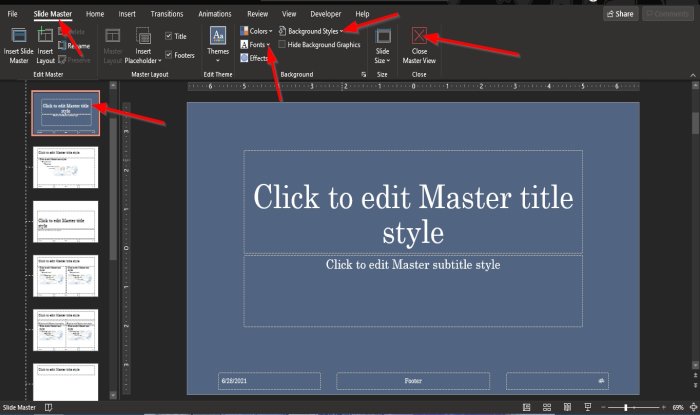
Click the Font button in the Background group and select a Font.
Then click the Background Styles button also in the Background group and select a background color.
Then click the Close Master View button on the right in the Close group.
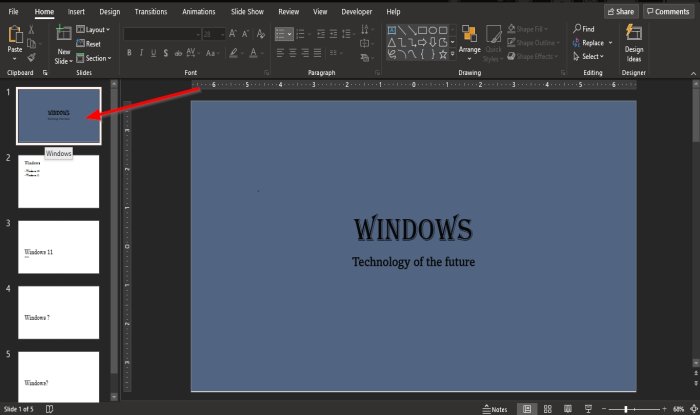
You will notice that the first slide is the only slide background that has change and not the others, and the font you have selected in the Slide Master View is displayed in the other slide layouts in the presentation except the first slide, which is a Title Slide layout; the reason for this is because the Title Slide layout has a different font from the others and a different layout.
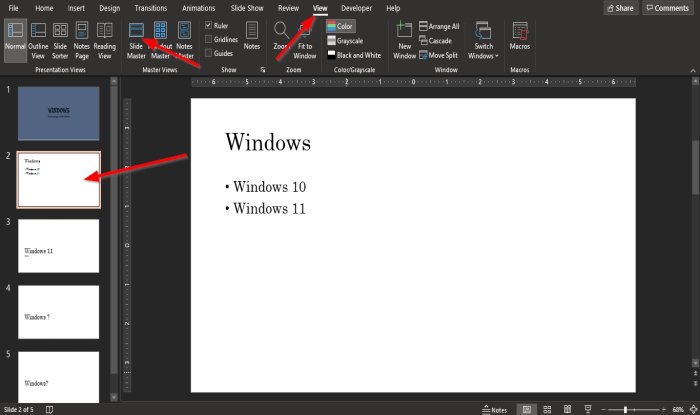
We are going to select the second slide in the presentation.
We will click the View tab again and click the Slide Master button.
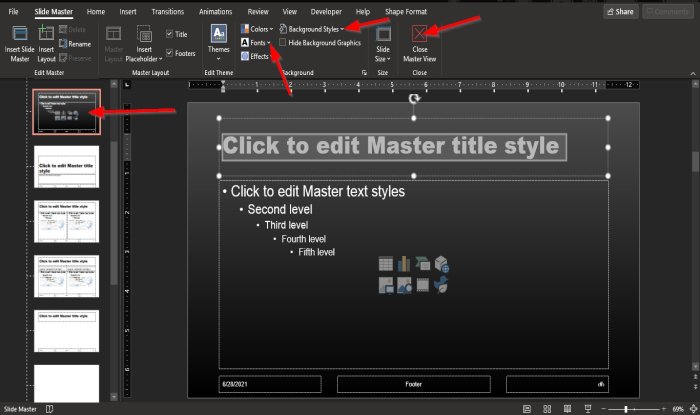
Change the font and background color in the Slides Master window.
Then click the Close Master View button.
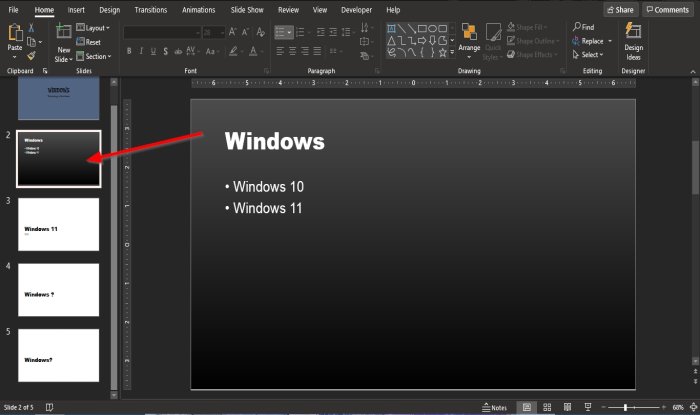
In the second slide, which is the Title and Content layout; you will notice that the background color and font has changed; the font for the other slides below the second slide has also changed because the second slide and the other slides below did have the same font but not same layout.
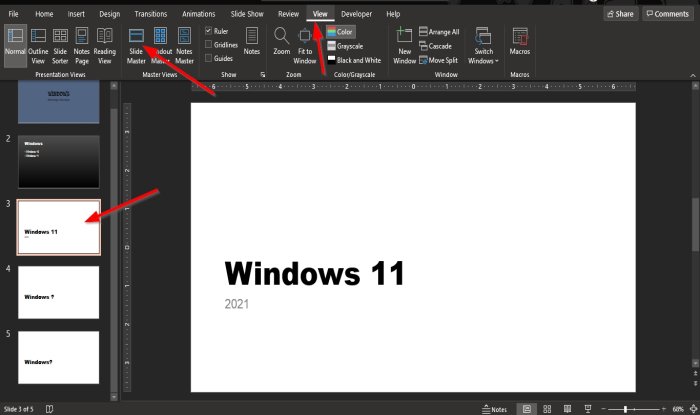
Now we will select the third slide, which is a Section Header layout.
Then go to the View tab and click the Slide Master button.
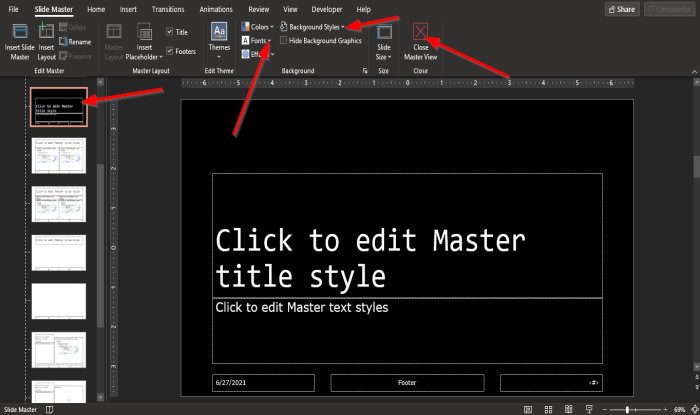
On the Slide Master window, choose a font and a background and click the Close Master View button.
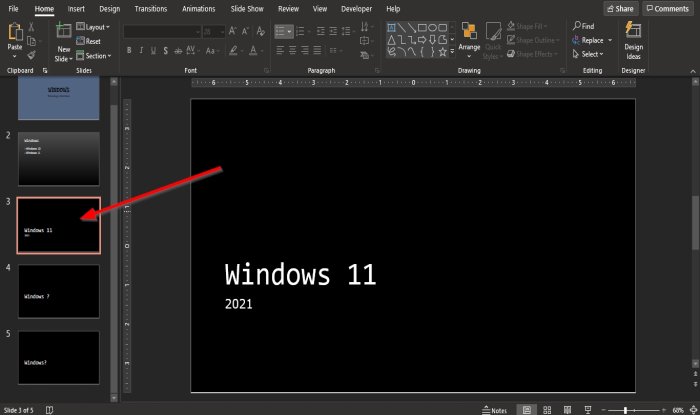
You will notice that the background for the third slide and the slides below change, and the font are the same; the reason for this is because the slides below are the same layout as the third slide.
We hope this tutorial helps you understand how to use the Slide Master in PowerPoint.