The photographer’s best friend after the camera is photo editing software. The photo may look lovely when you aim and shoot but when you download it on the computer, there may be things that need fixing. One thing that may be off is the straightness of the Photo. You may not be able to go and retake the photo so the next best thing is to use software to fix the issue. Photoshop offers lots of tools and features that can be used to correct problems with photos. In this post,we will show you how to use the Straighten tool in Photoshop.
The straightening tool in Photoshop is quite easy to use. Note that there may be photos that are deliberately taken at an angle to add interest. however, if the photo is supposed to be straight but is not then learning how to use the straighten tool in Photoshop will help correct the issue. You just need to get the photo into photoshop then click the Crop tool to access the straighten tool and find a reference point in the image.
How to use the Straighten tool in Photoshop
- Place the image in Photoshop
- Convert the image to a Smart object
- Find reference lines in the image
- Select the Straighten tool
- Save
1] Place the image in Photoshop
The first step is to get the image into Photoshop. There are multiple ways to get the image in Photoshop. However, one simple way is to find the image on your computer, right-click on it, then click Open with then Adobe Photoshop (version). The image will be opened in Photoshop as a locked background image.

This is the image that will be straightened.
2] Convert the image to a Smart object
This step is optional but I would recommend it. The smart object will be edited non-destructively. This means that the original pixels and quality of the image will be saved. With a Smart object, you can also change the image used and replace it with another image quickly. The image that replaces the original Smart image will fit right in and be cropped or rotated on the same spot. The second image would also become a Smart object.
3] Find reference lines in the Image
Observe the image and see if it has any reference lines. Reference lines are lines that would be straight, these could be a light pole (vertical), the horizon, or a line of grass or trees (horizontal). The image just needs to have one of these or any good reference point. The image may also have too many reference points and these can throw off the image even more if it is straightened using one. In this case, it may not be wise to straighten the image. The image in its original state may be ok, however, straightening it based on one reference point may make it worse.
If you are not the photographer, you may not know if the image was deliberately taken at an angle. Some photographs are deliberately taken at an angle to add something interesting to the shot. If this is the case then it would not be wise to straighten it. If it is straightened, it might throw off the whole image.
In extreme cases, you may need to retake the photo. In retaking the photo you will have to ensure that you have the proper equipment to keep the image straight.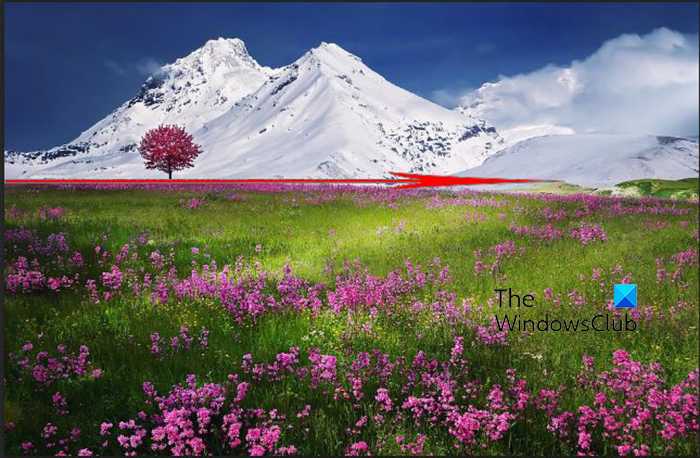
The Reference line in this image will be the line of pink flowers close to the mountain.
4] Select the Straighten tool
Now that you have decided to straighten the image, it is time to select the straighten tool. The straighten tool is not on the left tool panel, it is a feature of the Crop tool. You get the straighten tool when you click the Crop tool.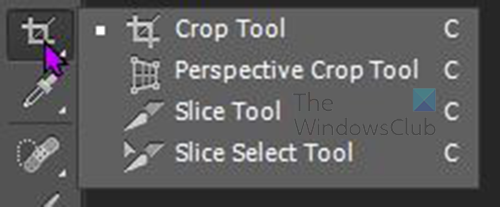
The Crop tool is located in the same group as the Perspective tool, Slice tool, and Slice select tool. If the crop tool is not the first tool displayed in the group then just click the group and hold, the group list will slide out and you can then select the Crop tool.
When you click the Crop tool you will see a crop mark appear around the image. this crop mark can be used to cut off a piece of the image or to add to the canvas size. Yes, you read right, the Crop tool can be used to add. The Crop tool can be used for more than just cutting, it can be used to Extend the canvas. You can use the Crop tool to add to one side or to all the sides of the canvas.
With the Crop tool selected, go to the top menu bar and click and you will see the Straighten tool. The straighten tool looks like the little vials/bubbles of liquid on a level tool.

When you have selected the Straighten tool, click the starting point of the reference line and hold and drag the line to the part that ends the reference line. Hold Shift as you drag to keep the line straight. You will notice that there is a little version of the straighten tool beside your cursor. You will also see the angle symbol and the angle measurement beside the cursor as you drag. The angle measurement will show if you are keeping the line straight. 0.0 shows that it is not up or down, a negative number shows that you are angling down and a positive number shows that you are angling up. You can correct it as you go along. If you want to keep the line straight, hold Shift as you drag to keep the line straight.
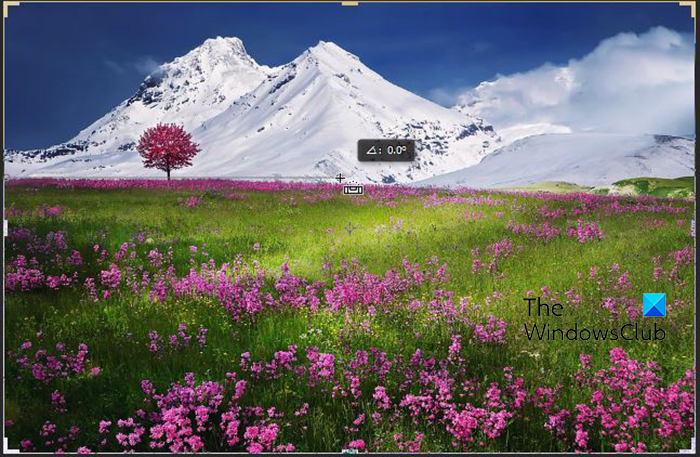
Look closely and you will see the Straighten line drawn at the reference line.
You may notice that as the line goes straight, it may eventually move away a bit from the reference line. This is ok because the reference line is not necessarily straight in all places. But the straighten tool’s line just needed a start and it will move straight. Depending on the way the photo was taken of what the reference line is, it will not be straight from beginning to end. However, keep the line of the Straighten tool straight to get the best result.
When you have reached the spot where you want to stop the Straighten line and you release the mouse button, you will see the image straighten and grids appear on the image. you will also notice that pieces of the image were cropped off. When you straighten an image, Photoshop will crop off the outer edges relative to how much the image has to be rotated to straighten it. This means that whenever to snap a picture, you would need to take extra spaces around it so that if you need to straighten it, the unwanted bits will be cropped off. You can always use Photoshop to cut off unwanted pieces even if you don’t need to straighten the image.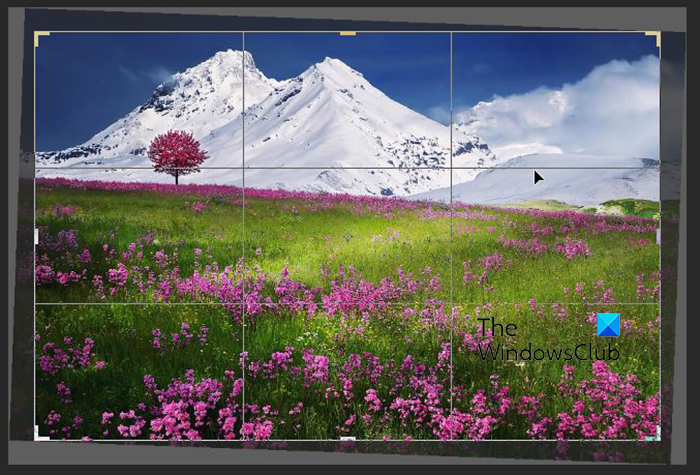
When you have released the mouse button, Photoshop gives a preview of how the crop will turn out. You will also see the image in the layer panel with the words Crop preview beside it. If you want to cancel just press escape and the image will not be cropped. If the straightening is not a lot, you may not notice a lot of changes in the image.

This is the straightened image.
5] Save
The easy work is done so it is time to save. You should first save as a Photoshop PSD file so that you can edit the file later. Go to File then Save as and name the file then file type as PSD and choose a location and save. You would follow the same steps but this time you would save the file as JPEG, PNG, or another file type. These other file types will flatten the image and it will not be editable. However, the PSD file will still be editable.
Read: How to convert Photo to Watercolor Painting in PhotoShop
Which other tools can be used to straighten images in Photoshop?
The Straighten tool is a feature of the Crop tool and this is usually used to straighten images. However, there are other ways to straighten an image. a combination of the Ruler and Guides can be used to straighten an image. you would place the image on the canvas in Photoshop then place the Guide from a certain point on the ruler. The guides would pass through the image then you could straighten the image according to the guide or guides.
What other purpose can the Crop tool be used for in Photoshop?
The Crop tool can be used to add extra canvas space to an image. when you place an image in Photoshop before you create the canvas the image becomes the background. This means you would be unable to make the canvas bigger without actually opening a new document or going to the top menu bar and extending the canvas. Well, the Crop tool can be used to extend the canvas, it can be used to extend a single side or all 4 sides. Click on the image then click on the Crop tool, and the crop mark will appear around the image. Click and drag the marks to extend the canvas around the image. you can click one of the edges where two lines meet and hold shift and drag to extend all four sides.
Leave a Reply