Photoshop with its wide array of tools and effects makes designing almost anything easy. However, there are times when your design does not turn out as you like. For example, you design artwork such as a text or shape with a gradient, you then warp the image, but you realize that the gradient does not warp. Instead of following the direction of the warp, the gradient keeps going straight. This post will show you how to make gradient text and how to make the gradient warp in the same direction as the text in Photoshop.

How to warp a Gradient with Text in Photoshop
In designing, keeping things uniform can make the work neat. When the gradient, does not follow the direction of the warp, it can make the design look less attractive. This is not the case with all gradients as some will blend in, however, gradients with straight lines of colors, like those that are reflected will show the problem. With Photoshop’s tools and a creative mind, the gradient can be made to follow the direction of the warp. Here is how the gradient can be made to warp with the text in Photoshop.
- Prepare Photoshop
- Write the text
- Apply gradient
- Apply warp
- Make the gradient follow the warp
1] Prepare Photoshop
The first step is to open Photoshop and then create a new document to work on.
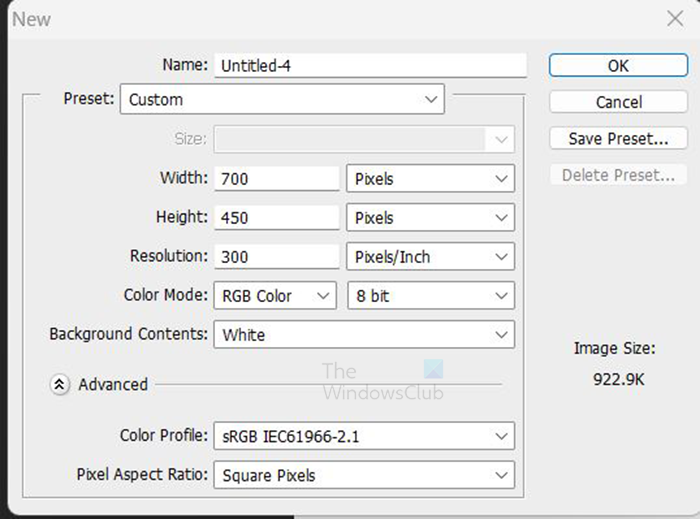
Open Photoshop and then go to File then New, fill out the New document options box, and press Ok to confirm your choices.
2] Write the text
The next step is to write the text that you want to work with.
To write the text on the canvas go to the left tools panel and click the Horizontal type tool. With the Horizontal type tool selected, click on the canvas, and a cursor will appear, type the word.
3] Apply gradient
The next step is to apply the gradient that you want to use. To apply the gradient to the text, select the text layer and go to the bottom of the Layers panel and click the Fx icon. When the menu appears, click Gradient. You can also right-click on the text layer and choose Blending options.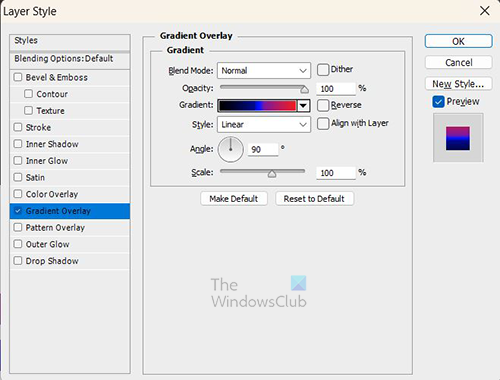
When the Layer style window appears, click on the word Gradient overlay on the left side of the window.
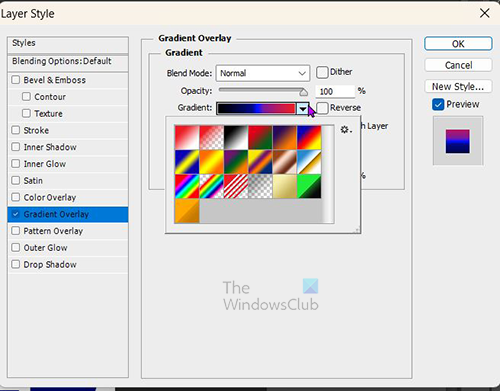
You then choose the gradient you want by clicking Gradient at the right of the window. a dropdown menu will appear with preset gradients and gradients that you may have saved earlier.
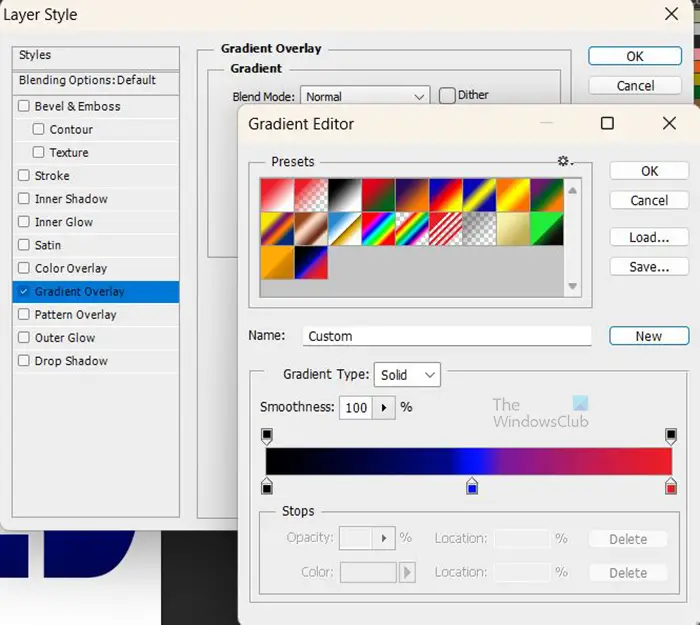
You can click one and modify it in the Gradient editor. When you have edited the gradient, you can choose to save it to use later by giving it a name and clicking New. The gradient will then be added to the list of available gradients.
This is the text with the gradient applied.
4] Apply warp
The next step is to apply the warp to the text.
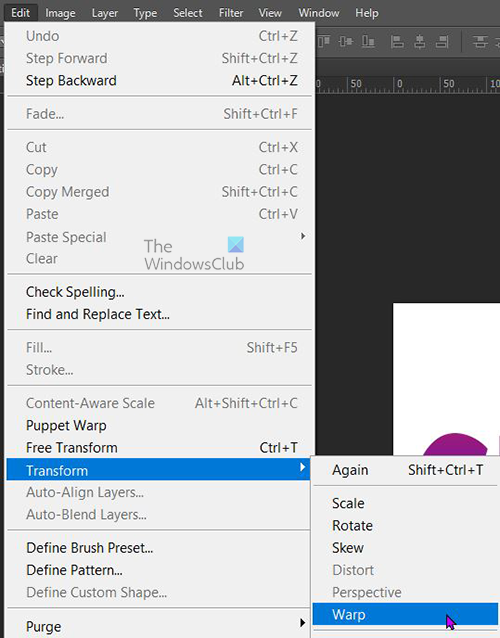
To apply the warp go to Edit then Transform then Warp.

The warp menu will appear on the top menu bar.
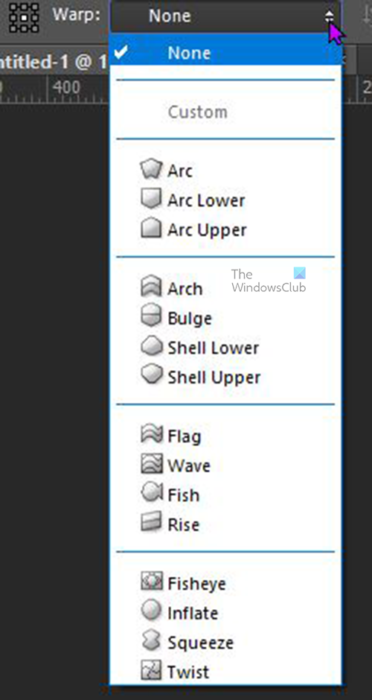
Click on the word None to make the drop-down with the other warp options appear. Click on the option that you want.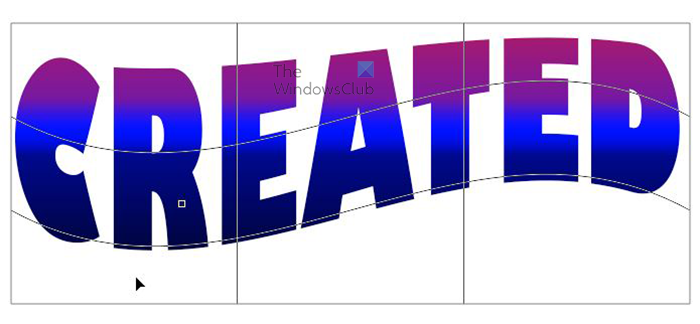
When you click on a Warp that you want, the warp transform grid will appear around the text and the text will be warped.
![]()
When you click on one of the Warp options, additional menu options will appear on the top menu bar. You can choose the Bend %, the Vertical distortion (V), and the Horizontal distortion (H).
When you are satisfied with the warp. Press Enter to close and confirm the changes.
You will notice that regardless of the warp style that is chosen the gradient stays the same. This is more obvious if your gradient has a straight line of color in it. if you compare the images before and after the warp you will see that the straight line of color is the same in both. This may not be an issue, but if you want to warp the gradient with the text, you will have to make some changes. The changes will have to be made before you apply the warp.
If you had already applied the warp you can undo it or change it in the History panel. However, if you had read through before making the warp then follow these steps without having to undo anything.
Making the gradient follow the Warp
Convert to Smart object
Before the warp is applied to the text, convert the text to a smart object.
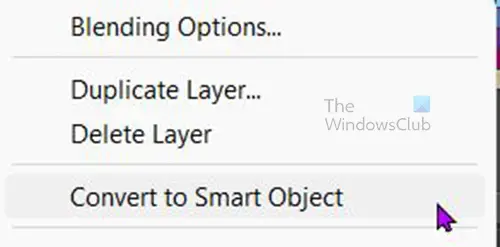
To convert the text to a smart object, right-click on the text layer and choose Convert to smart object. It will seem like nothing happened, or you may see a change in the gradient colors of the text. Look at the text layer and you will see an icon on the lower right of the text icon indicating that the text is now a smart object.
Warp text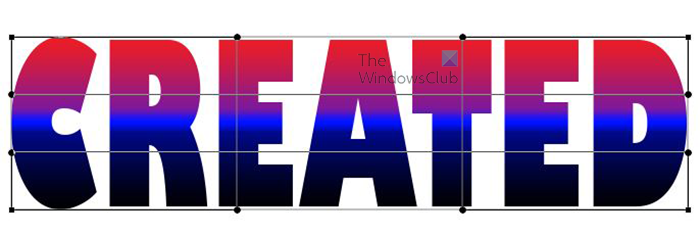
Once the text has been converted to a smart object, go to Edit then Transform then Warp. You will see the warp transform box appear around the text.

In the top menu bar, you will see the Warp option appear and Custom will be the preselected warp instead of None. With custom selected you can choose to drag the points on the transform grid and make your own changes.
You can also click custom to reveal the list of preset warps and choose one. When you have chosen a custom warp, you can also click make changes using your mouse to click and drag points. When you are finished, press Enter to keep the changes.
This is the Warped text that is a smart object, with the Flag warp style. You will notice that the color follows the direction of the warp. You can change the warp and see that the color will always follow the warp.
Change Text
You may want to make corrections to the text, however, you will notice that you cannot make any changes to the text by adding or removing letters. To make changes to the letters in the text, go to the layers panel and double-click on the image of the text layer. Click on the image (thumbnail) and not the word.
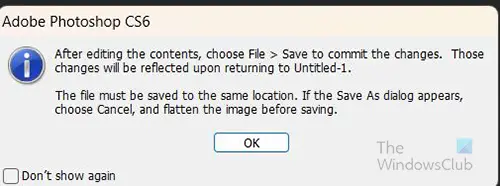
An instruction will pop up that tells you to click File and then Save to keep the changes. When you click OK, you will be taken to a new canvas with the text. You can make changes to the letters in the text there and other changes as well. When you are finished, you can click File then Save and move to the original document. You will see the changes there. This will also be the method that you have to use if you want to update the gradient. However, some changes can be made without having to do this method.

This is the text with the changes made to it. The word has been modified from Created to Creates and the gradient colors have been changed.
Read: How to insert Image into desired Shape in Photoshop
How can I make the gradient follow the direction of the warp in Photoshop?
- Open Photoshop and create a new document then add the text
- Add Gradient overlay to the text
- Convert the text to a Smart object
- Go to Edit then Transform then Warp from the menu choose the warp style
- When you have chosen the desired warp, press enter to keep it
How can I edit a Smart object?
To edit the smart object, double-click on its icon in the layers panel then press Ok on the instruction that will pop up. Edit the object in the new window that is opened. When you are finished editing go to File then Save. You can then go back to the original document and you will see the changes there. Some edits can be done without this method, but if you want to edit a text that is a smart object, this is the method to use.
Leave a Reply