In this post, we will show you how to download, install, and use the HP Smart app for Windows. We also show you how to uninstall or remove it if you do not need it.
When you plug in a new printer on your system, you need to install the printer software to enable your computer to communicate with the printer. HP Smart is a printer software developed by HP (Hewlett-Packard) that lets you set up and manage HP printers on your Windows 11/10 PC. It lets you scan, print, copy, and share documents directly from your system to your friends, colleagues, or a linked cloud account.
You can print over any network connection, check ink or toner levels, order print supplies, monitor printer status, get customer support, and manage your HP account directly from the HP Smart app. Apart from Windows, the app is also available for macOS and mobile operating systems (Android, iOS, iPadOS).
Unlike the HP Printer Assistant (another printer software by HP), HP Smart doesn’t get automatically installed with a printer driver. You need to manually download and install the app to use it on your system.
Download and Install HP Smart app for Windows 11/10 PC

The HP Smart app for Windows can be downloaded from Microsoft Store. Put your cursor in the Windows Search bar and type ‘store’. Click on Open next to the Microsoft Store app.
Next, type ‘hp smart’ in the Search bar on top of the Microsoft Store app window and select HP Smart from the search results. Click on the Download button on the HP Smart app page. The app will take a while to download and install on your system. Click on the Open button to launch the app.
Set up and manage HP printers
Before you start setting up the printer:
- Make sure the printer you’re going to set up is turned on.
- If you’re using a USB printer, connect the printer cable to your computer (if you haven’t already).
- If you’re setting up a printer on a Wi-Fi network, enable Wi-Fi setup mode for your printer (refer to your printer’s document for details). Then turn on Wi-Fi on your computer and connect it to your network. Also, enable Bluetooth to allow HP Smart to detect the printer during the setup.
- If you’re using a network printer (Wi-Fi or Ethernet), check for a solid blue light or icon to indicate a connection.
Initially, the app will ask for your permission to collect operational data from your system. You may accept or decline the app’s access to your device and continue further.
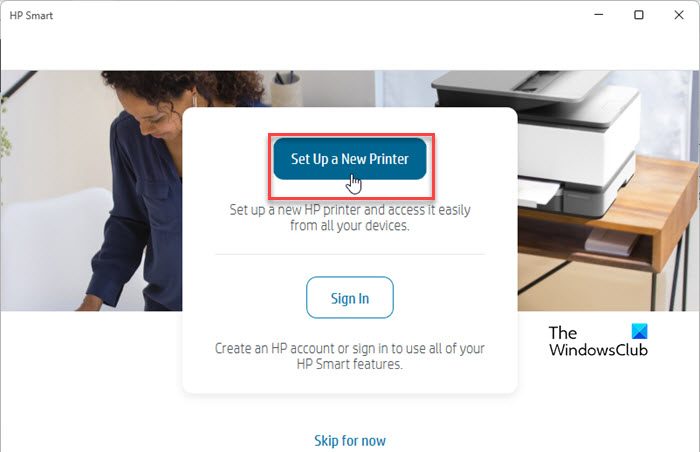
Next, click on the Set Up a New Printer button and sign in with your HP account. If you don’t have an existing account, click on the Sign up link. Then create your account and sign in to HP Smart to set up your new printer.
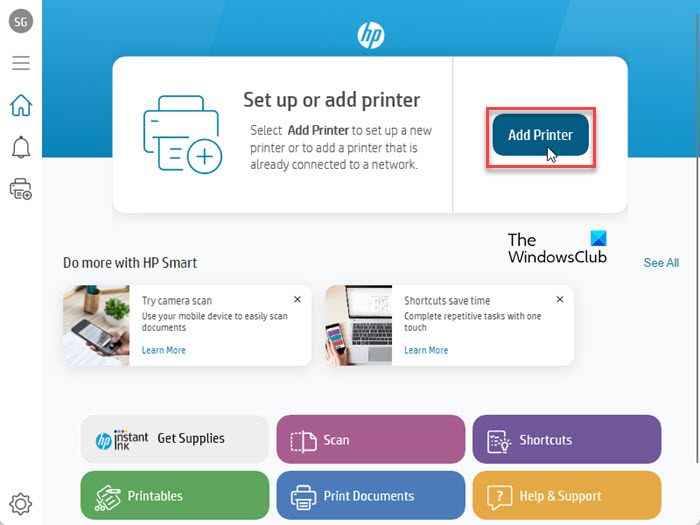
On the app’s home screen, you will see an Add Printer button. Click on that button. The app will start searching for available printers. Click on the printer you wish to set up.
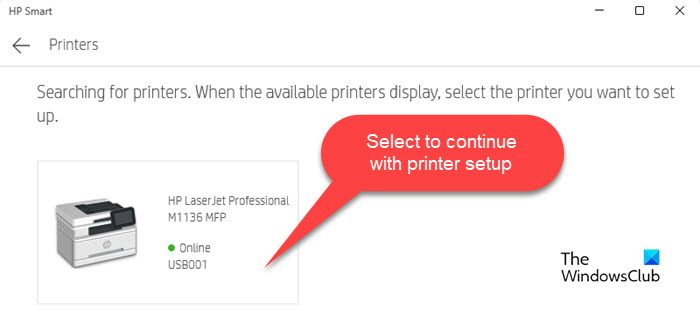
HP Smart will start getting the print driver information. Once the driver installation is complete, click on the Continue button.

After setting up the printer, HP Smart will return to the home screen. You can monitor your printer status (online/offline) from the app’s home screen or click on the Printer Settings button to see the printer status, printer information, network information, supply status, etc.
Read: HP Smart App not opening, working or detecting printer
Use HP Smart app to Print photos or documents
To print a document, click on the Print Documents button.
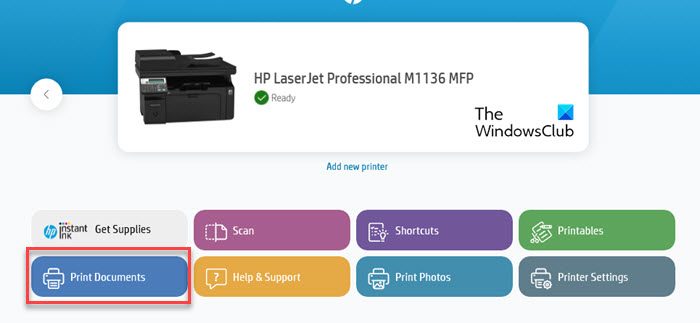
HP Smart currently supports printing PDF documents only. Browse and select the PDF you want to print, and click on the Print button.

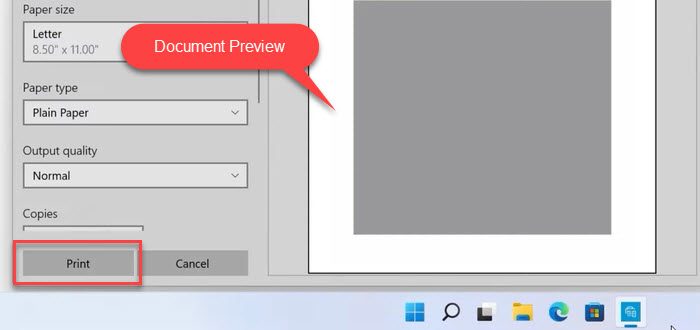
Adjust print settings if required (paper size, photo size, orientation, etc.) and click on the Print button on the document preview window.
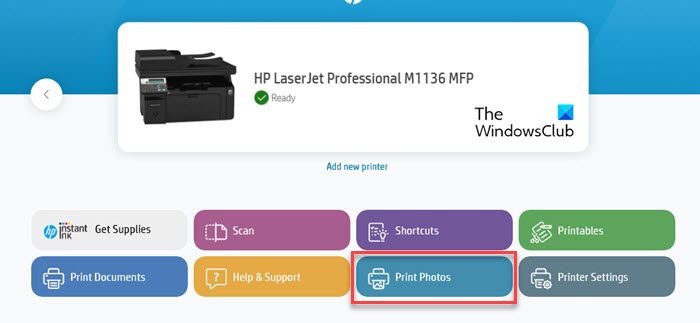
To print a photo, click on the Print Photos button on the app’s home screen. Then browse and select the photo you want to print and click on the Select Photos to Print button (you can select multiple photos at the same time).
You will see a preview of the photo(s). Adjust print settings (optional) and click on the Print button to print the photo(s).
Use HP Smart to Scan documents
HP Smart allows you to scan single or multiple documents and save them on your computer as a single PDF file.
To scan a document, place it under your printer’s scanner glass and click on the Scan button on the app’s home screen. Your printer will scan the document and show its preview in the HP Smart app. To add another document, click on the Add button in the top-right corner.
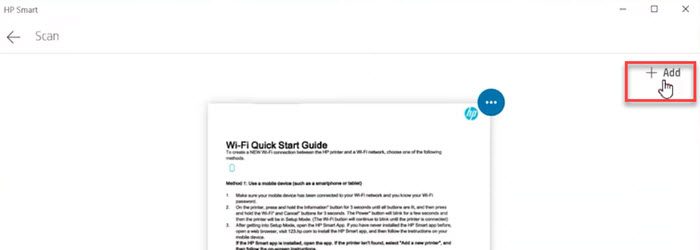
Then remove the old document from your printer and place the new document for scanning. Return to the HP Smart app and click on Scan in the bottom right corner. Repeat these steps for as many documents as you would like to add to your PDF.
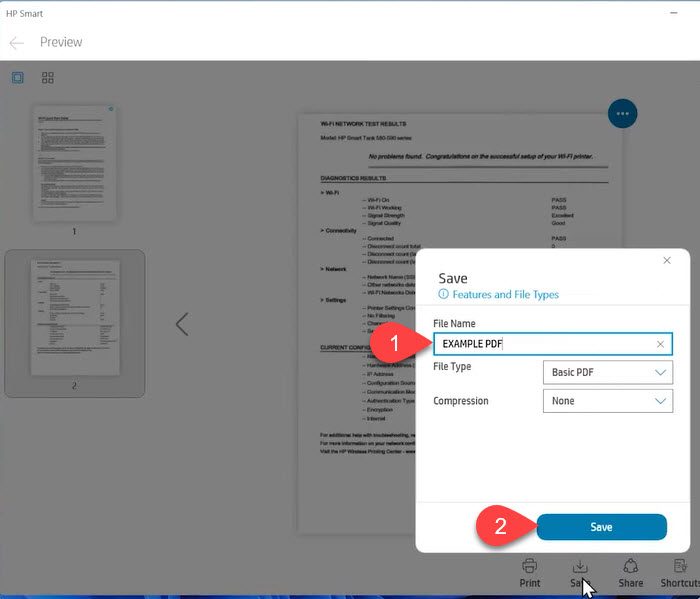
Once you’ve finished scanning, click on the Save button on the document preview screen. In the ‘Save’ dialogue, enter a suitable name for your PDF file and click on Save. In the ‘Save As’ dialogue, choose a location to save your PDF and click Save again.
To share the document, click on the Share button at the bottom of the document preview window.
Run Diagnose & Fix feature in HP Smart app to fix Printer problems
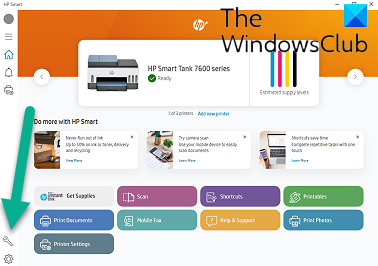
To run the Diagnose and Fix feature in the HP Smart app, open the app and then click the Diagnose & Fix icon in the bottom left corner. Next, click Start and then follow the on-screen instructions.
Use the Print Anywhere feature in the HP Smart App
This feature is available for selected printers only. It allows users to remotely send print jobs from any location if the printer and the computer are connected to a wireless network (not necessarily the same network).
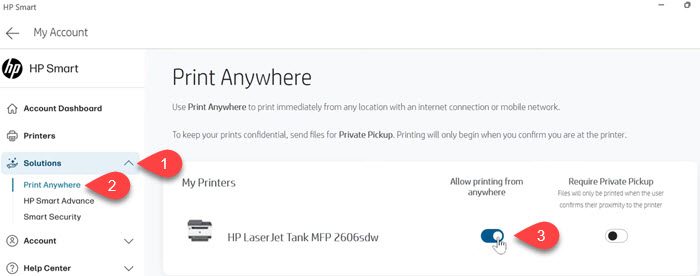
To enable Print Anywhere, click on the account icon in the top left corner of the app’s home screen and select Manage HP Account. In the left panel, select Solutions > Print Anywhere. Under My Printers, turn on the toggle next to the printer for which you want to enable the feature. A cloud icon next to the printer name on the app’s home screen indicates that Print Anywhere has been enabled on the selected printer.
Note:
- Make sure your printer and computer are connected to the same wireless network while enabling Print Anywhere for the first time.
- Print Anywhere is automatically enabled on all HP+ printers.
To use Print Anywhere, connect your computer to the available wireless network. Then go to the HP Smart app and select the printer for which you’ve enabled Print Anywhere. Select Print Documents/Print Photos and proceed with the printing job as explained above.
Remove the HP Smart app from Windows
To uninstall HP Smart from your Windows 11/10 PC, press the Windows key on your keyboard and go to Settings > Apps > Installed apps. Type ‘hp smart’ in the search bar on top. The HP Smart app will show up in the search results.
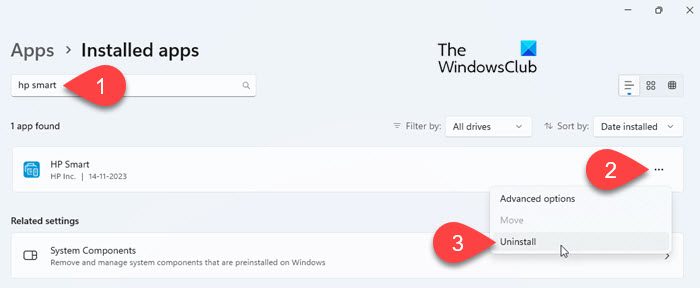
Click on the three-dots icon next to the app name and select Uninstall. Select Uninstall again to confirm the changes.
That’s it. I hope you find this useful.
Read: Fix Scanning or Feature is Unavailable errors in HP Smart app.
How do I add HP Smart App to desktop in Windows 11?
To add HP Smart for Windows to your desktop, click on the Start button icon in your taskbar and go to ‘All apps‘. Scroll down and locate HP Smart in the list of available apps. Click on HP Smart and drag it to your Windows 11 desktop to create a shortcut for the app.
How do I install HP printer on Windows 11?
If it is a USB printer, plug it into your computer and allow it to connect. Your PC will automatically install the required drivers. If it is a wireless printer, go to Settings > Bluetooth & devices > Printers & scanners. Click Add device next to the Add a printer or scanner option. Your system will start searching for available printers. Select your printer and click on the Add device button. You can also use the HP Smart app to set up HP printers on your Windows 11 PC.
Read Next: Wi-Fi Printer setup using USB fails with the HP Smart app.
Leave a Reply