If you are getting Hyper-V encountered an error while copying virtual hard disks to destination folder while importing a virtual machine, check out these tips and tricks to get rid of this issue. It appears when you have a corrupted virtual machine hard disk in the exported folder.

The entire error message says:
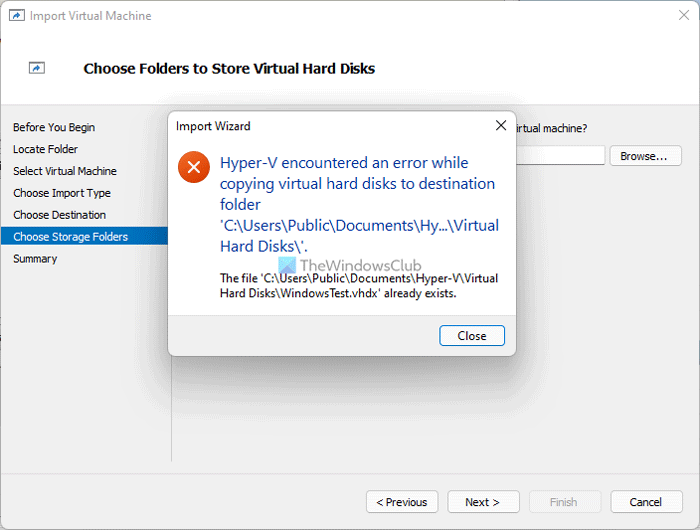
Hyper-V encountered an error while copying virtual hard disks to destination folder ‘C:\Users\Public\Documents\Hyper-V\Virtual Hard Disks\’.
The file ‘C:\Users\Public\Documents\Hyper-V\Virtual Hard Disks\file.vhdx’ already exists.
This error message could be slightly different on your computer.
What causes Hyper-V error while copying virtual hard disks?
Depending upon the error message you are getting, there could be two primary reasons:
- You already have a virtual hard disk named after the same title you are trying to import into Hyper-V. Let’s assume that you have a virtual hard disk named ABCD.vhdx. On the other hand, you are trying to import a virtual machine, which has the same virtual hard disk name. In such a situation, you could get the error as mentioned here.
- The virtual hard disk you are trying to import is corrupted, or not there in the selected folder you exported from Hyper-V.
The first reason is valid when you try to import a virtual machine on the same computer from where you exported the virtual machine. If the same virtual machine is still available in Hyper-V, you could get the error. However, if the second reason is valid, the solution is comparatively easier for you. You need to re-export the virtual machine and ensure the exported folder is intact until the import process is complete.
Hyper-V encountered an error while copying virtual hard disks to destination folder
To fix Hyper-V encountered an error while copying virtual hard disks to destination folder error, follow these steps:
- Delete existing virtual machine
- Re-export virtual machine
To learn more about these steps, continue reading.
1] Delete existing virtual machine

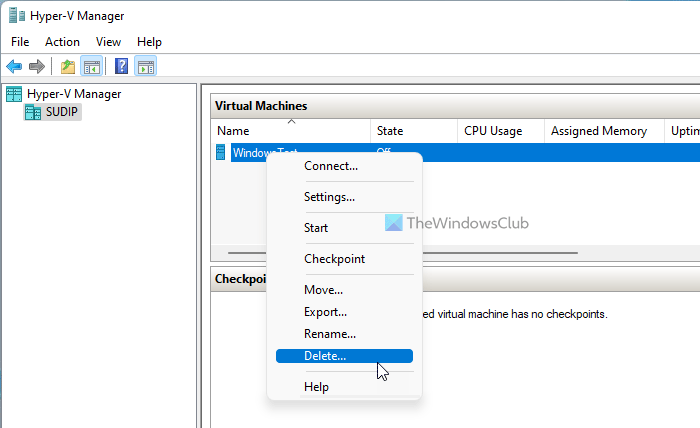
As mentioned earlier, if you have a virtual hard disk (or virtual machine) with the same name as you are trying to import, you might get this error. The simplest solution is to remove the existing virtual machine from Hyper-V before importing the new virtual machine. To delete a virtual machine from Hyper-V, do the following:
- Open Hyper-V Manager on your computer.
- Select the virtual machine you want to delete.
- Right-click on it and select the Delete option.
- Click on the Delete button.
After removing the virtual machine and all the associated files from your computer, you can follow this guide to import virtual machines in Hyper-V.
2] Re-export virtual machine

Although it is not common, your exported virtual machine files may be corrupted due to a malware or adware attack. In such a situation, you need to scan your computer for malicious files. Once that is done, you can export the virtual machine again. To do that, follow these steps:
- Open Hyper-V Manager on your computer.
- Select the virtual machine you want to export.
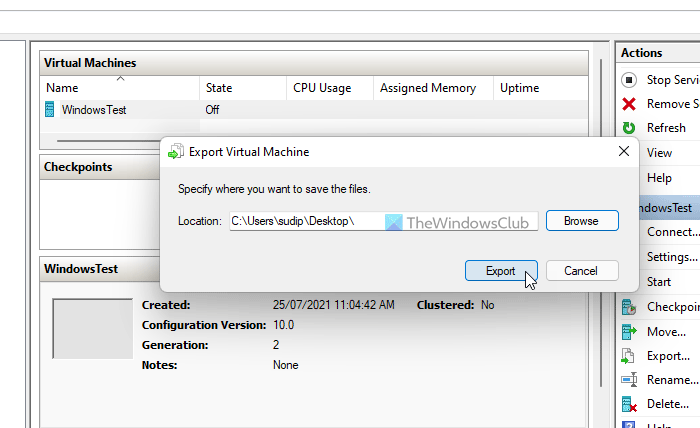
- Click on the Export button visible on the right sidebar.
- Choose a location where you want to export the files by clicking the Browse button.
- Click the Select Folder button.
- Click the Export button.
After that, you need to delete the existing virtual machine with the same name before importing it on the same computer.
Hyper-V encountered an error while loading the virtual machine configuration
If you get the Hyper-V encountered an error while loading the virtual machine configuration error while importing virtual machine, you delete the old virtual machine and create a new unique ID. If you do not want to delete the virtual machine, you need to choose the Copy the virtual machine option in the Choose Import Type page.
That’s all! Hope this tutorial helped you fix the virtual machine import error in Hyper-V.
Read: How to Install Windows 11 using Hyper-V in Windows 10.