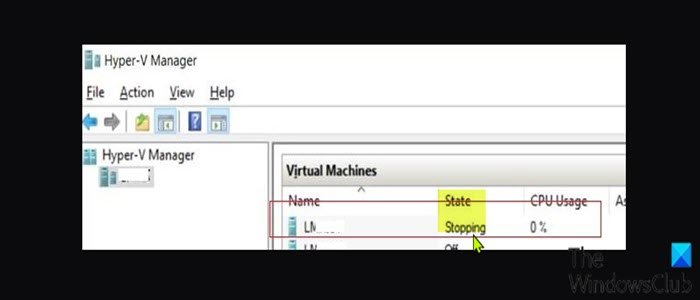
One of the numerous Hyper-V issues some PC users may encounter is when the virtual machine gets stuck in the Stopping state on their Windows 10 or Windows 11 computer. This post provides the most suitable solutions affected users can try to resolve the issue successfully.

The error messages you could see are:
Failed to restore virtual machine state. Virtual machine could not be started because the hypervisor is not running.
OR
Failed to change state. The operation could not be performed while the object is in its current state
The most likely culprits to this error include-
- Outdated version/build of Windows OS host.
- Storage Failure.
- RRA service misconfiguration.
- Windows Power Options.
How do I force stop a VM in Hyper-V?
To force-stop a Virtual Machine (VM), follow these instructions; on the server where the virtual machine is running, open the Task Manager, navigate to the Details tab. Now, locate the vmwp.exe process that has the GUID for the user name virtual machine then select and click End Task to force the shutdown. Confirm the action by clicking the Stop Process button.
Hyper-V Virtual Machine stuck in Stopping State
If your Hyper-V Virtual Machine is stuck in Stopping State, you can try our recommended solutions below in no particular order and see if that helps to resolve the issue.
- Kill the Virtual Machine process
- Change Power options
- Disable Routing and Remote Access (RRA) Service.
Before you try any of the solutions below, the easiest and quickest way to resolve the issue is simply by rebooting the Windows host machine. Once you have rebooted the host machine, the VM will clear out and start normally. Also, check for updates and install any available bits on your Windows 11 device as the issue might also be caused by a Windows bug which is often patched in subsequent CUs.
1] Kill the Virtual Machine process
This solution requires you to identify the GUID of the problematic VM, assuming you’re running multiple VMs, and then kill the process in Task Manager. However, if you have a single virtual machine running on the host machine, you don’t need to identify the GUID because the Virtual Machine Worker Process or vmwp.exe won’t be listed multiple times – in this case, simply open up Task Manager and kill the only vmwp.exe process listed there.
To kill the Hyper-V Virtual Machine stuck in Stopping State on your Windows PC, do the following:
- Press Windows key + X to open Power User Menu.
- Then press I on the keyboard to launch PowerShell.
- In the PowerShell console, type in or copy and paste the command below and hit Enter. Substitute the <VMname> placeholder with the actula name of the problematic VM.
Get-VM <VMname> | fl *
- Now, make a note of the VMId as you will need this to identify the right process to end.
- Next, open Task Manager.
- In Task Manager, switch to the Details tab.
- Now, locate the vmpw.exe process by pressing the V key on the keyboard. Multiple processes will be listed if you have multiple VMs running.
- Now, use the VMid noted earlier to find the right process.
- Finally, highlight the process whose User name correlates with the ID and kill the process.
Read: Virtual machine could not initiate a checkpoint operation
2] Change Power options
If the Power options of the display of your Windows host machine is not configured to never turn off you may experience this issue because the display setting affects the state of your Hyper-V virtual machines. In this case, you can simply set the display to never Turn off to resolve the issue.
Related: Hyper-V encountered an error while loading the virtual machine configuration
3] Disable Routing and Remote Access (RRA) Service

This issue can occur if there is misconfigured remote access service as your network interface might be interfering with the service, and consequently causes the VM to get stuck. In this case, you can disable the Routing and Remote Access (RRA) service to resolve the issue at hand.
To disable the RRA service on your Windows PC, do the following:
- Press Windows key + R to invoke the Run dialog.
- In the Run dialog box, type services.msc and hit Enter to open Services.
- In the Services window, scroll and locate the Routing and Remote Access service.
- Double-click on the entry to edit its properties.
- If the service is running, stop it by clicking the Stop button.
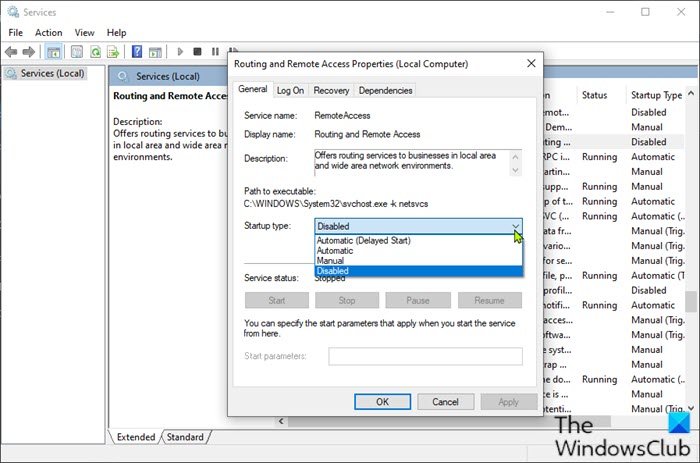
- After the service has been stopped, still in the properties window, click the drop-down on the Startup type and select Disabled from the menu.
- Click Apply > OK to save changes.
- Restart PC.
That’s it!
Related:
What does Hyper-V reset do?
When you perform a Hyper-V reset, the operation will reset a specific virtual machine hosted on a local or remote Hyper-V Management Server. If you want to perform the task or control the local computer, you’ll need to select the Local server radio button, otherwise select the Remote server radio button if you want to control a remote computer. The Restart-VM cmdlet restarts a virtual machine. Running this cmdlet results in a “hard” restart, like powering the computer down, then back up again.
TIP: This post will help you if you can’t connect to Hyper-V Virtual Machine.
Leave a Reply