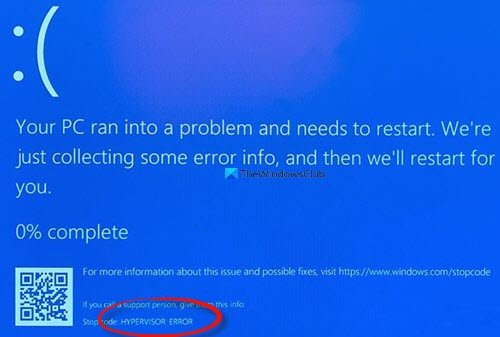
The HYPERVISOR_ERROR issue can be due to outdated or incompatible system drivers, bad disk sectors, and corrupted image files among other things. Some users have posted on Microsoft’s forum about a HYPERVISOR_ERROR BSOD (blue screen of death) issue with the stop code below-
The HYPERVISOR_ERROR bug check has a value of 0x00020001.
This indicates that the hypervisor has encountered a fatal error. Error code 0x00020001.

This BSOD error can arise for users utilizing Windows Sandbox or third-party virtual machine applications within Windows 10. In this article, we will explore the ways to deal with this frustrating issue.
Fix HYPERVISOR_ERROR Blue Screen on Windows 11/10
The HYPERVISOR_ERROR can be fixed with the help of these steps:
- Fix RAM issues with Windows Memory Diagnostic.
- Update device drivers.
- Run a Deployment Image Servicing scan.
- Update your BIOS (Basic Input Output System).
- Use the !analyze debug extension.
These outlined steps are properly explained below.
1] Fix RAM issues with Windows Memory Diagnostic.
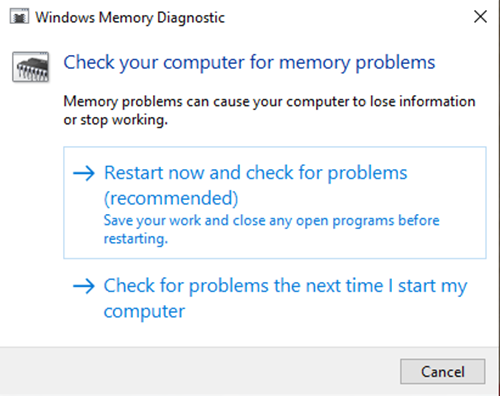
To do this, press the Windows + S hotkey for the search utility. Type memory in the search box.
Click on Windows Memory Diagnostic to open that utility’s window.

Click on the Restart now button within the Windows Memory Diagnostic utility.
When this is done, your desktop or laptop will restart and the Windows Memory Diagnostic tool will check for RAM issues.
2] Update device drivers
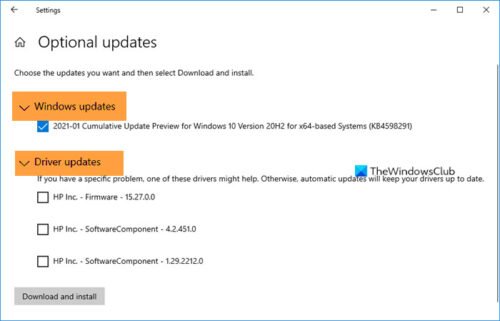
Updating device drivers may resolve the HYPERVISOR_ERROR. Users can update device drivers on their system by opening Settings, then navigate to Update & security and click on it to open the Windows Update page.

Just under it, users will see a clickable link View optional updates, click on it.

Under Driver Updates, a list of updates will be available, which you can choose to install. when you have checked the box of the update you want to install, then click on Download and install.
Read: How to disable Hypervisor in Windows.
3] Run a Deployment Image Servicing scan
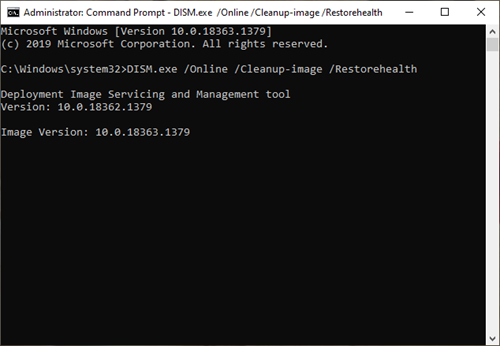
DISM can be run done by typing cmd in Windows search box. Then right-click Command Prompt and select Run as administrator on the context menu that opens.
Next, input the following Deployment Image Service command in the Prompt’s window:
DISM.exe /Online /Cleanup-image /Restorehealth

Click the Enter button to run the Deployment Image Service command.
Thereafter, restart Windows when the scan is complete.
4] Update your BIOS (Basic Input Output System)
To update an outdated BIOS, you’ll need to download the latest BIOS firmware from your motherboard manufacturer’s website.
There might also be a dedicated software utility available for updating your BIOS:
- Dell Update utility will help you download or update Dell Firmware & Drivers
- Lenovo System Update helps you download Lenovo Drivers, Software, Firmware, Update BIOS.
- AMD users may use AMD Driver Autodetect.
- Intel users may use Intel Driver & Support Assistant.
5] Use the !analyze debug extension
!analyze extension displays information about the current exception or bug check. It is meant for developers only.
In user mode, !analyze displays information about the current exception whereas in kernel mode, !analyze displays information about the most recent bug check.
User-Mode:
!analyze [-v] [-f | -hang] [-D BucketID]
!analyze -c [-load KnownIssuesFile | -unload | -help ]
Kernel-Mode:
!analyze [-v] [-f | -hang] [-D BucketID]
!analyze -c [-load KnownIssuesFile | -unload | -help ]
!analyze -show BugCheckCode [BugParameters]
If you are a developer, then use the !analyze debug extension – It displays information about the bug check and can be helpful in determining the root cause.
With these steps, users can fix the Hypervisor_Error in Windows 11/10.
Leave a Reply