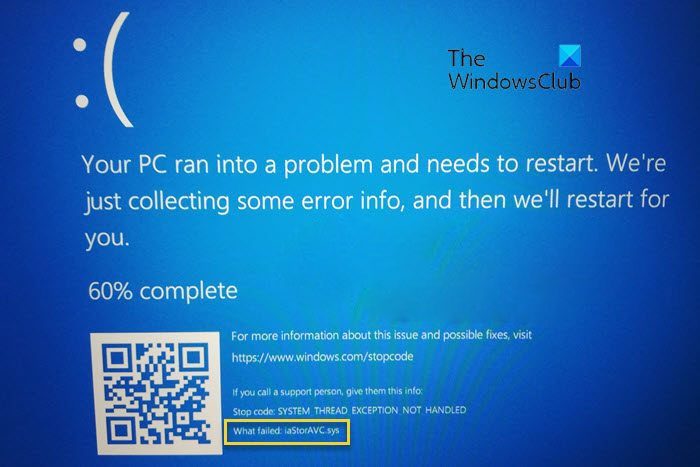
If you get the Blue Screen error on Windows 11/10 saying that iaStorAVC.sys failed, here are some tips to help you get rid of this issue. You need to follow all of them one after one to troubleshoot this BSOD, which is related to Intel Rapid Storage Technology.

Fix iaStorAVC.sys failed Blue Screen on Windows 11/10
To fix iaStorAVC.sys Blue Screen on Windows 11/10, follow these steps:
- Install or update IRST driver
- Remove and reinstall IRST driver
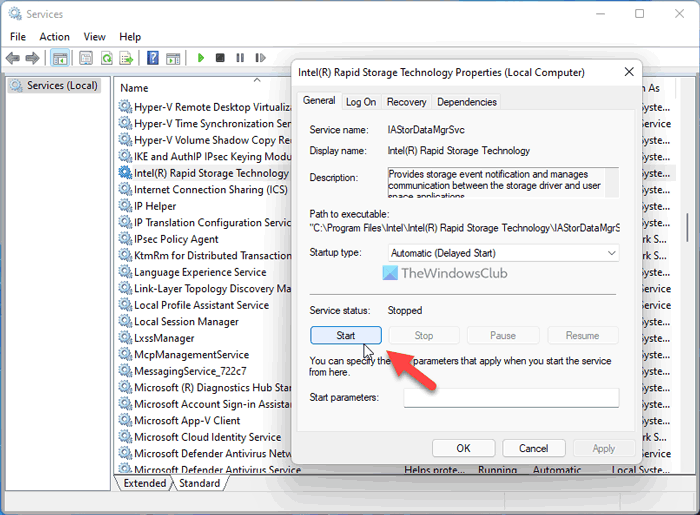
- Restart Intel Rapid Storage Technology service
- Enable AHCI
To learn more about these steps, continue reading.
1] Install or update IRST driver
If you are using an Intel chipset, it is recommended to install the Intel Rapid Storage Technology driver on your computer. It helps you establish a connection between your chipset and hard drive, which is one of the most important components. Although modern-day computers may not need this driver, it is highly recommended to install the driver on your PC. However, if you have already installed it a long time back, it is suggested to check for updates. If you recently installed a Windows Update, and the system broke after that, you can search for pending updates and install them accordingly.
You may use download, install, and update Intel Drivers with Intel Driver & Support Assistant.
2] Remove and reinstall IRST driver
As this Blue Screen error occurs mainly for the Intel Rapid Storage Technology driver, it is recommended to remove it once. If an internal conflict is blocking your system from running the IRST driver on your PC, you won’t be able to use your PC without any error.
That is why you can remove the IRST driver from your PC using the Device Manager. For that, do the following:
- Press Win+X to open WinX menu.
- Select Device Manager.
- Expand the Disk drives section.
- Right-click on the driver and select the Uninstall device option.
- Confirm the change.
- Insert the motherboard installation media.
- Install the Intel Rapid Storage Technology driver.
After that, you should not have any problems.
3] Restart Intel Rapid Storage Technology service

To run the IRST on your PC, a service runs in the background. It is called the Intel Rapid Storage Technology service. If it is stopped due to any reason, there is a chance of getting such an error. Therefore, follow these steps to verify if the service is running or not:
- Search for services and click on the individual search result.
- Double-click on the Intel Rapid Storage Technology service.
- Select Automatic from the drop-down list.
- Click the Start button.
However, if it was already running, you need to click the Stop button first.
4] Enable AHCI
If you have an old PC, you may get this problem due to not having the AHCI enabled. In that case, you can follow this guide to enable AHCI in Windows after installation to get rid of this problem.
UPDATE: The Intel Rapid Storage Technology and Intel Optane Memory applications have reached End of Life. It is best to update drivers via System manufacturers website or Windows Update now.
Related: Intel Rapid Storage Technology Service not working
How do I fix iaStorA.sys?
It is pretty straightforward to fix the iaStorA.sys BSOD error on Windows 11 and Windows 10. You can fix it by updating the Intel Rapid Storage Technology driver or Intel SATA/AHCI driver. However, if that doesn’t work, you can fix it by removing and reinstalling the same driver. For your information, you can do it with the help of the Device Manager.
How do I change my iaStorA.sys driver?
It is not possible to change the Intel Rapid Storage Technology driver on Windows 11/10 if you are using an Intel chipset. However, it is possible to update the driver if an update is pending. In that case, you need to download the update from the official manufacturer’s website. However, if you haven’t installed the driver, you need to find it on the CD given to you while purchasing the chipset.
That’s all! Hope this guide helped.
Leave a Reply