Viewing graphics on Windows 10 is super easy due to the abundance of options available to the user. However, today are going to talk about a free-to-use program known as IrfanView Graphic Viewer, and from what we’ve gathered, it is one of the most popular graphic viewing tools for Windows 11/10.
Now, we have the 64-bit version, but there is also a 32-bit version for anyone lacking a 64-bit Windows machine. Whatever version you’re using, everything works just the same, so worry not. In terms of installation, this doesn’t take long to process, but be sure to decide if you want to associate all images and video extensions with IrfanView.
Once you’ve done this, then during the installation, go ahead and check the extensions you want to associate and continue. After you’re done, all images and videos associated with the extensions you’ve chosen will open automatically in IrfanView going forward.
IrfanView Image Viewer and Editor software
IrfanView lets you view & edit a picture, insert, crop, compress, or cut out an image, and more. Let us take a look at this free image editor software.
1] Edit an image
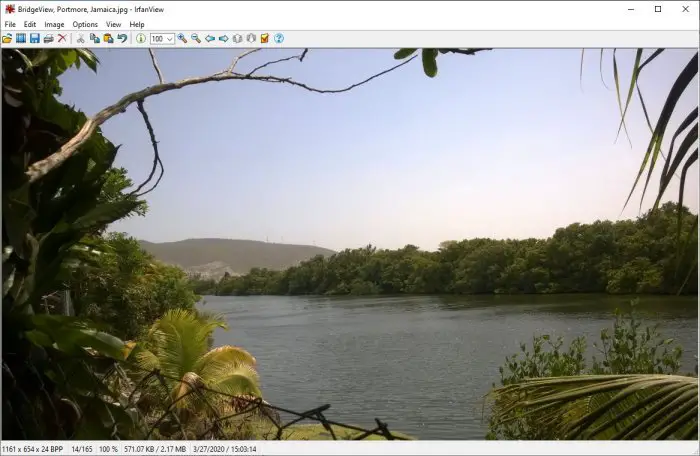
OK, so editing an image in IrfanView is simple, at least from our point of view. Select a file from the section above to open a picture, then click Open. From there, a new window should appear for you to select the image you want to add for editing.
2] Insert Text
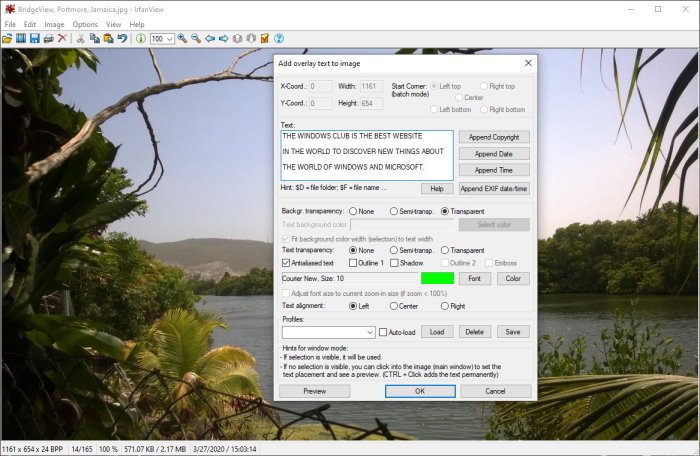
After adding your preferred image, it’s time to insert text. To do this, simply click on the Edit section from the top menu and select the Insert Text option. Adding text allows the user to Append Copyright, Append Date, Append Time, and more.
Just bear in mind that users can change the color of the font. By default, the color is green. To change, click on the color and select from the options and that’s it. Be sure to add your text to the huge box opening, then hit the OK button to complete the task.
3] Insert Watermark
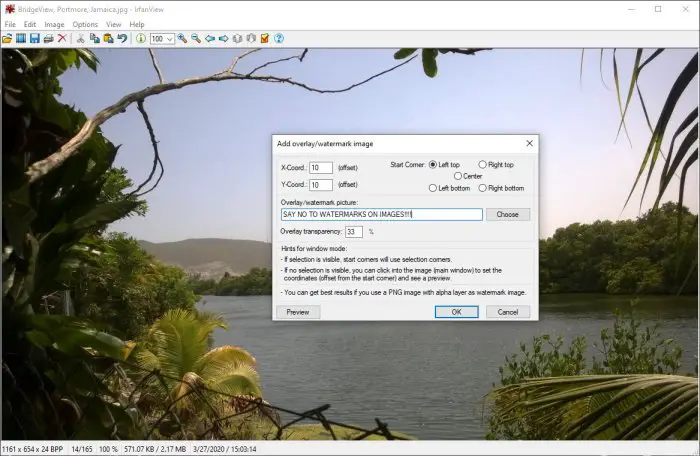
Depending on your business type, you might need to add a watermark to an image. We can safely say that IfranView is one of the best tools for the job. Again, click on Edit, and then select Insert Overlay/Watermark Image.
A new window should pop up. This is where the user will add the text for the watermark, determine its transparency, and more.
4] Resize
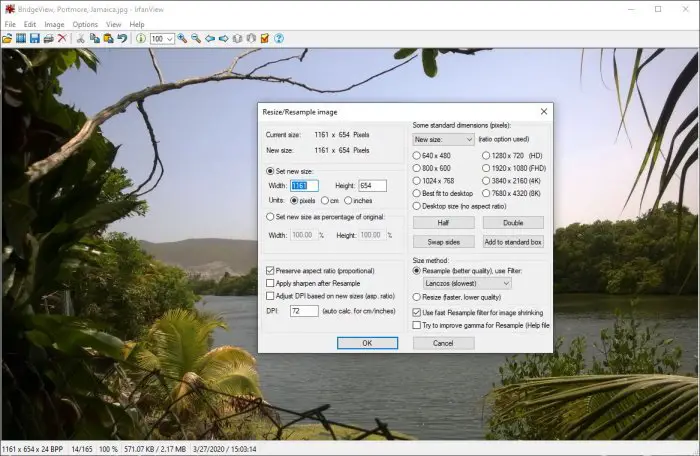
Yes, it is possible to resize images with IrfanView, and the task is super easy. Click on the section at the top that says Image, then select Resize/Resample Image to get going. From the new window that appears, choose the preferred size, and take advantage of the other features available. After that, hit the OK button and you’re done.
It works well, and since it performs resampling techniques, the image should come out looking fine even after a downgrade.
5] Create image Histogram
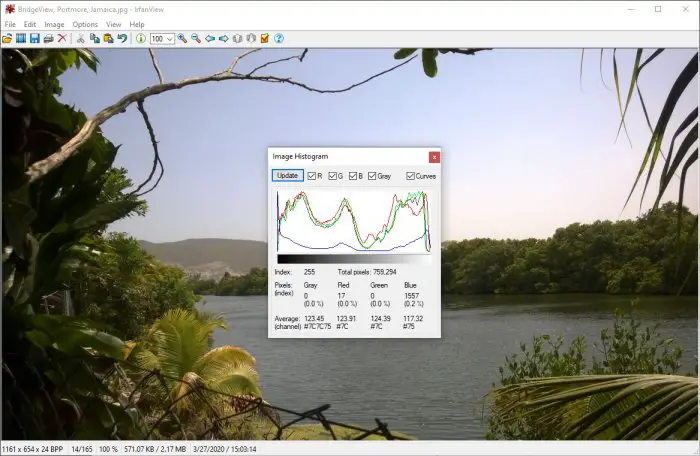
This feature reminded me of creating histograms and other graphs in R (programming language). I had no idea that this option was available in all my years of using IrfanView, or maybe it came in a recent update.
OK, so how do we create an image histogram? It’s simple, really. Select Image, then scroll down to Histogram. Click it, and it should automatically provide a graph of the current image. If need be, the user can add colors to the lines to make them stand out.
Overall, we enjoy using IrfanView. However, we have yet to scratch the service regarding all the features this image viewer and editor brings to the table. Keep playing around with it to learn of all the things it can do. You can download it from its homepage.
TIP: Also take a look at PRIMA Rapid Image Viewer.