IMAX Enhanced enhanced the movie-watching experience for viewers. Disney Plus has integrated this feature, which has worked like a charm for them. If a movie supports IMAX Enhanced, it looks magnificent. However, on some systems, IMAX Enhanced Disney+ is not working. Sometimes, it doesn’t make any changes, whereas, on some occasions, it makes the viewing experience worse. Therefore, in this post, we will find solutions to resolve this issue.

Fix IMAX Enhanced Disney+ not working
If IMAX Enhanced Disney+ is not working, try the solutions mentioned below:
- Restart the PC
- Check the server status
- Run Network Troubleshooter
- Clear browser cache
- Disable HDR
- Make sure that there are no viruses or malware
- Update the Disney Plus app
- Reinstall the app
Let’s find out more about these solutions.
1] Restart the PC
To kick start this troubleshooting guide, we recommend you just close everything and then RESTART THE PC! This is the easiest way to fix all the problems concerning the PC. This simple task can do so many things in such a short span of time; the Operating system clears ram, restarts crashed or overloaded processes, fix memory leaks and graphics issues.
2] Check the server status
If the Disney Plus server is down, then there is no other solution than waiting for it to be back and working. To check and be sure of the status of the Disney Plus server, you can use any of the following third-party website monitors. If the server is not under maintenance and working fine, then proceed to system and browser-level troubleshooting.
3] Check Internet Speed
Since this app requires a minimum Internet speed of 25mbps, it’s necessary to check whether your Internet is able to meet this requirement or not. we can do this using free third-party internet speed test tools. If the Internet is in fact slow, reboot your router and if that doesn’t work, contact your ISP.
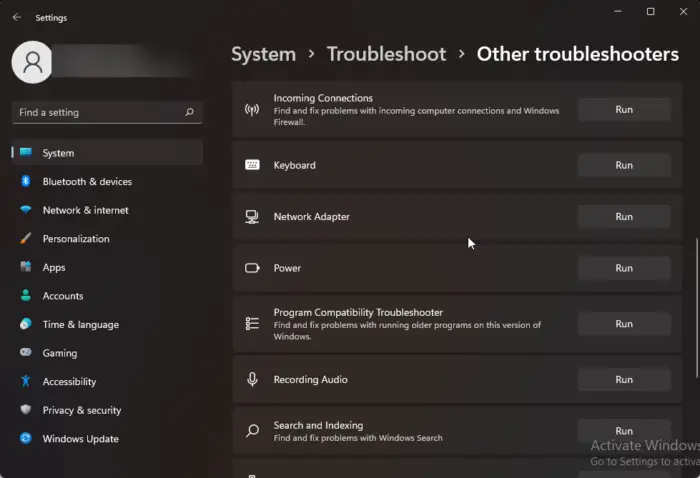
4] Run Network Troubleshooter

IMAX would fail to work in Disney+ if it is not getting enough bandwidth due to some network glitch in your computer. In that case, we recommend running the Network troubleshooter. The tool will scan and repair the issue. Follow the steps prescribed below to run the Network adapter troubleshooter:
- Click Win + R to open the run dialog box.
- Type ms-settings: troubleshoot and hit the Enter button.
- Click on Other Troubleshooters for Windows 11 or Additional Troubleshooters for Windows 10 in the troubleshooting window.
- Windows 11: Select the Run next to Network Adapter.
- Windows 10: Select Network Adapter and click on Run the troubleshooter.
- Wait for the scan to complete and if the “Apply this fix” message appears on the screen, click on it to fix the network adapter issue.
Now, check if the issue is resolved.
5] Disable HDR

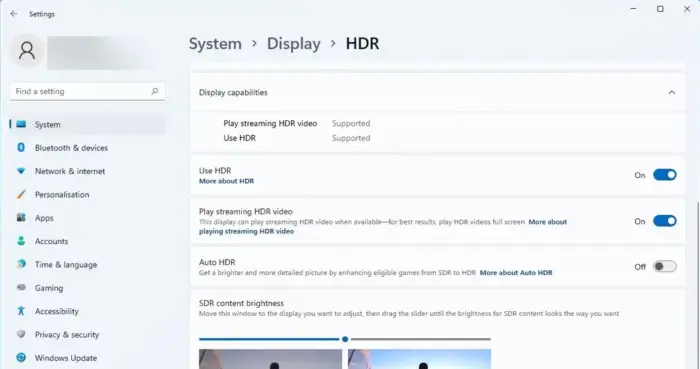
After some experiments, we concluded that IMAX Enhanced worked like a charm on non-HDR screens. That’s because the two technologies conflict. Sometimes, IMAX fails to make any enhancements, and sometimes, it makes the display worse. So, if your screen actually supports HDR, make sure to disable it before viewing such content. Follow the steps mentioned below to disable HDR on a Windows 11 computer.
- Launch Settings by Win + I.
- And navigate to System > Display
- Click the Windows HD Color Settings link
- Set Use HDR toggle to Off.
After making the adjustments, restart your computer and then play IMAX Enhanced content; it will work like a charm. In case you are using Firestick or Android TV, make sure to disable their HDR as well.
Read: How to enable Auto HDR in Windows
6] Clear browser cache

In this solution, we will delete the browser’s cache that gets corrupted over time and causes the app to stop working. Yes, these caches are the only reason we can access some data faster, but it’s also necessary to delete them occasionally.
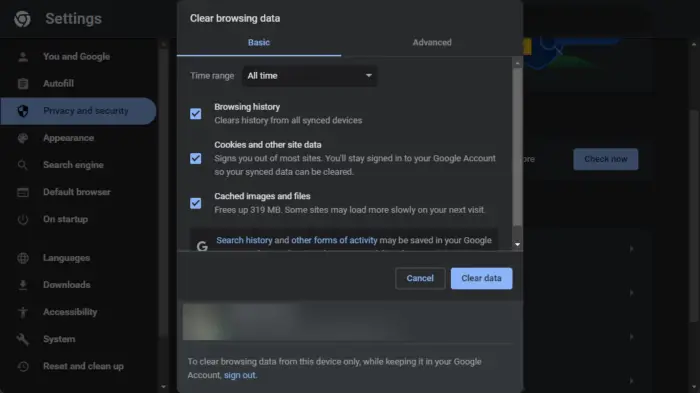
To clear the corrupted cache in the Google Chrome browser, follow these steps:
- Open Chrome and click on the three dots.
- Select the More tools option, and then ‘Clear browsing data’.
- Select the items that need to be deleted, and click the Clear Data button.
- After the process finishes, restart the Chrome browser, and Disney + app.
To clear your browser cache in the Mozilla Firefox browser, follow these steps:
- Open Firefox, and click on the three lines.
- Click on History > Clear Recent History option.
- Finally, select the items that you want to delete, and click the Clear Now button.
- Restart the Firefox browser, and try to use the app again.
If you are using Edge, follow the steps below to clear its cache.
- Open Edge.
- Click on the three dots and select Settings.
- Go to Privacy, search, and services, then click Choose what to clear.
- Select All time from Time range and then click on Clear now.
Now, open Disney+ and check if IMAX Enhanced is working or not.
7] Update the Disney Plus app
This blockage may be caused by your failure to update the app. If it’s a simple bug, developers dispatch new updates to fix it. So go to the Microsoft Store and look for Disney + in the search bar. Click on Update if it is available.
8] Reinstall the app
Last but not least, if doing everything was of no help, just delete the app with all its files. Sometimes, nothing works because the issue lies with the installation, and reinstalling it can only help. So go ahead and uninstall Disney Plus; once done, reinstall it.
Hopefully, you can resolve the issue using the solutions mentioned here.
Read: How to fix Disney+ Error Codes 43, 73, 83 on your streaming device?
How do I activate IMAX enhanced on Disney Plus?
As we know, Disney supports IMAX Enhanced, and to prove this, a label will be placed alongside the usual labels. So, whatever app supports IMAX will automatically play the video and audio in the expanded resolution.
Does Disney Plus charge for IMAX enhanced?
No, if a user has monthly or yearly subscriptions for Disney +, then there’s no additional cost to play for streaming IMAX Enhanced content. It can be accessed across whatever device you want it to use: TVs, Desktops, mobiles, and PCs.
Leave a Reply