To get a cellular data connection on your Surface Pro with LTE Advanced, Surface Go with LTE Advanced, or Surface Pro X, you’ll need a nano SIM from your mobile carrier before you get started. In today’s post, we will illustrate how to insert a SIM card & set up a data connection on your Surface device. The instructions apply to
How to insert a SIM card into your Surface
Surface Pro with LTE Advanced
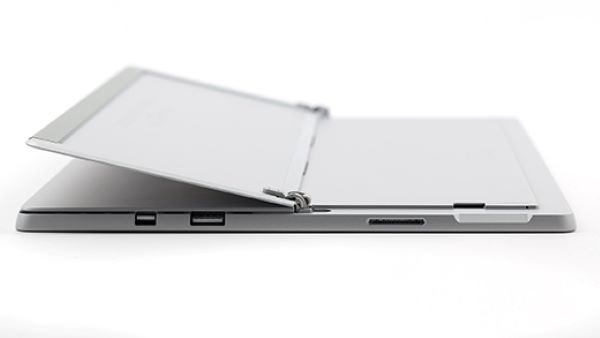
1. With your Surface Pro (5th Gen) with LTE Advanced facing down, gently pull out the kickstand. The kickstand has the Microsoft logo on the back.

2. Remove the SIM ejector tool from the instruction card on top of the envelope in your Surface Pro box.
3. Locate your SIM card tray near the bottom-right corner and under your Surface Pro (5th Gen) kickstand with LTE Advanced.
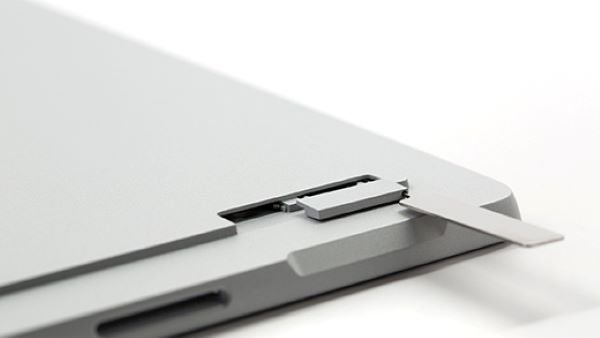
4. Insert the SIM ejector tool into the small hole and gently press in to eject the SIM card tray. When you’re done, slide the SIM ejector tool back into the instruction card to find it again later.

[Image source – Microsoft]
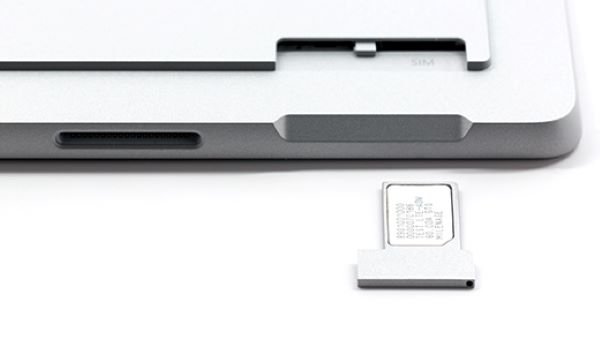
5. Remove the SIM card tray from the slot. When you remove it, keep it face-up.
6. Place the SIM card face up in the SIM card tray. Please make sure the small notch in the corner of the SIM card matches the one in the SIM card tray so that it fits properly. The words or logo on the SIM card should be facing up.

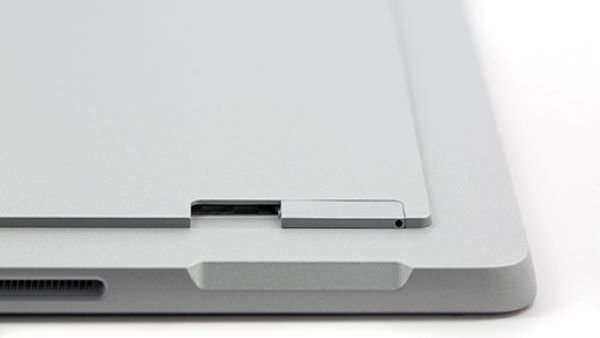
7. Slide the SIM card tray back into the SIM card slot until it clicks. The small hole in the SIM card tray should be closest to the bottom-right corner. Make sure the SIM card tray slides in smoothly—don’t force it.

Microsoft has also provided a short video on how to install a SIM card in your Surface Pro device.
How to install a SIM card in Surface Go with LTE Advanced
The procedure to install a SIM card in your Surface Go device is fairly the same as above. Here’s how:
- With your Surface Go with LTE Advanced screen facing you, turn the left edge towards you until you see the SIM card tray.
- Remove the SIM ejector tool from the instruction card that’s in the box your Surface Go came in.
- Insert the SIM ejector tool into the small hole and gently press in until the SIM card tray is ejected. When you’re done, keep your SIM ejector tool somewhere safe so you can find it again later.
- Remove the SIM card tray from the slot. When you remove it, keep it face up.
- Place the SIM card in the SIM card tray. Make sure that the notches on the SIM card and the tray line up. The words or logo on the SIM card should be facing up.
- Slide the SIM card tray back into the SIM card slot until it clicks. Don’t force it in – the SIM card tray should slide in smoothly.
How to install a SIM card in your Surface Pro X device:
- Place your Surface Pro X screen on a table and lift the kickstand to reveal the SIM door.
- Insert the included SIM ejector tool into the small hole on the SIM door to detach it.
- Push your SIM card into the SIM card slot until it clicks.
- Slide the SIM door into place, then press down until it clicks.
- To use your SIM, select Start > Settings > Network & Internet > Cellular , then under Use this SIM for cellular data, select SIM1.
- On the taskbar, select the Network icon and make sure your SIM card mobile operator is listed.
How to set up a data connection on a Surface device
You can set up the LTE connection on your Surface Pro X, Surface Pro with LTE Advanced, or Surface Go with LTE Advanced to stay connected anywhere you go.
Surface Pro X and Surface Pro with LTE Advanced
There are two ways to get cellular data on your Surface Pro X:
1. You can use a nano SIM and data plan from your mobile operator.
OR
2. You can use the embedded SIM (eSIM) that comes built into your Surface Pro X, along with the Mobile Plans app in Windows 10. In the Mobile Plans app, you may be able to add your device to your current mobile operator account or sign up with a new one.
1] Using SIM and data plan from your mobile operator
- Contact your mobile operator to sign up for a data plan or add to your current plan.
- Insert the SIM card into your Surface Pro X.
- Once the SIM card is inserted, select Start > Settings > Network & Internet > Cellular and then select SIM1 from Use this SIM for cellular data.
2] Using your eSIM and the Mobile Plans app
If this is your first time using an eSIM, you need to connect to Wi-Fi and open the Mobile Plans app. Refer to this Microsoft guide for more info.
If you have both types of data plans (one from your mobile operator and one from another mobile operator through the Mobile Plans app), you can switch between them at any time. Here’s how:
- Select Start > Settings > Network & Internet > Cellular to choose a data plan.
- To use your mobile operator SIM card, select SIM1 for Use this SIM for cellular data.
- To use the data plan on your eSIM, select eSIM for Use this SIM for cellular data.
Surface Go with LTE Advanced
Your Surface Go with LTE Advanced has a single SIM tray allowing you to insert a nano SIM card. Before you set up your LTE connection, you’ll need your mobile operator’s activated nano SIM card.
Here’s how to get started with LTE on Surface Go:
- Contact your mobile operator to sign up for a data plan or add to your current plan.
- Insert the SIM card into your Surface Go with LTE Advanced.
- To check that you’re connected to a cellular network, select Start > Settings > Network & Internet > Cellular.
I hope you find this guide useful.
Leave a Reply