In Microsoft Word, the user can insert the current date or date and time as text or fields that can update automatically by using the date and time feature. In this tutorial, we will explain how to insert the current date, insert a date that updates automatically and how to edit or update a date field. This feature in Word instantly adds date and time to your document.
How to insert the current date in Word

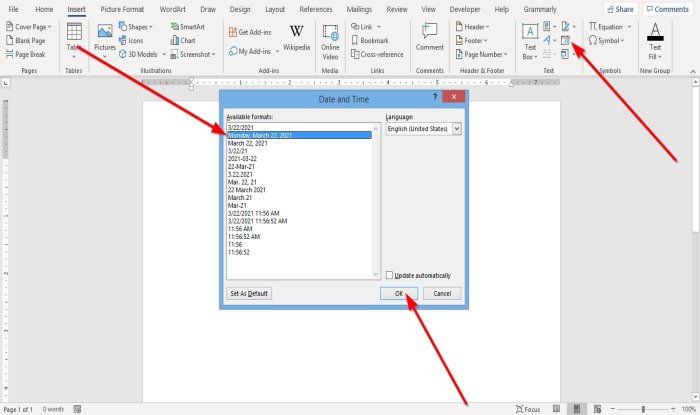
- On the Insert tab in the Text group, click the Insert Date and Time button.
- A Date and Time dialog box will open.
- Inside the dialog box, insert the date and time format you want.
- Then, click OK.
- The date and time format you chose will appear in the document.
How to insert a date in Word that updates automatically

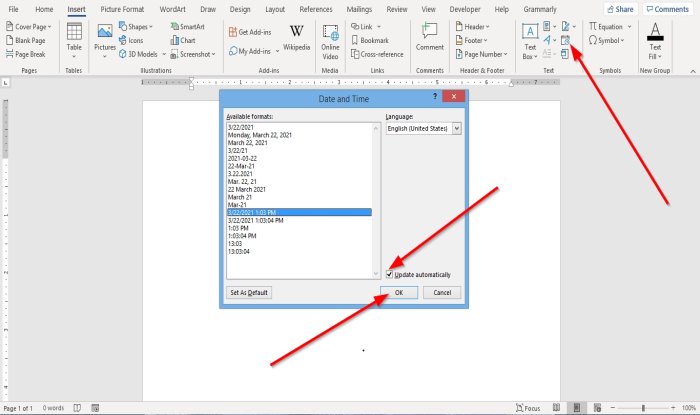
- On the Insert tab in the Text group, click the Insert Date and Time button.
- A Date and Time dialog box will open.
- Inside the dialog box, once you choose a date and time format.
- Select the Update Automatically check box.
- Then, click OK.
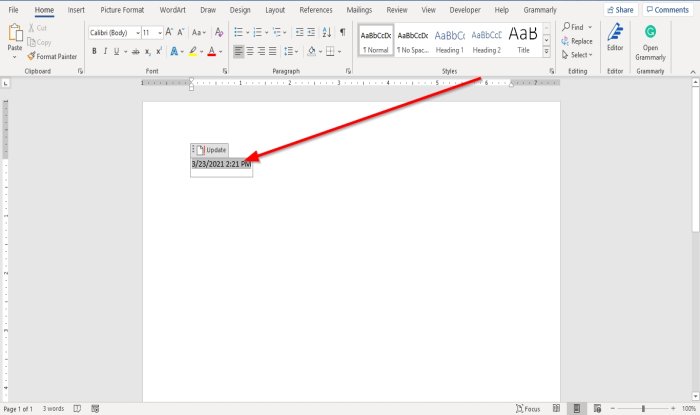
- The Date and Time are inserted as a field and can update automatically.
If you save the document with a Time and Date format, every time you open the document, the date and time will change automatically.
Read: How to Mark a Document as Final in Word.
How to edit or update a date field in Word
Once you choose to select Update Automatically in the Date and Time dialog box and click OK, you will notice that it will turn grey whenever you place the cursor on the date and time.

To edit the date and time, click on the grey box, change the date and time, and then click outside the box.

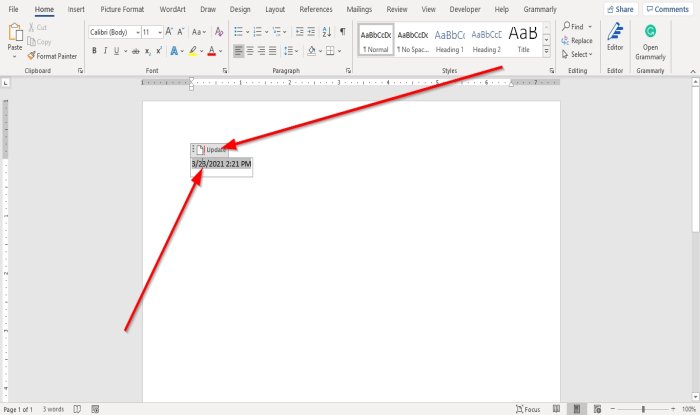
To change the date back to the current date, click the date field, then click Update.
It changes back to the current date.
I hope this helps; if you have questions, please comment below.
Read: How to compare two Word documents and highlight differences.
Leave a Reply