Cover pages are a terrific way to make your document have a great impression and a stylish look. In Microsoft Word, some features can assist you in designing a cover page. The cover page feature offers various built-in style templates that make it easier for customization. You can add text, font, font color, font size, and color to the built-in style cover page template.
Create Custom Cover Pages in Word
In this tutorial, we will explain:
- How to insert a Cover Page into a Word document.
- How to Create Custom Cover Pages in Word.
- How to remove a Cover Page from a Word Document.
- How to remove Custom Cover Page.
A cover page is a feature in word that designs cover pages for your document.
1] How to insert a custom Cover Page into a Word document
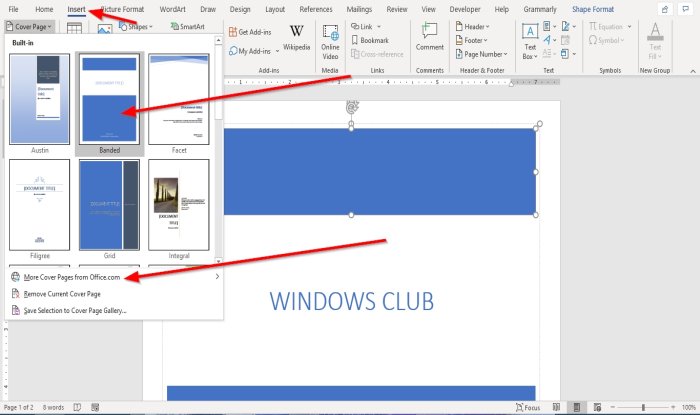
- Open Microsoft Word.
- Click the Insert tab.
- On the Insert tab in the Pages group, click Cover Page.
- A drop-down list will appear displaying built-in style templates of cover pages; select the style you want.
- A cover page will appear in the document; make your changes to it.
- You can also get more cover pages by clicking More Cover Pages from Office.com.
2] How to Create Custom Cover Pages in Word
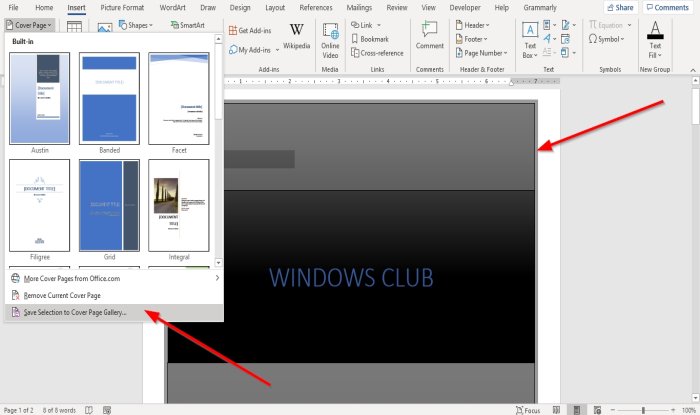
After designing the built-in style cover page template, press Ctrl-A on the keyboard to select the cover page.
Click the Insert tab and click Cover Page in the Pages group.
In the drop-down list, click Save Selection to Cover Page Gallery.
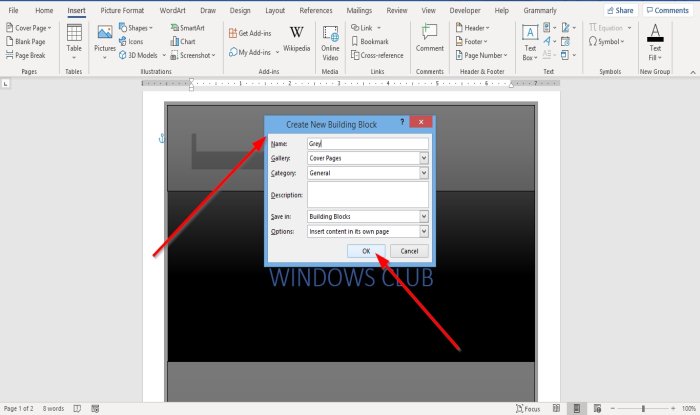
A Create New Building Block dialog box will pop up.
Inside the dialog box, name the custom cover page and select a category from the list, and there is an option in the list that allows you to create a new category.
Then click OK.
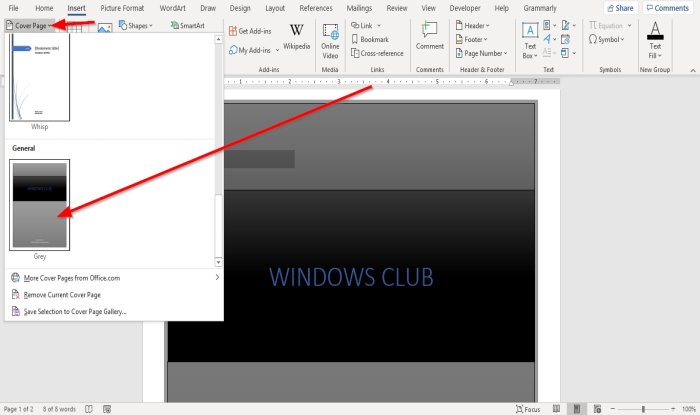
To search for the custom cover page, click the Insert tab, then click Cover Page in the Pages group, scroll down until you see your custom cover page in the list.
3] How to remove a Cover Page from a Word Document
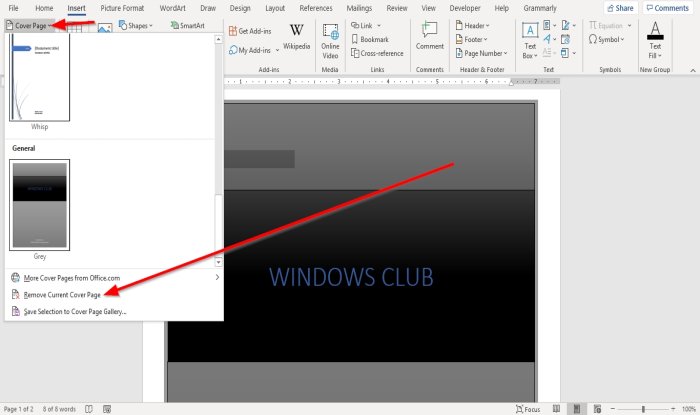
On the Insert tab, click Cover Pages in the Pages group.
In the drop-down list, click Remove Current Cover Page.
The Cover Page is Removed.
4] How to remove Custom Cover Page in Word
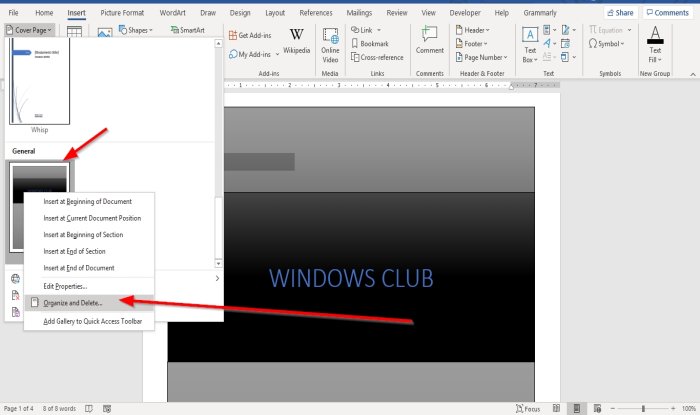
On the Insert tab, click Cover Pages in the Pages group.
In the drop-down list, scroll down until you see the custom cover page you created.
Right-click the custom cover page and select Organize and Delete.
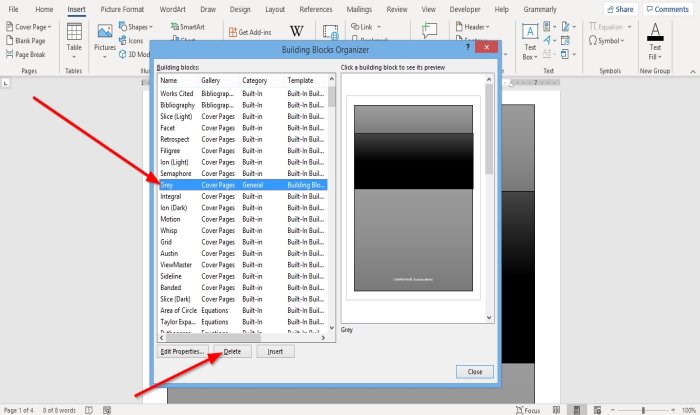
A Building Block Organizer dialog box will appear.
In the dialog box, locate the custom cover page and click Delete below.
The custom cover page is deleted.
Now read: How to remove the Underline from a Hyperlink in Word.
Leave a Reply