In this guide, we will learn how to install and configure DNS on Windows Server. So, if you are interested, join this walkthrough on how to install, configure, and manage DNS on Windows Server machines.
What is DNS in Windows Server?
The Domain Name System (DNS) is an important service for both businesses and the Internet. It allows us to use names instead of IP addresses to find the necessary systems. So, when you type a hostname, say, www.thewindowsclub.com, it translates it into an IP address that the computer then uses to identify and open the respective website.
Install and configure DNS on Windows Server
To install and configure DNS on your Windows Server, follow the steps mentioned below.
- Assign a Static IP Address
- Install DNS Role from Roles and Features
- Add a new DNS Entry
- Limit IP Address
Let us talk about them in detail.
1] Assign a Static IP Address

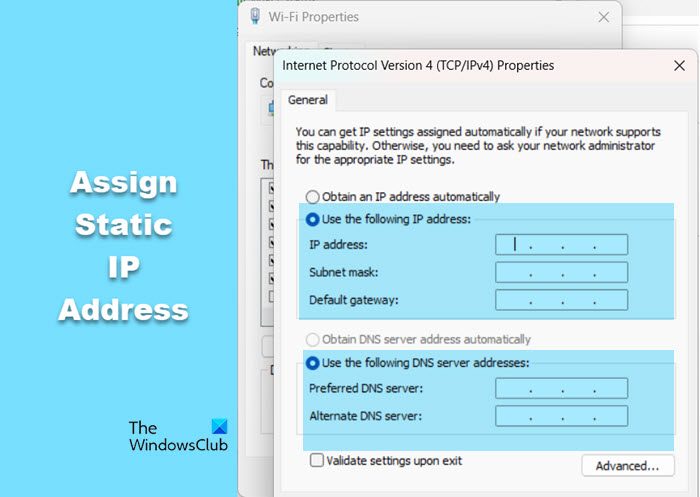
First, we are going to assign a static IP Address instead of the dynamic one that is the default. To do so, follow the steps mentioned below.
- Open the Start search option and search for “View network connections”.
- Right-click on your network interface, which can be WiFi or Ethernet, and click on Properties.
- Select Internet Protocol Version 4 (ICP/IPv4) and click on Properties.
- Now, check the box associated with Use the following IP address, enter an IP, click on the Subnet Mask field—it will populate automatically, and then enter the Default gateway. Usually, it’s 1 IP address.
- Enter a DNS – you can enter the local system’s one and click on Ok.
- Now, reboot your computer.
Please ensure you have set up a default gateway (like your router/modem) and an external DNS server. The gateway determines where traffic goes outside your network (like the Internet), and the external DNS server is necessary to find names outside your network.
2] Install DNS Role from Roles and Features

After configuring a static IP, we will install the DNS Role that will allow us to configure DNS. To do so, follow the steps mentioned below.
- Open Server Manager.
- Go to Manage > Add Roles and Features and click on Next.
- Make sure to select Role-based or feature-based installation and click on Next.
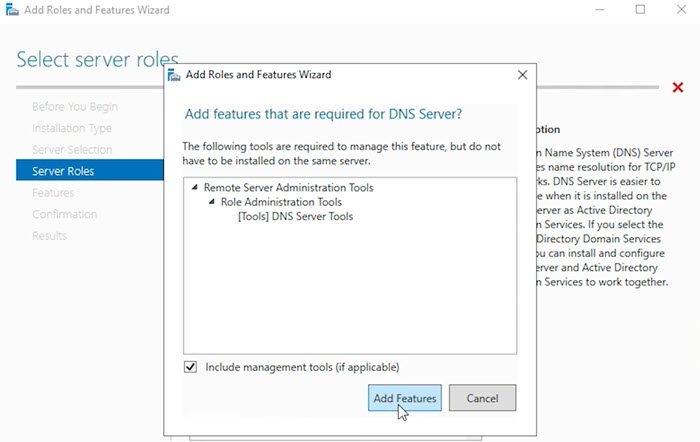
- In the Server Roles tab, select DNS Server, and click on Next.
- Since there is no need additional feature, click on Next to skip the Features tab.
- Again click on Next.
- When you are at the Confirmation tab, make sure to tick Restart the destination server automatically if required and then click on Install.
Let the installation complete, and click on Close.
After installing DNS, to check if it is working, open Command Prompt as an administrator and try to ping your host. Since DNS is configured, it will resolve the hostname successfully.
Read: How to change DNS server with Command Prompt or PowerShell?
3] Add a new DNS Entry

When you install the DNS Role, a default entry is created, with the hostname being the same as your computer’s name. However, we can also add various DNS host entries. To do so, follow the steps mentioned below.
- Open the Server Manager console.
- Go to Tools > DNS.
- Click on your server name, expand it, then, expand the Forward-lookup zone, and then, click on your domain to expand it.
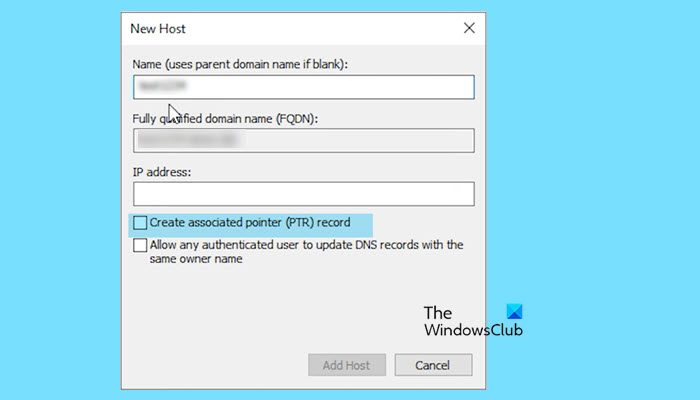
- You will see an entry for the host server there. We are going to create a new entry. To do that, right-click on an empty space and click on New Host (A or AAAA).
- You can give it a name of your choice, assign an IP address, and even include the IP address of the server you are using.
- Select Create associated pointer (PTR) record.
- Click Add Host.
- Click OK when prompted.
Now, you can ping the server using the hostname we just created.
We recommend flushing all the DNS information your system knows once. To do so, run ipconfig /flushdns in the Command Prompt.
4] Limit IP Address

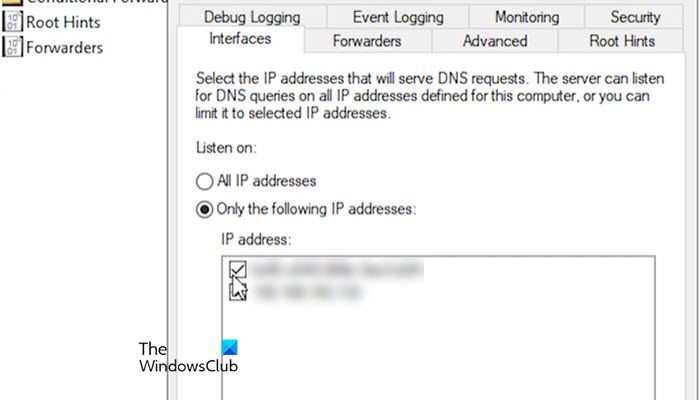
If a system has multiple IP addresses or interfaces, you can control which ones are used to handle DNS requests. Follow the steps given below to do the same.
- In Server Manager, go to Tools > DNS.
- Select the server on the left-hand side, right-click, and click on Properties.
- In the Interfaces tab, check Only the following IP addresses, and then select the IP address you want to use.
- Finally, click on Apply > Ok.
Hopefully, this guide will give you an idea of how to configure and use DNS.
Read: How to enable the DNS Client Service if greyed out?
How to add DNS entry in Windows Server?
To add a DNS entry to your server, go to Server Manager and click on Tools > DNS. This will open the DNS console. Expand the server entry, navigate to your domain, right-click anywhere, and select New Host (A or AAAA). Finally, populate all the fields, and you will be good to go.
Also Read: DNS server is not responding.
Leave a Reply