Windows Admin Center allows the administrator to manage servers and clusters using a GUI. It is one of the essential components of Windows Server administration. In this tutorial, we will show you how to install and configure Windows Admin Center.
Install and configure Windows Admin Center
Windows Admin Center (WAC), previously known as Microsoft Project Honolulu, is a user-friendly tool developed by Microsoft for managing Windows servers and clusters. It provides a modern and streamlined experience for tasks like monitoring performance, logging events, and managing configurations. WAC can handle Windows Server 2012 and newer versions, Azure VMs, and Windows 10 and 11 PCs. It is extensible, allowing third-party developers to create additional management capabilities for various server roles and applications. WAC can manage both physical and virtual machines (VMs) in on-premises data centers or in the cloud.
To install and configure Windows Admin Center, we will have to perform the following steps.
- Download and install the Windows Admin Center utility
- Access Web Admin Console
- Add target hosts
Let us discuss them in detail.
1] Download and install the Windows Admin Center utility
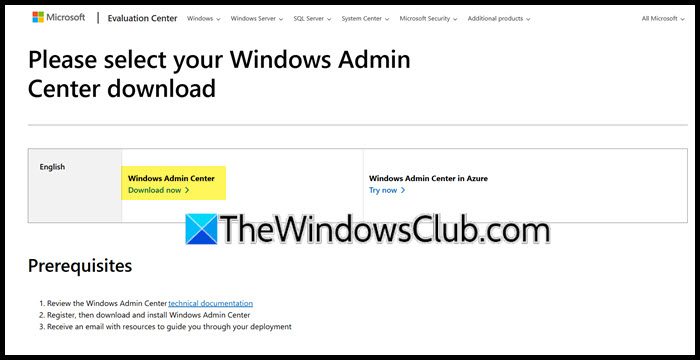
On most devices, Windows Admin Center is not preinstalled. So, will have to download the installation media from the web and then install the utility. In order to download the installation media, you need to open a browser on the system and then navigate to microsoft.com. You need to click on the Download now button associated with the Windows Admin Center.
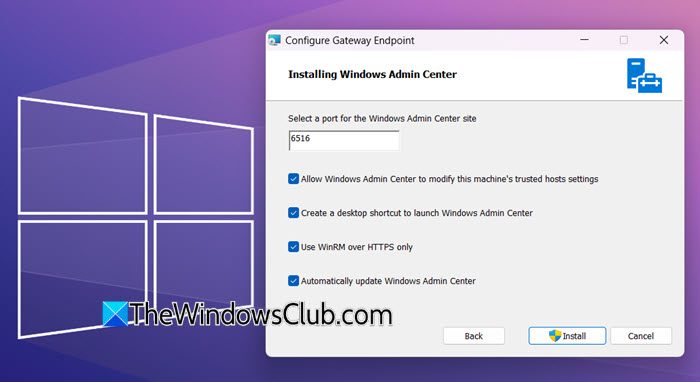
Once Windows Admin Center’s installation media is downloaded, follow the below steps to install it.
- Go to the Download folder and double-click on the installation media.
- It will take a little time to get things ready, once done, tick the box that says “I accept these terms”, and click Next.
- Tick Required diagnostic data and click on Next. You can also tick Required and optional diagnostic data if you know what you are doing.
- Make sure that the Use Microsoft Update when I check for update is ticked and click Next.
- Once you are on the Configure Gateway Endpoint, set a port for the Windows Admin Center, make sure that Allow Windows Admin Center to modify the machine’s trusted hosts settings and Automatically update Windows Admin Center, and if you want you can check the other two options as well.
- Click on Install.
- A UAC prompt will ask you to acknowledge it, click on Yes.
- This will start the installation process.
Wait a couple of minutes for your system to install the Admin Center. Once it is done, you can launch it.
2] Access Web Admin Console
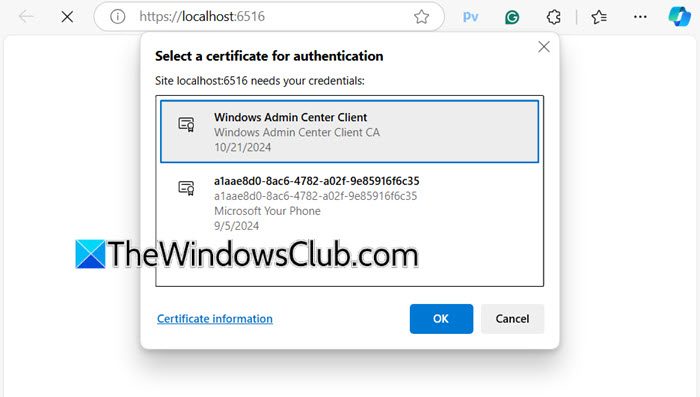
When you launch the Admin Console, it will ask you to Select a certificate for authentication, if your organization has its own certificate, select it, otherwise, we will go with Windows Admin Center Client. You need to select the certificate and click on OK.
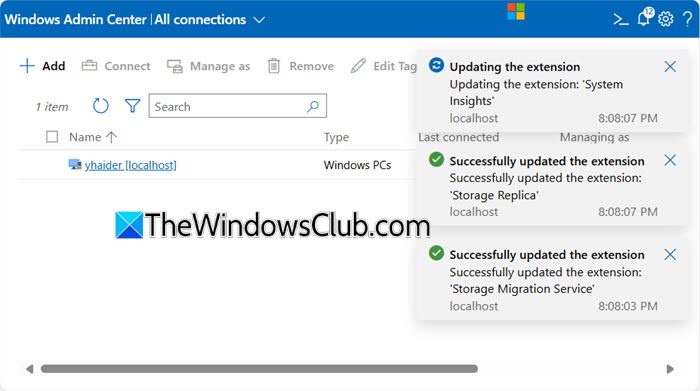
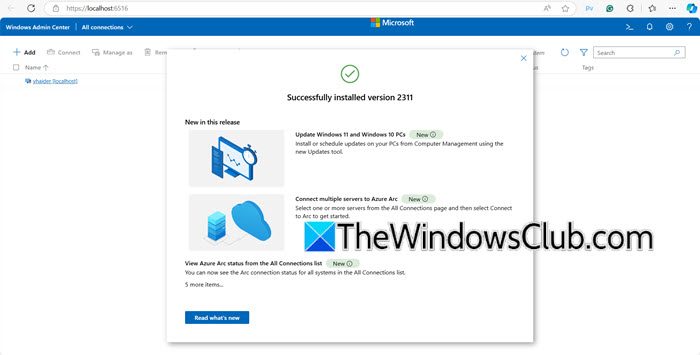
Wait for a few minutes as it sets your environment. Once done, you will see a welcome screen; close it. You might get a prompt asking you to update all the outdated extensions. Click ‘Yes’, and you will see the UAC prompt. Click Yes when you see that. Once you finish the extension, click OK when you get the successfully installed prompt.
3] Add another target host
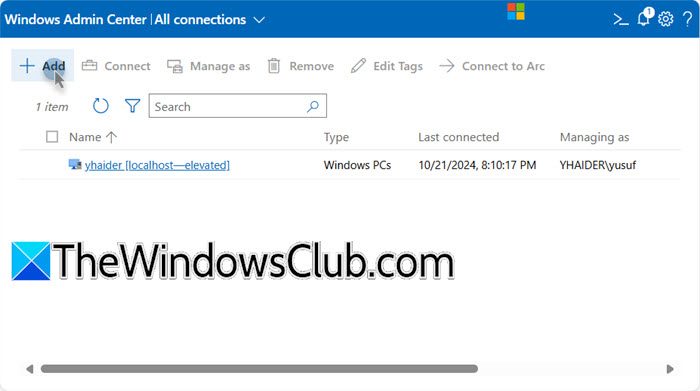
After setting up the environment, we will see the default host added, which will be the local computer. However, you can add more target hosts to the admin center. Follow the steps mentioned below to do the same.
- In the Windows Admin Center, click on the + Add icon.
- You will see the “Add or create resources” wizard, click on the Add button associated with the type of resource you want to add.
- Fill in all the details and click on Add.
- Once added, you should click the Refresh icon to register the changes.
We hope you can install, configure, and use Windows Admin Center on your Windows Server or client machine.
Read: How to Configure Data Deduplication on Windows Server?
How do I install and configure Windows?
There are various ways to install and configure Windows on your computer. However, the easiest way would be to create an installation media using Windows ISO, plug it into the target computer, change its boot order to boot from the USB drive, and then follow the on-screen instructions to complete the process. We recommend you check our guide on how to install Windows using installation media to know more.
Read: How to connect Windows Server to Azure
How do I start Windows Admin Center?
If you have installed the Windows Admin Center utility on your computer, then you can pretty easily open it by searching “Windows Admin Center” from the Start Menu or in your browser, typing localhost:<port-number>, in my case, it is localhost:6516. This will do the job for you.
Also Read: Convert Distribution Groups to Security Groups in Windows Server.