A Makefile is a special file that contains information about a program’s flow, targets, and libraries. To use it, we need to access the Make command. However, it is not preinstalled on Windows. In this post, we will learn how to install and run Makefile on Windows.
Install and run Makefile on Windows 11/10
A Makefile is a file that contains information about a program’s flow, targets, and libraries. It is also known as a description file as it includes a group of targets and the sources on which they depend. Additionally, the Makefile contains libraries that support the source code. This type of file is executed using the make command. To install and run Makefile on your computer, you are supposed to follow the steps mentioned below.
- Download and install MinGW
- Configure Environmental Variable
- Install the Make command
- Rename mingw32-make.exe to Make
- Create and run the Makefile
Let us talk about them in detail.
1] Download and install MinGW
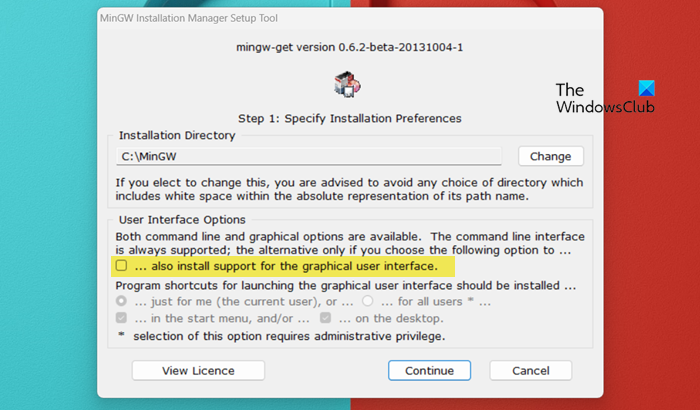
MinGW is the Windows adaptation of the GNU Compiler Collection (GCC), offering freely distributable import libraries and header files essential for developing native Windows applications. To use Make, we first need to download the MinGW installation media. Once downloaded, run the installation media, make sure to untick“also install support for the graphical user interface.”, and follow the on-screen instructions to complete the process. It will take some time to complete the installation process, so wait, and once done, click on Continue or Quit.
2] Configure Environmental Variable

After installing MinGW, we need to add the environmental variable to access the ‘Make’ command. For this, we need to first fetch the path of MinGW and add it to the environmental variables. Follow the steps mentioned below to copy the path of the mingw-get file.
- Open File Explorer by Win + I.
- Go to the location where you have installed MinGW. If you didn’t make any changes to the default location, go to C:\MinGW.
- Double-click on Bin to open the folder.
- You need to copy the path of the folder, as that would be the path of mingw-get.
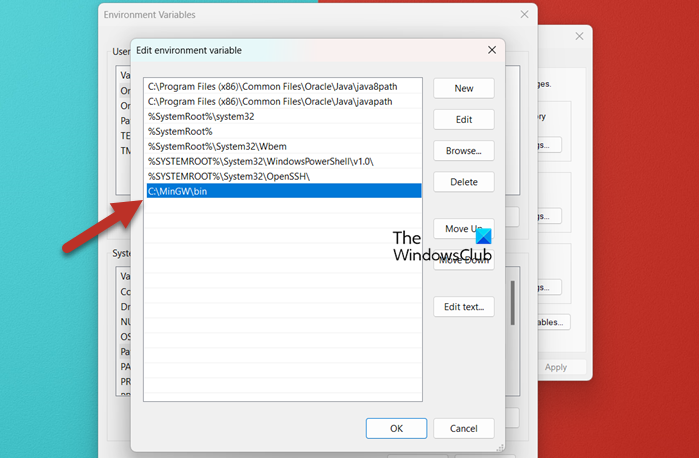
Once you know the path of the file, follow the steps mentioned below to add it to the Environmental Variable.
- Open Control Panel.
- Search for “Environmental Variables”.
- Click on Edit the system environmental variable.
- Now, click on the Environmental Variable button.
- From the System variables section, click on Path, and then on Edit.
- Click on New and then paste the path we asked you to copy earlier.
- Click on Ok.
Now you can close all interfaces as we have added the environmental variable.
3] Install the Make command
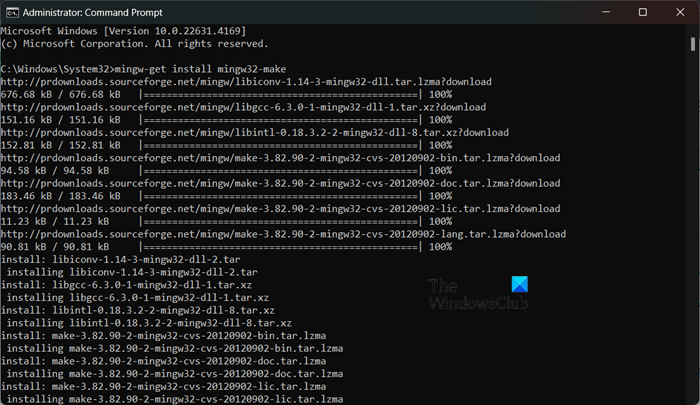
After adding the environmental variable, we can install the Make command. However, you won’t be able to run the Make command without following the previous steps. To do so, open the Command Prompt as an administrator and then run the following command.
mingw-get install mingw32-make
When you run this command, MinGW will install all the modules related to Make; however, it will take a while to do so.
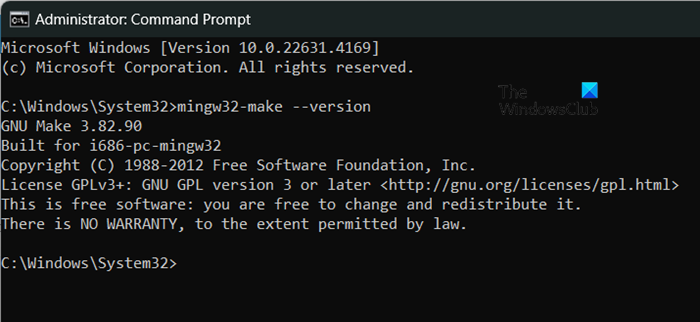
To know if it is installed, you can run mingw32-make --versioncommand. It will give you the version information about the MinGW installation.
4] Rename mingw32-make.exe to Make
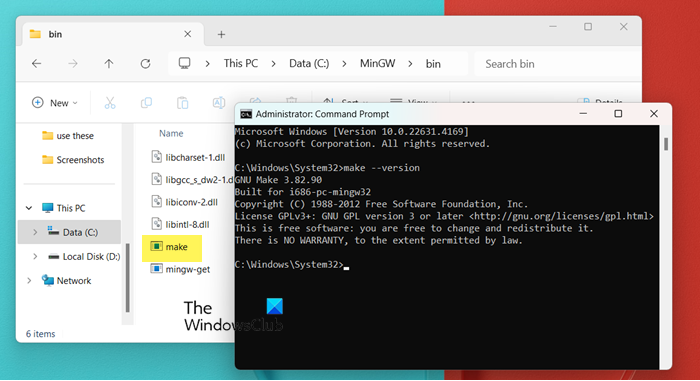
Don’t you think, running ‘mingw32-make’ every time to use the ‘make’ command is a bit of a hassle? If yes, we would rename mingw32-make to Make so that next time we can just use the ‘make’ command. To do so, follow the steps mentioned below.
- Open File Explorer.
- Go to the location where you have installed mingw32.
- Now, double-click on Bin, and then rename mingw32-make file to make.
To verify this, run make --version. If the command is running without throwing any error, you can rest assured that renaming worked.
5] Create and run the Makefile
Upon installing the Make command, we can create a Makefile. There are various ways to do this, but we have listed a general guide below that you can follow.
- You can create a new folder with a name of your choice or the Makefile on your desktop; that’s what we did.
- Now, create a text file. To do so, right-click on a space and select New > Text document.
- Open the file and paste the following lines of code. Make that before starting the second line, you give a Tab.
firstmakefile:
      echo "Getting started with Makefile";
- To save it, go to File > Save as.
- Give it a name, let’s say, Makefile, change the Save as type to All files, and click on Ok.
- To run the file, open Command Prompt.
- Navigate to the location where you have created the folder, for that, run the cd command. Since my location is C:\Users\yusuf\OneDrive\Desktop, I ran cd C:\Users\yusuf\OneDrive\Desktop.
- Run dir to list all the files present in that particular directory.
- To run the file, just run
make -f filename.
That’s how you can create and run a Makefile.
Read: How to install NumPy using PIP on Windows
What is the command to run a makefile?
To run a makefile, you are required to use the make command. However, if you want to call a file, use -f option so that the command would look like make -f filename.
Read: How to create a file without Extension in Windows
How do I install Make on Windows?
To install Make on your computer, we can install MinGW first, then add the environmental variable path, and finally, install Make. We recommend that you follow the guide mentioned earlier to install Make on your system.
Leave a Reply