Windows 11/10 has added several functionalities to the feature stack that was available on the previous version of Windows. One such functionality is the ability to install Graphic Tools as an additional feature to the operating system. Such features are not included with the shipped-in product but you can easily install them per your wish. It’s important to note that these features are not obligatory and their absence doesn’t affect your system in any way.
What are Graphic Tools?
Graphics Tools can be used to take advantage of the graphics diagnostic features provided in the runtime and Visual Studio to develop DirectX apps or games. It also includes the ability to create Direct3D debug devices (via Direct3D SDK Layers) in the DirectX runtime, plus Graphics Debugging, Frame Analysis, and GPU Usage.
There may be times when you require a minimal set of graphic tools, like for instance in the following scenarios:
- Scripting of API traces or carrying out regression testing on a lab machine
- Installing D3D SDK Layers
- Using the DXCAP command-line tool to capture and playback D3D graphics log file
At such times, Windows 10 Graphics Tools can be of great help.
Install or Uninstall Graphics Tools in Windows 11/10
To install Graphics Tools on your Windows 11 or Windows 10 computer, follow these steps.
Windows 11
Right-click the Windows button on the Taskbar and select Settings from the list of options. Alternatively, you can press Win+I in combination to go to the settings directly.
Select Apps settings from the side-panel on the left.
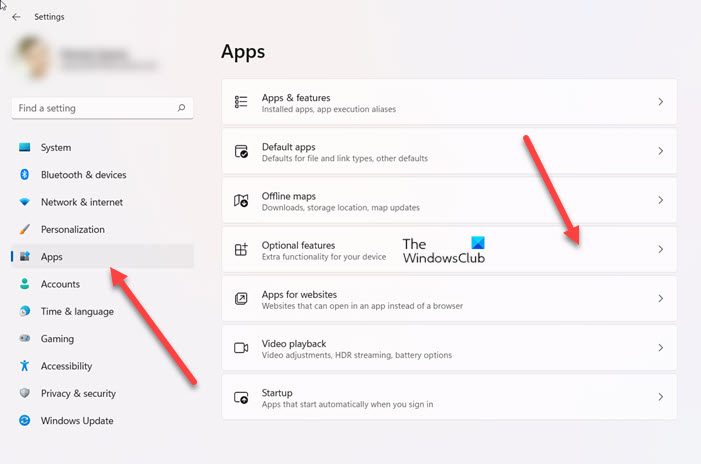
Move to the right pane of the Apps and select Optional features option.
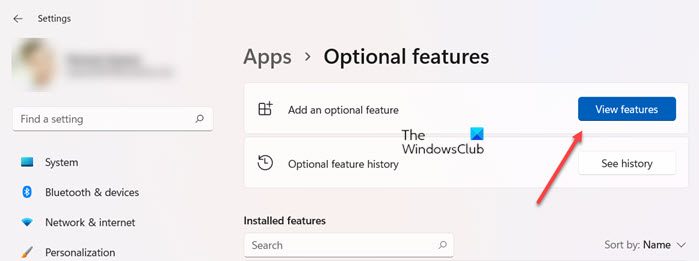
When directed to a new screen, hit the View features button, next to Add an optional feature text heading.
Then, under Add an optional feature box, type graphics tools.
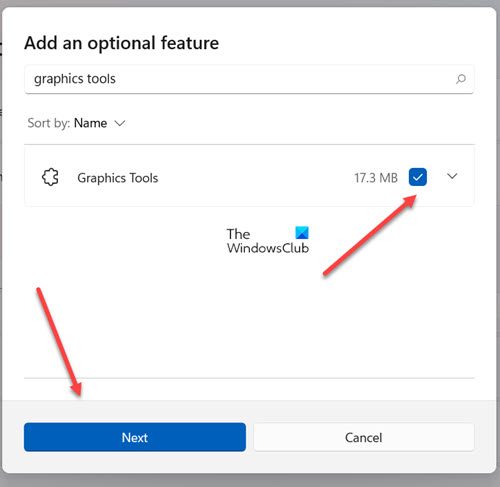
When the option appears, check the box and hit the Next button.
Now, click the Install button to proceed further.
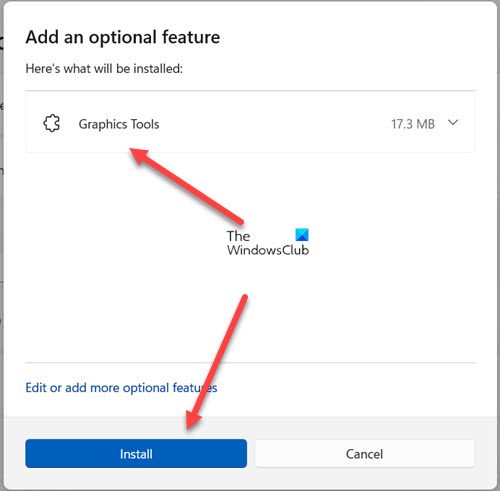
Allow the installation to complete.
Once done, close Settings and exit.
Windows 10
1. Press Windows Key + I key combination on your keyboard to open Settings app and click on System.
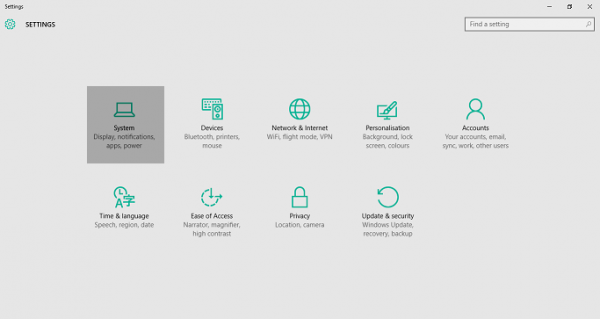
2. In the System Settings window, click on Apps & features present in the left pane.
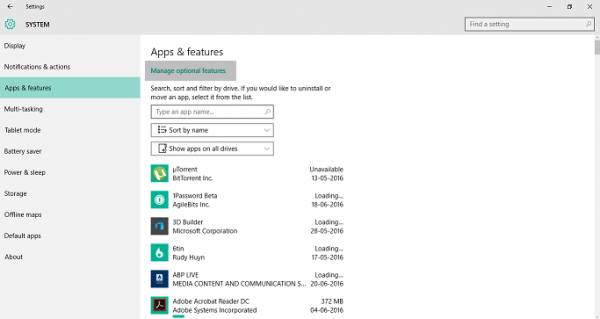
3. Now, on the right-side pane, click on Manage optional features present at the top as shown in the above image. This will open up all the optional features that are already added to your computer.
4. Now, in Manage Optional Features window, click on Add a feature. Here apart from Graphic Tools, you will be able to add several Fonts as well as the Insider Hub.
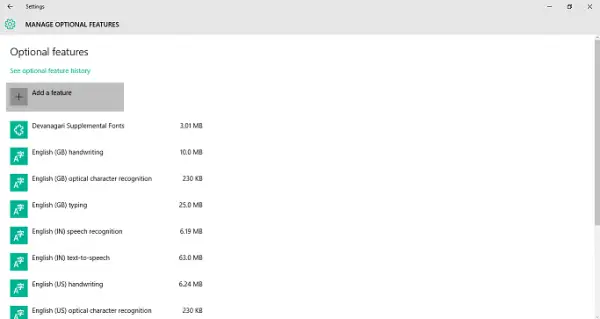
5. Look for Graphics Tools and click on it.
Now, click Install button to onboard the feature to your PC.
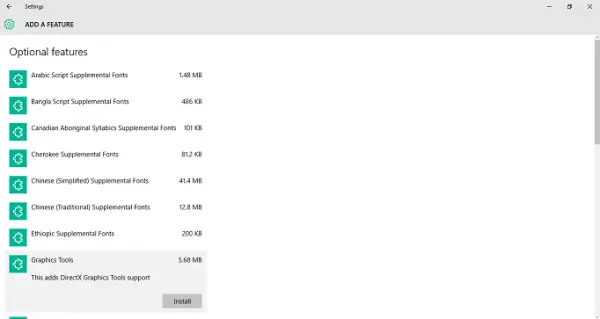
That’d be all you need to do to add this functionality to your Windows 10 PC.
You can easily uninstall Graphics Tools from the Manage Optional Features window if you wish to do so, by clicking on the Uninstall button.
What is the use of DirectX graphics tools?
DxDiag or better known as DirectX Diagnostic Tool is a tool which helps us in identifying problems that are related to audio, display, video and any other multimedia applications with required features running on our computer.
What are optional features in Windows?
Windows Optional features are the features that you can turn on or off through the Windows Features dialog. As the name suggests, they are optional. So, it’s not essential to enable every feature as they could result in security problems or slower system performance. It’s advisable to enable only those features that you actually require.
it says, No Features to install
Are you able to see Graphics Tools in the list of optional features? Its should be around 5-6 MB in size
Please check this 2 images, I have uploaded the screen shots!
http://imgur.com/a/WUozu
Will you please tell me that how can i Install or Uninstall Graphics Tools in Windows 8.
Hi, Thanks for sharing the screenshots! Can you please do the following?
1. Open Group Policy Editor.
2. Navigate to Computer Configuration>Administrative Templates>System on the left side pane. Now on the right side pane, scroll down and look for “Specify settings for optional component installation and component repair.”
3. Double click and open it. Select Enabled and make sure that you have ticked “Contact Windows Update directly to download repair content instead of Windows Server Update Services (WSUS)” option in alternate source file path section.
4. Restart your machine and try to install Graphics Tools again.
Unfortunately I try to install it but my laptop keeps saying it failed to install and gives me this code error: 0x800F081F
I can install graphics tools but I doesn’t go on the installed list