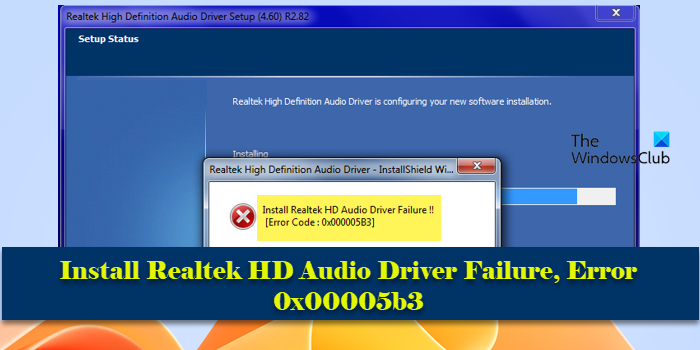
If you get Realtek HD Audio Driver Failure error code 0x00005b3 while installing or updating the driver on your Windows 11/10 PC, read this post. We will show you the steps to troubleshoot and resolve the issue.

Error code 0x00005b3 indicates an issue with the driver installation that may occur if your current audio driver is either corrupt or partly uninstalled. In that case, it will interfere with the installation of the latest driver and throw an error. The issue may also occur due to low disk space or incompatibility between the audio driver and your version of Windows. The error is often accompnied by a message that reads:
Install Realtek HD Audio Driver Failure!!
[Error Code: 0x00005B3]
If you’re getting the same error and unable to proceed with the Realtek Audio Driver Installation wizard, continue reading to know how to troubleshoot the issue.
How do I fix Realtek audio driver installation failure?
Make sure you have downloaded the driver version that supports your OS and try running the installer as an administrator. This will ensure that the installer has the necessary permissions to make changes to your system. Verify that your Windows operating system is completely up to date. Driver installation issues can sometimes be resolved by installing the latest Windows updates. Also, temporarily disable any antivirus or firewall you may have running on your system and see if it helps.
Install Realtek HD Audio Driver Failure, Error 0x00005b3
If the above quick fixes won’t work, use these solutions to fix Realtek HD Audio Driver installation failure error 0x00005b3:
- Download and install Realtek HD Audio Driver manually
- Boot into Safe Mode and install the driver
- Disable Microsoft UAA Bus Driver for High Definition Audio in Device Manager
Before you begin, you might want to run the Disk Cleanup Tool to free up disk space.
1] Download and install Realtek HD Audio Driver

On certain Dell computers with Maxxaudio installed, the issue is sometimes caused by unwanted driver updates from Microsoft, causing audio drivers to stop working or result in audio-related issues.
MaxxAudio is an audio enhancement software by Waves Audio that provides better sound quality and control over a system’s audio settings. It often comes pre-installed on Dell computers. If you’re experiencing audio issues on a Dell computer with MaxxAudio installed, we recommend re-installing the Dell-specific Realtek audio and Maxxaudio driver from the Dell support site.
To uninstall your current audio drivers, follow these steps:
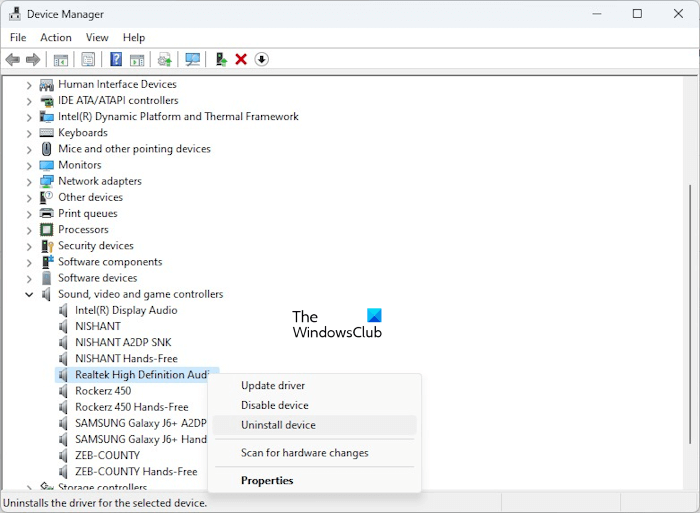
Press Win+X and select Device Manager from the Power User menu. Click and expand the ‘Sound, video and game controllers‘ section in the Device Manage window. Right-click on Realtek High Definition Audio and select Uninstall device. In the Uninstall Device prompt, check the box for Attempt to remove the driver for this device, and click on Uninstall.
Repeat this process for MaxxAudio/Waves Audio devices.
Now reboot your PC and run the Realtek HD Audio driver installer setup you’ve downloaded from the Dell support website. The setup will also install Waves MaxxAudio on your system.
To prevent the the issue from reappearing further, disable any Realtek driver updates that Windows Update may offer.
Read: How to download and reinstall Realtek HD Audio Manager in Windows.
2] Boot into Safe Mode and install the driver

If the above solutions won’t work, we suggest installing the driver in a Clean boot state or Safe mode with Networking. This will resolve any third-party software conflicts, if any.
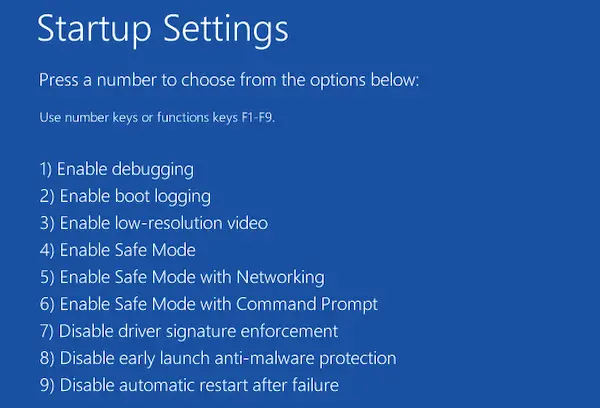
Press and hold the Shift key and restart your computer. It should boot into the Windows Recovery Environment. From the ‘Choose an option’ screen, select Troubleshoot > Advanced options > Startup Settings > Restart.
Once your system restarts, you’ll see a list of Startup Settings. Press F5 to select Safe Mode with Networking. Allow your system to boot into Safe Mode and install the audio driver.
Once the installtion finishes, restart your PC to exit Safe Mode and boot back into normal mode.
3] Disable Microsoft UAA Bus Driver for High Definition Audio in Device Manager

Microsoft UAA Driver is a system driver framework that provides a standardized way for audio class drivers to communicate with audio hardware. There are cases where conflicts between the Microsoft Universal Audio Architecture and third-party audio drivers like Realtek HD Audio have occurred, leading to malfunctioning audio devices or driver installation failure. If such a conflict is causing the Realtek HD Audio driver installation failure on your Windows 11/10 PC, you can try installing the Realtek driver after disabling the Microsoft UAA driver.
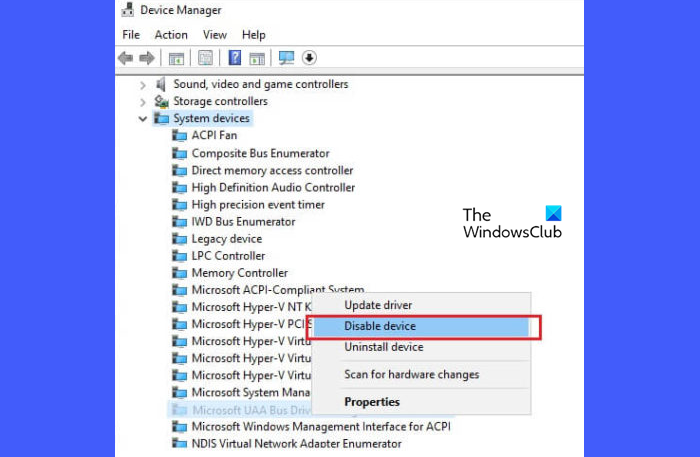
To disable Microsoft UAA driver, Open Device Manager and click on System devices. When the section expands, locate Microsoft UAA Bus Driver for High Definition Audio. Right-click on it and select Disable device. Reboot your PC to apply the changes.
I hope this helps.
Similar errors:
- Install Realtek Audio Driver Failure error code No driver supported in this driver package
- Error 0xE0000246, Install Realtek HD audio driver failure
- Error code 0x000003F1, Install Realtek HD audio driver failure
- Install Realtek HD Audio Driver Failure, Error Code -0001
- Install Realtek HD Audio Driver Failure, Error 0xC0000374.
Can I use NVIDIA audio instead of Realtek?
Yes. Newer NVIDIA GPUs, such as the GeForce G210, GeForce GTX 480, etc., often come with an internal sound controller that allows them to transmit audio signals through HDMI or DisplayPort connections. If your Nvidia graphics card has audio capabilities, you can set up Nvidia audio as your audio output device and use it (instead of Realtek) to play audio on your system.
Leave a Reply