If you want to install the hidden Aero Lite theme in Windows 11, here is how you can do that. Although Windows 11 comes with an Aero Light theme, it is not visible in Windows Settings. Here is how you can tweak a few things in the source file to install and apply the Aero Light theme in Windows 11.
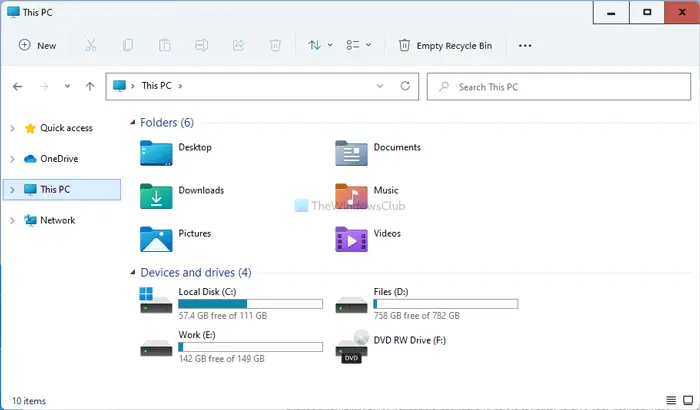
Aero Lite theme has been there for quite a long time. If you are using Windows 11 and want to try out other themes, Aero Lite could be an option.
How to install the hidden Aero Lite theme in Windows 11
To install the hidden Aero Lite theme in Windows 11, follow these steps:
- Open File Explorer on your computer.
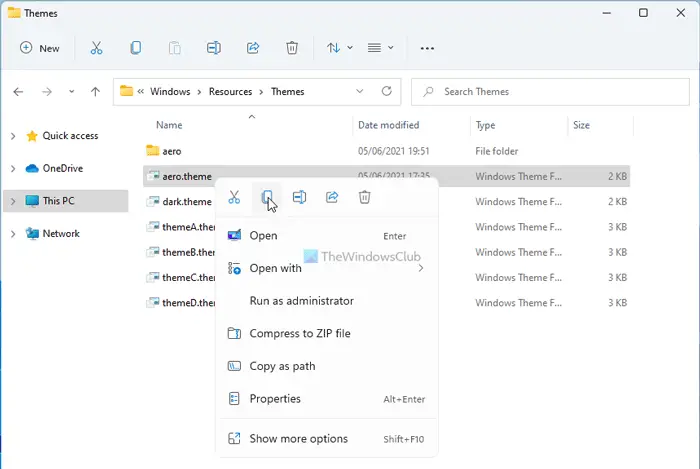
- Go to C:\Windows\Resources\Themes.
- Right-click on the aero.theme and select the Copy option.
- Go to Desktop and paste the aero.theme file.
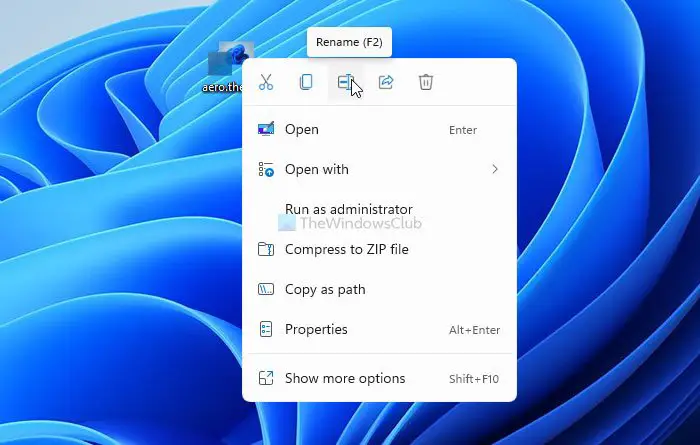
- Rename aero.theme to aerolite.theme.
- Right-click on aerolite.theme > Open with > Choose another app.
- Select Notepad from the list.
- Delete two lines under [Theme].
- Write Displayname=Aero Lite under [Theme].
- Replace Aero.msstyles with Aerolite.msstyles under [VisualStyles].
- Save the changes by pressing Ctrl+S.
- Double-click on the aerolite.theme file on Desktop.
To learn more about these steps, continue reading.
At first, you have to open the File Explorer on your computer and navigate to the following path:
C:\Windows\Resources\Themes
Here you can find all the themes, including aero.theme. Right-click on it and select the Copy option. Alternatively, you can press Ctrl+C to copy the file. Next, go to Desktop or any other location, and paste the file by pressing Ctrl+V.
Them, right-click on the aero.theme and select the Rename option. Rename the file to aerolite.theme.
After that, right-click on aerolite.theme and select Open with > Choose another app.
It opens up a list of apps that you can use to open the source file of the theme. You have to choose Notepad from the list to make all the further changes.
In the beginning of the file, you can find two lines under the [Theme] label:
; Windows - IDS_THEME_DISPLAYNAME_AERO_LIGHT

DisplayName=@%SystemRoot%\System32\themeui.dll,-2060
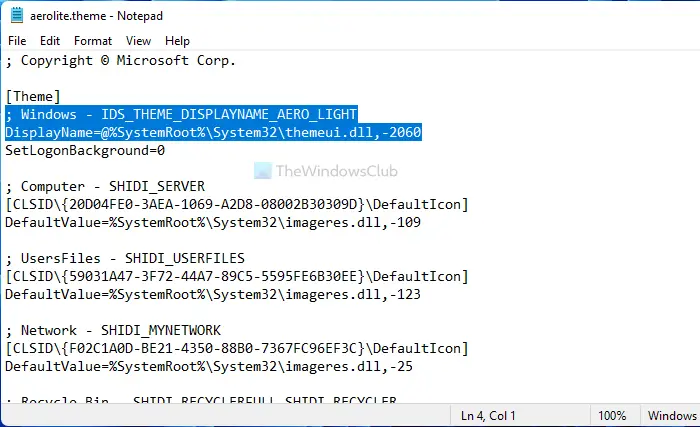
Select both the lines and delete them. In that place, write the following line:
Displayname=Aero lite
Find out [VisualStyles] label and replace Aero.msstyles with Aerolite.msstyles in the first line.
Next, press Ctrl+S to save the change and double-click on the aerolite.theme to apply the theme.
Now, you can see the new Aero Lite theme on your Windows 11 computer.
How to delete Aero Lite theme in Windows 11
In case you do not like the Aero Lite theme in Windows 11, and you want to delete it or apply another theme, do the following:
- Press Win+I to open Windows Settings.
- Go to Personalization > Themes.
- Choose another theme from the list.
- Right-click on the Aero Lite theme.
- Select the Delete option.
To learn more, continue reading.
At first, you have to open the Windows Settings panel by pressing the Win+I button together. Next, go to Personalization > Themes.
Here you can find all the themes. Click on another theme that you like to apply on your Windows 11 computer. After that, right-click on it and select the Delete option.
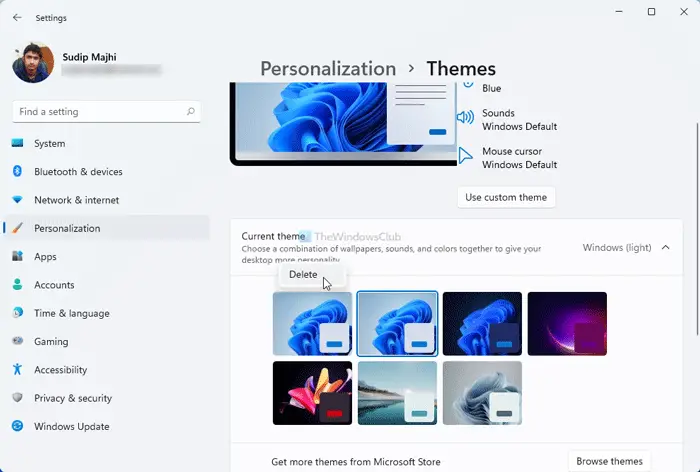
It will remove the theme immediately.
How do I download the Aero Lite theme on Windows 11?
You do not have to download the Aero Lite theme on Windows 11 since it is already there by default. You have to rename the theme, change a few lines, and apply it accordingly.
What is the default theme on Windows 11?
Windows (Light) is the default theme name on Windows 11 for consumers; For businesses, it is the Dak theme. However, you can set any other as your theme, including Aero Lite. All you have to do is to follow the guide mentioned above.
This is how you can install and apply the hidden Aero Lite theme in Windows 11.
Leave a Reply