If you wish to install Windows 11/10 on a second SSD or Hard Drive, it is possible to do so. There are multiple reasons to do so. You may want to test out an unreleased version of Windows 11/10, or you want to have your copy of Windows 11/10 to which you can boot by plugging in and booting up. In this guide, we will share how to install Windows on a second SSD or HDD.
Install Windows 11/10 on second SSD or Hard Drive
To install Windows 11/10 on a new or secondary SSD or HDD, you will have to:
- Create a new partition on the Second SSD or Harddrive
- Create Windows Bootable USB
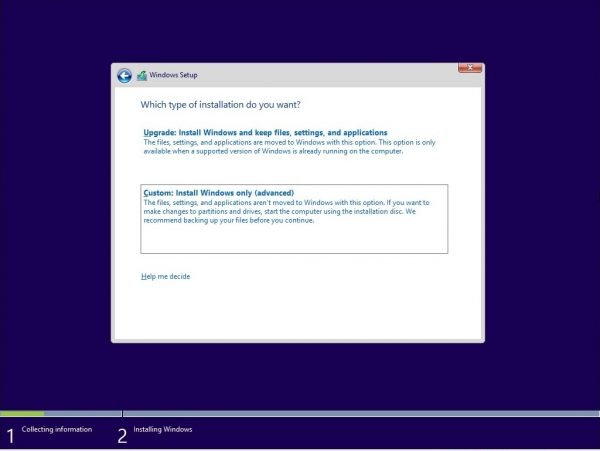
- Use the Custom Option when installing Windows 11/10
While you can, I would suggest that you not remove the external SSD or Hard Drive unless it is necessary. When you install Windows, the Bootloader will register the path of the installed OS. If it is missing, then it can be problematic. Also do not remove the OS from primary SSD or HD, especially if you plan to remove the second SSD and plan to use on a need per basis.
1] Create a new partition on the second SSD or Hard drive
Connect the secondary SSD or the hard drive to your computer. The computer should detect it immediately. We need to prepare a partition of the Secondary drive to install Windows. To get that done, we will use the built-in Disk Management Tool.

If there is data on the file, back up those files.
- Use Win+X simultaneously to bring up the Power Tasks Menu and from the options displayed, choose Computer Management.
- In Computer Management, you will find the Storage option. Under it, you will notice ‘Disk Management.’ Click to open it.
- If there is an existing volume, right-click on it and delete it.
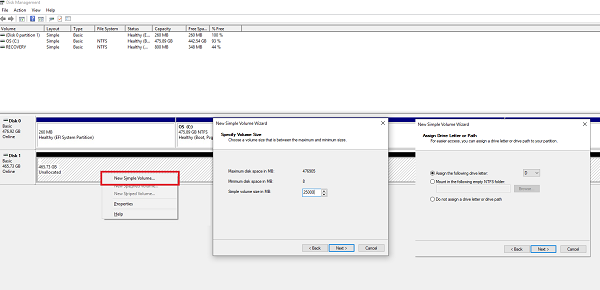
- Now you will have unallocated storage. Right-click on it and then create a simple volume.
Make sure to choose a size of at least 50 GB for the primary partition. You can create extended partitions with the rest of the storage space. Now you are ready to install Windows 10.
2] Create Windows 11/10 Bootable USB
Download the latest ISO, and create a bootable USB. Next plug in the USB drive, and boot from it. You will have to change the Boot priority, so it boots from the USB drive instead of the default HDD.
3] Use the Custom Option to install on the new partition
When installing Windows 11/10 from the USB drive, choose the Custom option. When you use it, it gives you the option —Where do you want to install Windows?. Here you can select the partition you created in the above steps or choose the one entitled Unallocated Space. Windows installation will automatically activate the partition if necessary.

Here is a warning. While you can create and manage partitions from here, it’s easy to do it from the Disk Management tool as the interface is much cleaner. Not only you have a limited option, but the interface is restricted. There is also a chance that you may end up deleting the first drive partition if not appropriately managed.
Henceforth, the installation process should go through as usual. When the computer reboots, you will have the option to choose between the two operating systems. Both the SSD and HDD will be available in the OS’s, so you have complete access to the files.
We hope the guide to install Windows on 11/10 on second SSD or HDD was easy to follow.
Can I install Windows on a second SSD?
Yes, you can install Windows 11/10 on a second SSD. You can do it using Disk Management Tool. Start by making a Windows Bootable Media and then follow the instructions laid down in this post.
Should I install my Windows on SSD or HDD?
Installing your Windows OS on an SSD will make your PC boot and run faster since an SSD has high Read/Write speeds. This will improve your gaming experience as well.
Leave a Reply