If you are a student of Windows Server administration, one of the best ways to get hands-on practice is by installing the operating system on a virtual machine. In this post, we will see how to install Windows Server on VMware Workstation to experience Windows Server without creating a separate partition.
Install Windows Server on VMware Workstation
If you want to install Windows Server on VMware Workstation, follow these steps.
1] Install VMware Workstation on your computer
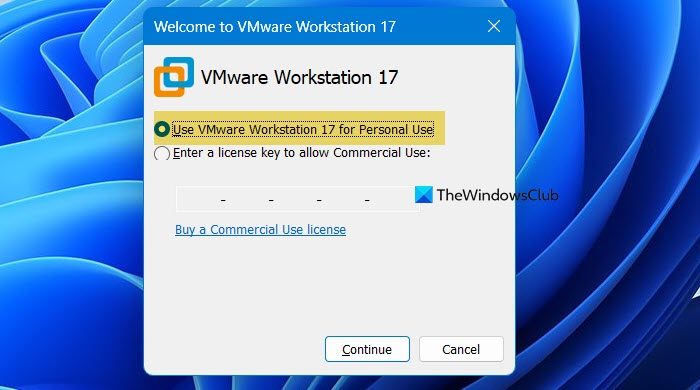
First, install VMware Workstation on your computer. To do so, let us go to support.broadcom.com. You might have to register yourself and create an account. Once done, again, come back to this link and open the download portal. Go to VMWare Workstation Pro 17.0 for Personal Use. Since we are on a Windows computer, we will go with the same, but if you are using some other OS, select the respective option.
We recommend you download the latest version from the list, as it will pack all the latest features. Older versions might ask you to enter a key.
After downloading the utility, double-click on it to install. When you launch VMware Workstation for the first time, you will get a Welcome prompt where you need to select Use VMware Workstation 17 for Personal Use, and click Continue.
2] Download Windows Server ISO
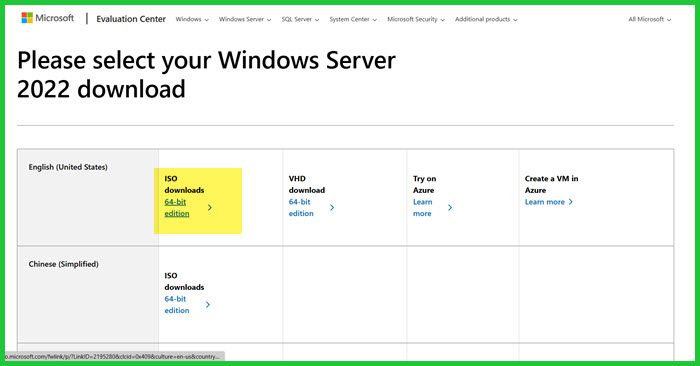
Next, download the Windows Server ISO file. To do so, we must visit microsoft.com. When you visit the website, click on Evaluate now associated with Windows Server 2022, then click on Download ISO, enter your details to register for the free trial, and then click on Download now. Then download the ISO file for the language of your choice. Wait for some time, as the ISO file will take a while to download.
3] Create the virtual machine
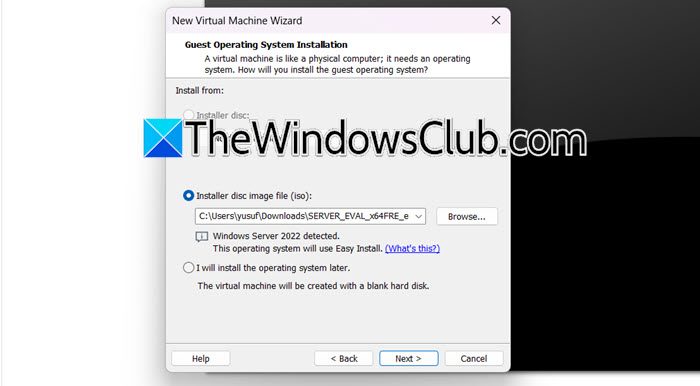
Now that we have both software required to create a virtual machine, let’s create one and prepare the environment for the installation of the operating system. To do that, follow these steps.
- Open VMware Workstation.
- Click on File > New.
- Keep Typical selected and click on Next.
- Select the Installer disc image file (iso), click Browse, select the ISO file, and then attach it. You will see that VMware has automatically detected “Easy Install”, an option that automatically detects the operating system in the ISO file. This feature optimizes the virtual machine for the OS, reducing manual setup during installation. While not all operating systems support it, most commonly used ones do.
- Click on Next.
- Since we don’t have a product key, skip that and the password. If you don’t want to set it now, click Next.
- Edit the VM name and the location; click Next.
- You will be asked to allocate system resources such as storage and memory. After you do that, finalize your machine.
This will create and start the virtual machine.
4] Install Windows Server
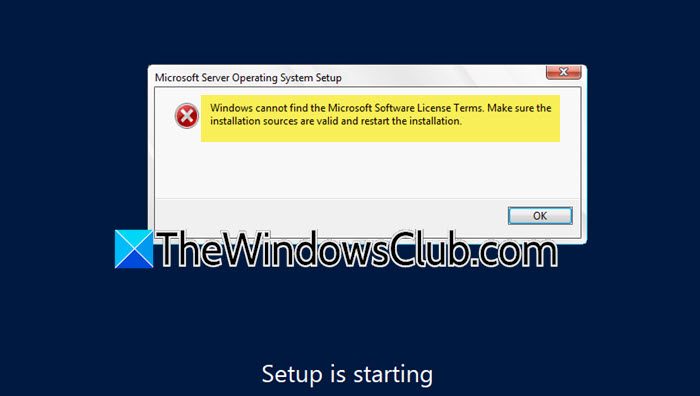
Once you start the virtual machine, the installation process will start automatically. However, there is a high chance that you will get the following error message during the installation.
Windows cannot find the Microsoft Software License Terms. Make sure the installation sources are valid and restart the installation.
To resolve it, remove the Floppy drive. Your machine thinks it contains the product key, which it doesn’t.
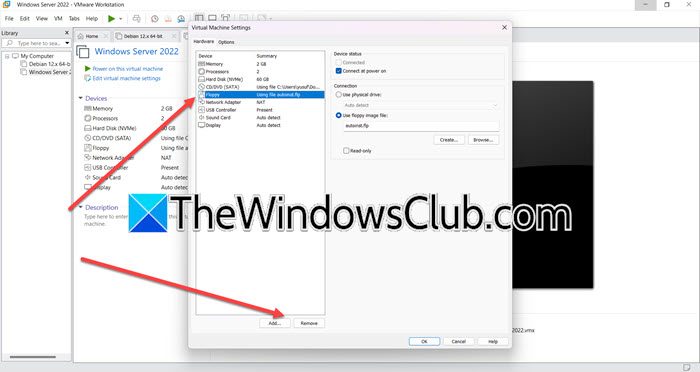
To do that, follow these steps.
- Click on the Cross icon to close the error message.
- Then, right-click on the tab of your virtual machine and select Power > Power off.
- After powering off the machine, right-click on it and select Settings.
- Click on Floppy > Remove.
- Click on OK now.
Once done, start your virtual machine again, then press any key when prompted.
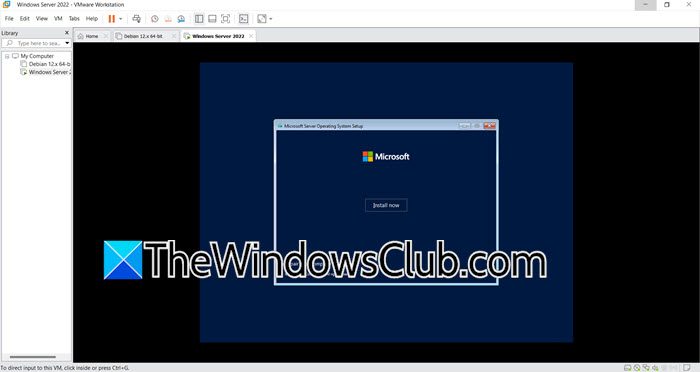
Select your preferred language and region, then click Next and Install Now.
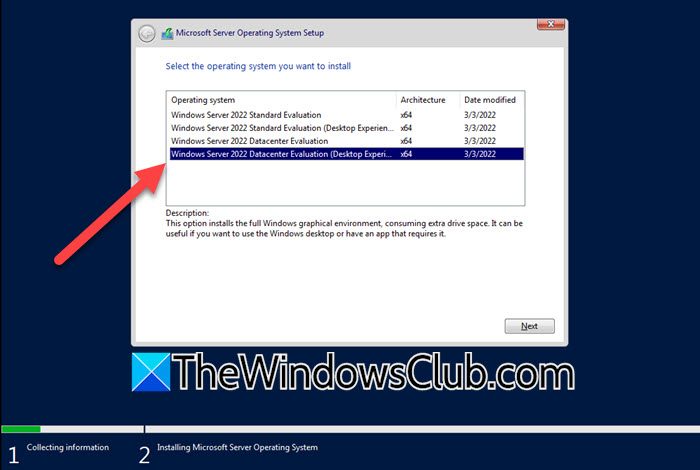
When asked to choose a Server version, select Windows Server 2022 Datacenter Evaluation (Desktop Experience) > Next. Skipping this will install Server Core, which lacks a graphical user interface. Read and agree to the license terms, then click Next. Choose the Custom installation type and select “Drive 0,” then click “Next” and wait for the installation to complete. Once finished, the VM will reboot. You may need to enter an administrator password. After that, use Ctrl + Alt + Insert to log in, or choose Send Ctrl+Alt+Del from the VMware menu.
Once done, you can use your Windows Server on a VMware virtual machine.
How to install Windows Server on Vmware ESXi?
First, you need the Windows Server ISO file, which you can get from the link mentioned earlier. Then, follow the steps mentioned earlier.
- Open VMware ESXi, go to Virtual Machines, and click Create VM / Register VM.
- Select Create a New Virtual Machine, and enter the name and other details.
- Then select a disk and click on Next.
- Set the CPU counter and enable Hardware Virtualization & Performance Counters (if required).
- Next, you must set the CD/DVD Drive 1 to Datastore ISO File.
- Then, select the ISO file from the one that we downloaded.
Finally, follow the on-screen instructions and complete the whole process.
Read: Enable, disable, set up, use Remote Assistance in Windows Server.
Can we install Windows Server on VMware Workstation?
Yes, you can install Windows Server on a VMware Workstation machine. The only error that users get when trying to do so is that, by default, VMware thinks that the Floppy drive has some activation file and throws an error. We addressed that issue earlier in this post, along with how to resolve it.
Read: Add Group Policy Management Console in Windows Server
How to create a Windows Server virtual machine in VMware?
To create a Windows Server virtual machine in VMware, you first need to install VMware Workstation on your computer and then get the ISO file for Windows Server. Then, you can create a virtual machine and install the operating system on it. We recommend following the aforementioned guide to do the same.
Leave a Reply