If you want to get a list of all installed apps on Windows 11/10, you can use this software called InstalledAppView. It is a free portable tool that lets you get a list of all installed apps on Windows 11/10. Let’s check out the features and options of this software before opening it on your PC.
Get a list of all installed apps on Windows PC
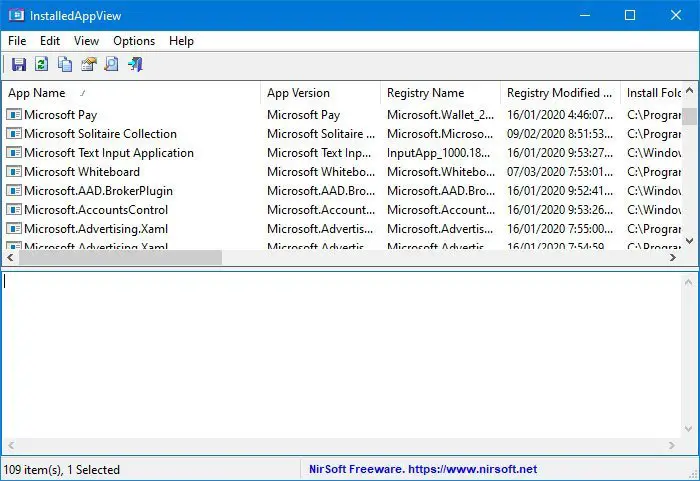
InstalledAppView will create a list of all the installed apps on Windows, and list details like App Name, App Version, Registry Name, Registry Modified Time, Install Folder, etc.
Here is a comprehensive list of features that you can see in InstalledAppView-
- It shows all the essential details of system apps. It displays app name, app version, Registry name, last Registry modification date, installation folder and modification date, installation folder owner name, uninstallation command, quiet uninstallation command, Registry key, install user, and architecture (32-bit or 64-bit).
- Show and export list: It not only shows the list and details but also it can help you save the list with all the information to your computer. You can get a .txt file without an issue.
- Get XML file: It displays the XML files (AppManifect.xml and AppxBlockMap.xml) of the pre-installed Windows apps so that you can do further tasks.
- Uninstall pre-installed apps: If you do not like to have a pre-installed app on your Windows PC, you can ask this software to uninstall it. There is an option called “Quiet uninstall,” which is handy too.
- Uninstall multiple apps: To accelerate the process as mentioned above, you can enable the multiple apps uninstallation.
- Always uninstall with administrator privileges: By default, InstalledAppView doesn’t perform the uninstallation process with administrator privileges. You can enable this option if you want to.
You can find other features in InstalledAppView. You need to use it to learn about them all.
Using InstalledAppView to get a list of installed apps
To get started, you need to download it to your computer first. You can download and use it on 32-bit as well as the 64-bit machine. After downloading and extracting the folder, you can find a file called InstalledAppView.exe that you need to run. After opening, you should find a list that looks something like this-

Now, you can check what you want to export or not.
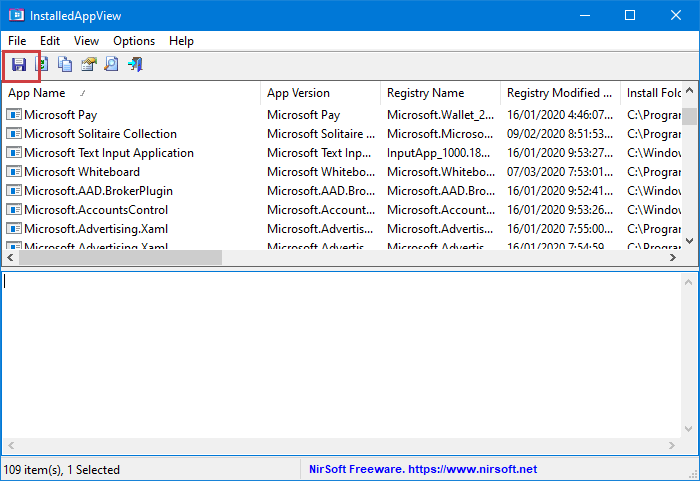
If you want to create a list of all installed apps, select them all by pressing Ctrl+A, and click the Save button visible on the navigation menu bar.

After that, you need to choose a path where you want to save the File, give it a name, and save it. You can see all the information in the .txt File that is mentioned earlier.
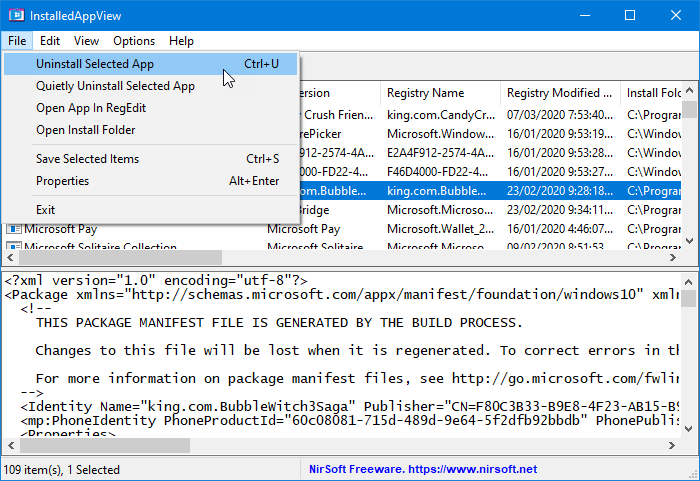
If you want to uninstall an app, select it from the list and go to File > Uninstall Selected App.

It should open a Windows PowerShell window where you must type Y to confirm and hit the Enter button. If you want to uninstall multiple apps at a time, you need to enable that functionality first. To do so, go to Options and click on Allow Uninstall Of Multiple Items. After that, you can select all the apps you want to uninstall and perform the same steps as you did to uninstall a single app.
Some apps may not be uninstalled without administrator privileges. If you encounter permission-related issues while uninstalling an app from your PC, go to Options > Uninstall Run Mode and select the Always run as administrator option.
If you like it, you can download InstalledAppView for Windows from the official website.